Bitdefender Tutorial: How to Install, Configure, and Cancel

Bitdefender is one of the best-known antivirus programs on the market. It protects your computer from viruses, trojans, ransomware, and other threats, and it comes with a range of additional security features.
This guide walks you through installing, setting up, and, if needed, uninstalling Bitdefender, step by step.


How to Buy Bitdefender

You can buy Bitdefender directly from the manufacturer’s website*. It offers different packages depending on the level of protection you need and how many devices you want to cover.
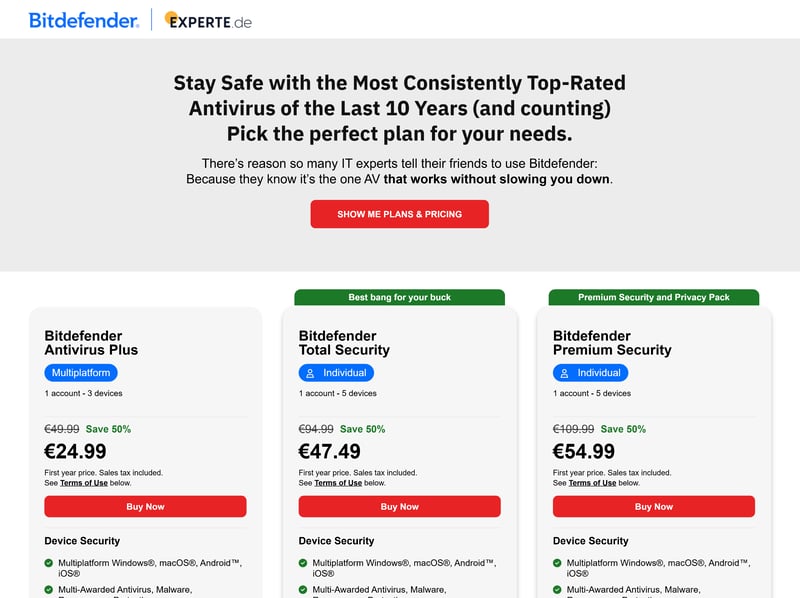
Bitdefender offers several subscription tiers to match different security needs and device counts.
After purchasing, you’ll create a user account or sign in with an existing one. Your license is linked to your account automatically—no product key is required.
You can manage your Bitdefender subscription through the online dashboard, Bitdefender Central. It also shows which devices are currently protected.

Paid antivirus software isn’t a must these days. Modern operating systems like Windows or macOS already come with strong built-in protection. But antivirus programs can add extra security and bundle useful features like parental controls, a password manager, or a VPN.
We take a closer look at whether antivirus software is still necessary in this article.
Download Bitdefender
To download the software, go to the “My Devices” section in Bitdefender Central. Here, you'll see every device already protected by Bitdefender. If you just made your purchase, this section will be empty. Click “Add Device” to get started.
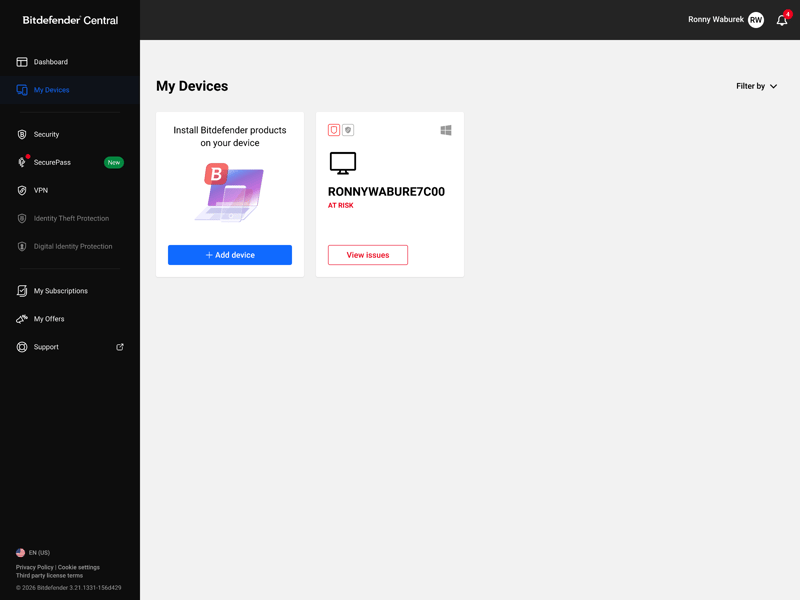
Start your Bitdefender download directly from your account in the “My Devices” section.
Bitdefender lets you choose whether to install the software on your current device or another device.
You can download the software directly to your computer or request an installation link (by email, for example) to set it up on other devices.
To install Bitdefender on the device you're currently using, click “Download.”
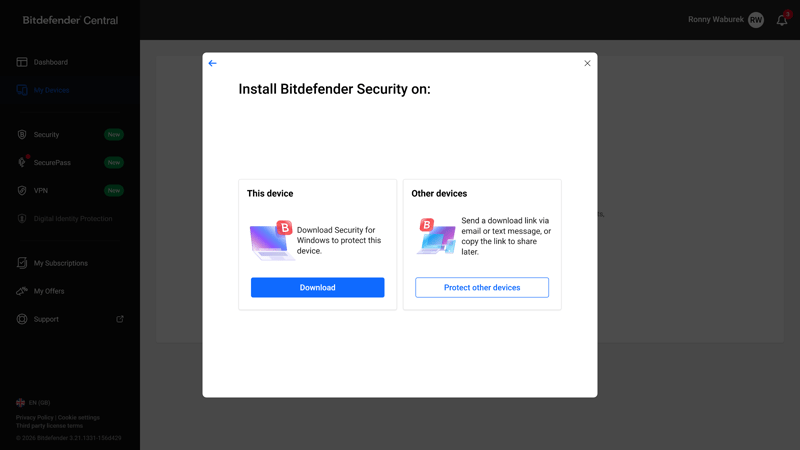
Bitdefender lets you choose between your current device and other devices.
Install Bitdefender
Once the download finishes, you can start the installation. The setup file is a small installer that downloads the full program from the internet during installation.
When you open Bitdefender, it first checks your system. It confirms that your operating system is supported and looks for other security software. If it finds any, it will ask you to remove it, since running multiple security programs at once often causes problems.
Running multiple antivirus programs at the same time can cause conflicts. They may interfere with each other and affect system performance, so Bitdefender may prompt you to uninstall other security software before continuing.
Next, the actual installation begins. All you need to do is accept the license agreement; no other settings are required. The installation then runs automatically and usually takes a few minutes, depending on your internet connection.
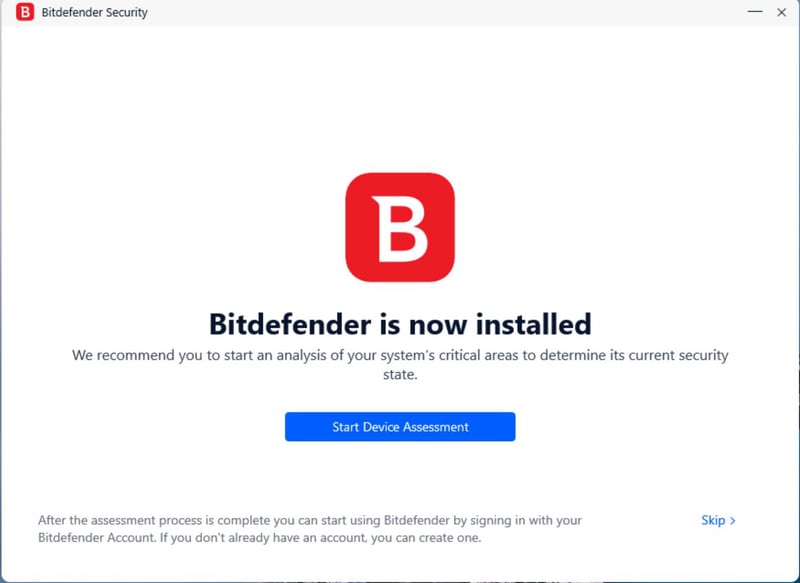
Before installation, you must accept the terms of use.
Once installed, Bitdefender automatically starts its initial scan to check your system.
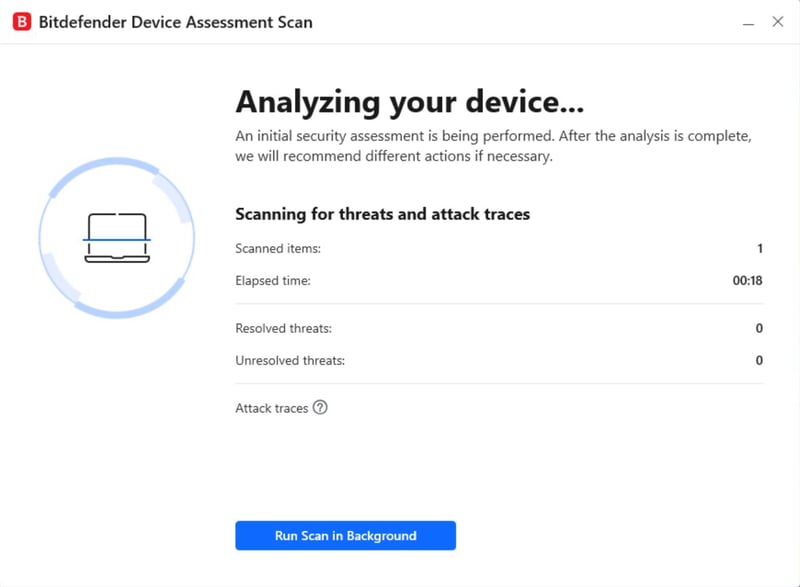
After installation, Bitdefender offers to run an initial system scan.
After installation, Bitdefender may offer to run an initial system scan.
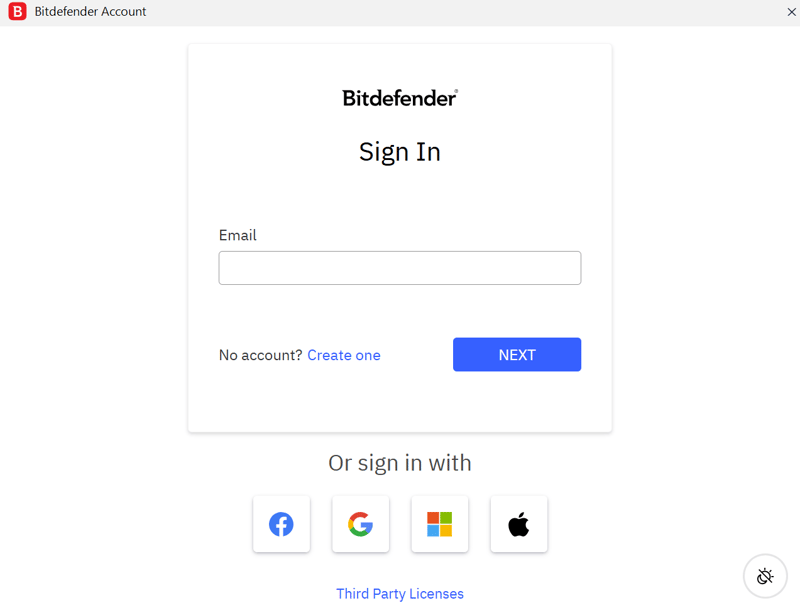
Sign in with your login details.
Sign in with your Bitdefender account credentials. Your device will then be linked to your account and subscription.
Set up Bitdefender
Bitdefender is ready to use right after installation. But to make sure you’re fully protected, take a brief look at the key settings.
Open the Bitdefender interface. The homepage shows how secure your device is. If protection is listed as active, Bitdefender is already running in the background.
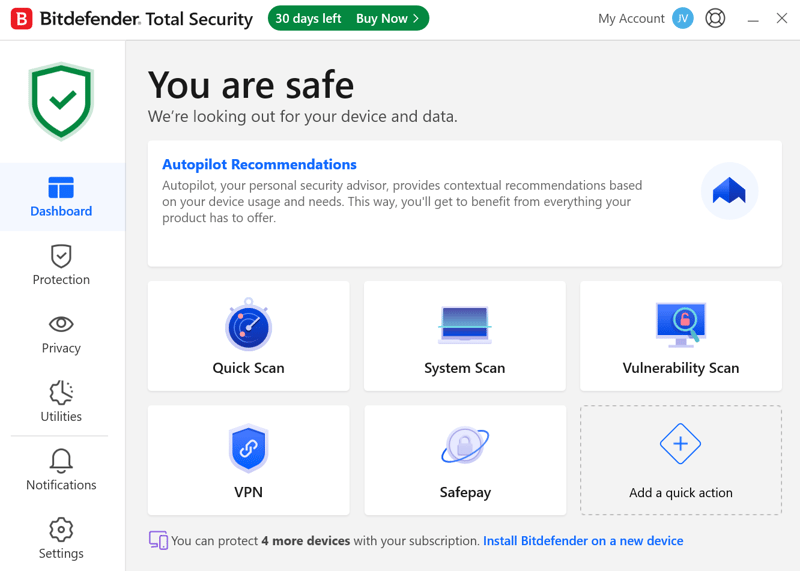
The Bitdefender interface.
Next, check the core features: real-time protection, web protection, and ransomware protection. These are enabled by default and rarely need adjusting. Only change them if Bitdefender mistakenly blocks a program or website.
Real-time protection
Real-time protection constantly monitors files and programs, detecting threats instantly and blocking harmful content on the spot.Web protection
Web protection scans websites as you visit them, warning you about phishing attempts and malicious downloads before they become a risk.Ransomware protection
Ransomware protection keeps your important files safe from unauthorized encryption. It detects suspicious access early and blocks changes.Automatic updates
Automatic updates keep your security features current, accounting for new threats so you don’t have to lift a finger.
Depending on your plan, you can also set up extra features. For example, you can turn on the VPN directly in the Privacy section. To use the password manager, Bitdefender SecurePass, you’ll first need to download it from Bitdefender Central.
Finally, run a full system scan to check whether your device is already infected with malware. The scan runs in the background, so you can continue using your device while it runs.
How to Disable Bitdefender
Sometimes you may need to turn off Bitdefender temporarily, for example, when you’re having trouble installing software, running certain games, or testing something quickly.
Open the Bitdefender interface and go to the Protection section. Under the Advanced tab, you’ll see security modules like real-time protection or web protection. You can turn each module on or off individually.
If you disable real-time protection, Bitdefender may display a warning reminding you that your device will have reduced protection. Depending on your version, you can choose how long to disable the protection or have it turn back on after the next restart. After that, protection turns back on automatically.
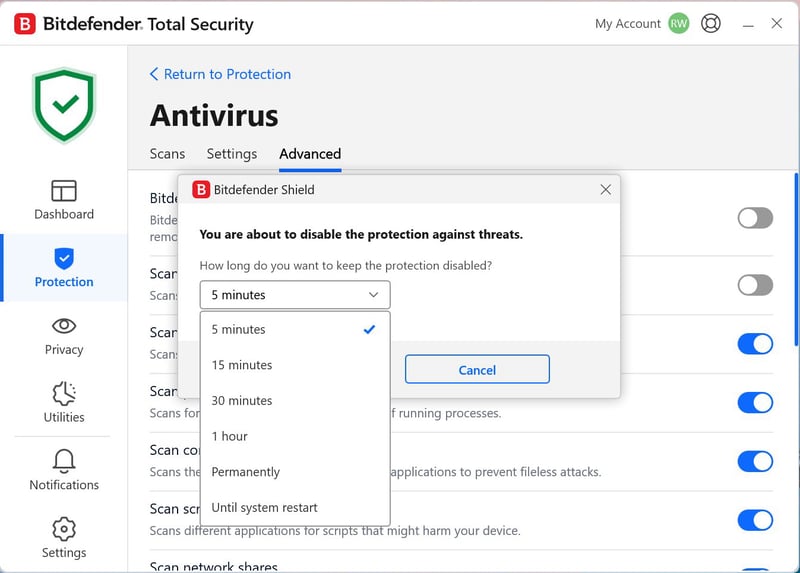
Bitdefender lets you turn off individual protection modules for a limited time.
Even with modules turned off, Bitdefender stays installed. But your system won’t be fully protected. Only disable modules when absolutely necessary, and only for a short time.
Turn protection back on as soon as you’re done. This keeps your device monitored and protected against the latest threats.
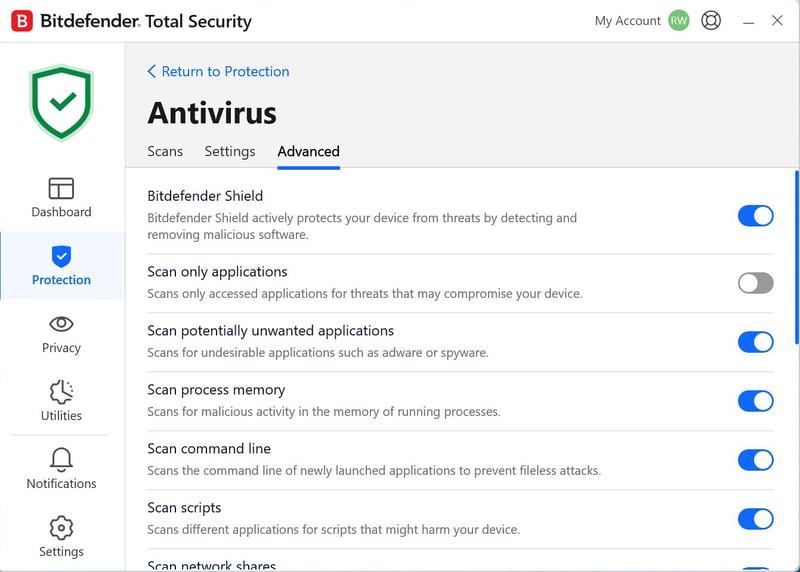
In the advanced settings, you can turn virus protection on or off.
Uninstall Bitdefender
If you no longer want to use Bitdefender or are switching to another security solution, you can remove it from your device.
On Windows, open Settings and go to “Apps” or “Installed Apps.” Find Bitdefender in the list and select Uninstall.
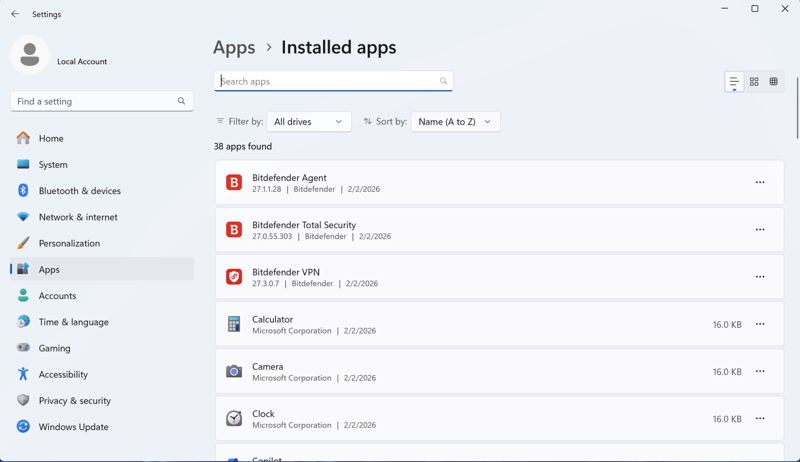
Uninstall Bitdefender through Windows Settings under “Apps.”
The Bitdefender uninstaller will launch. Follow the on-screen instructions to remove everything. To complete the process, you’ll usually need to restart your computer.
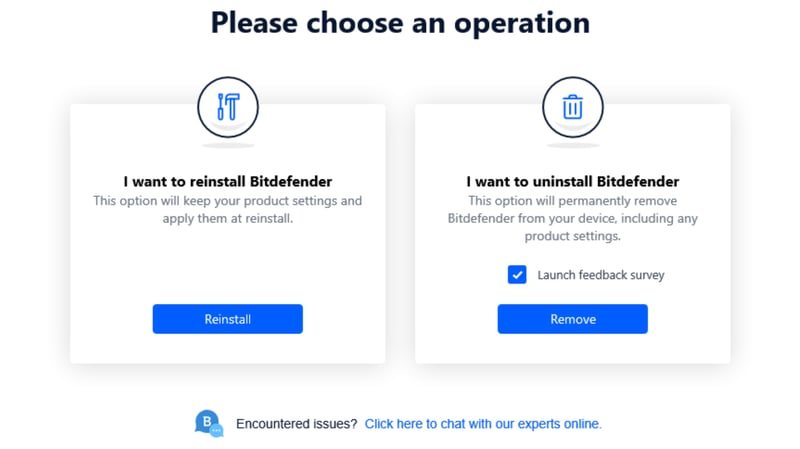
When removing Bitdefender, you must select “Remove” to proceed.
If files or services remain after uninstalling Bitdefender, you can use Bitdefender’s dedicated removal tool to remove any remaining components. This helps, especially if you plan to install another security program afterward.
After uninstalling, your device is no longer protected by Bitdefender. Make sure another antivirus is already active or will be set up soon.
Removing Bitdefender from your device only uninstalls the software. Your paid subscription continues and may renew automatically. To stop future billing, you must cancel your subscription separately through your Bitdefender account.
How to Cancel Your Bitdefender Subscription
Bitdefender subscriptions generally renew automatically at the end of the subscription term. If you don't want your subscription to renew, you need to turn off automatic renewal.
The cancellation option is not immediately obvious—here's where to find it. You’ll find it in Bitdefender Central under “My Subscriptions.” Click the three-dot menu in the top-right corner:
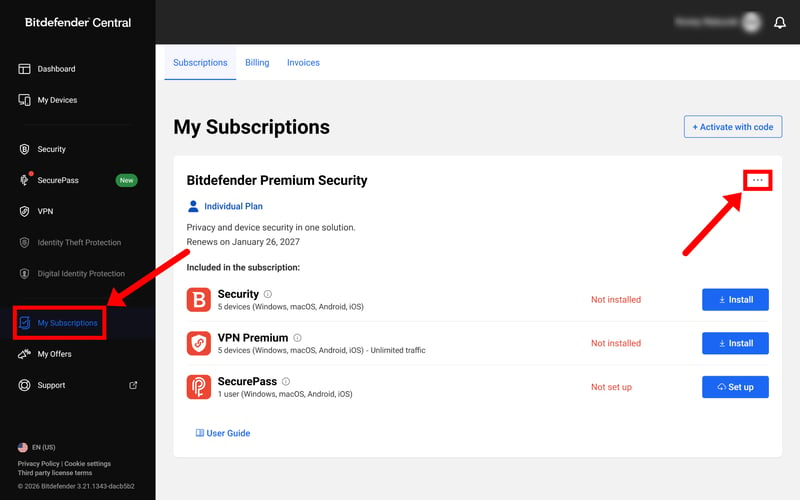
You can cancel your Bitdefender subscription under “My Subscriptions.”
Click “Subscription & continuous protection.”
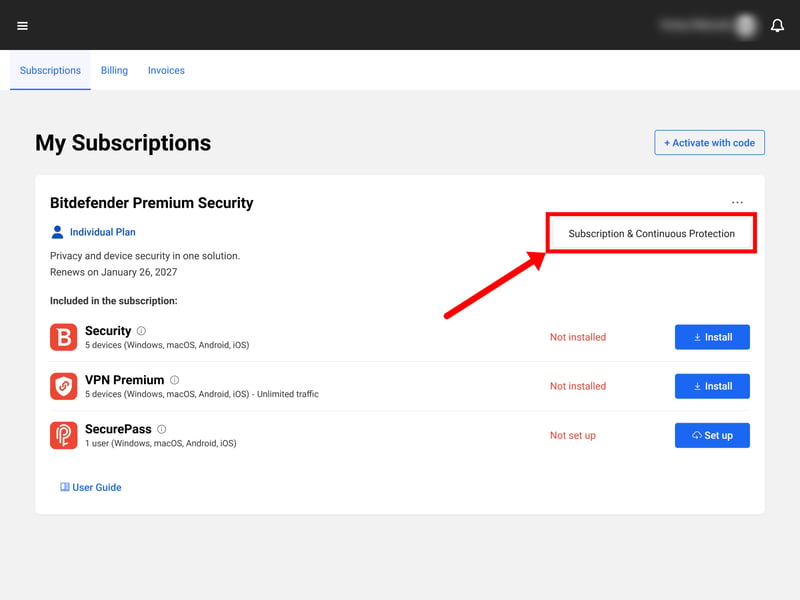
The cancellation option is located within your subscription settings.
A pop-up appears with your Bitdefender subscription details. Click “Cancel subscription.”
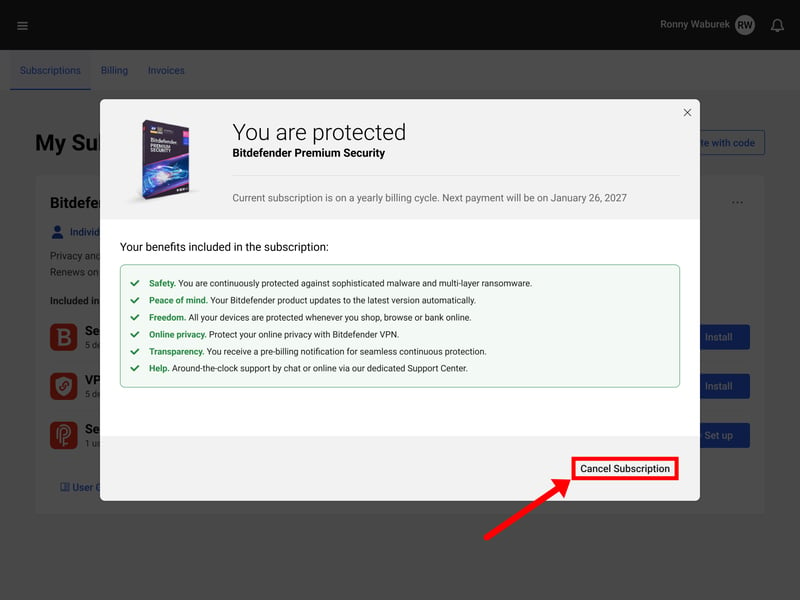
Start the cancellation process.
Bitdefender may display additional information or offers before completing the cancellation. Follow the prompts and click “Cancel Subscription” to confirm.
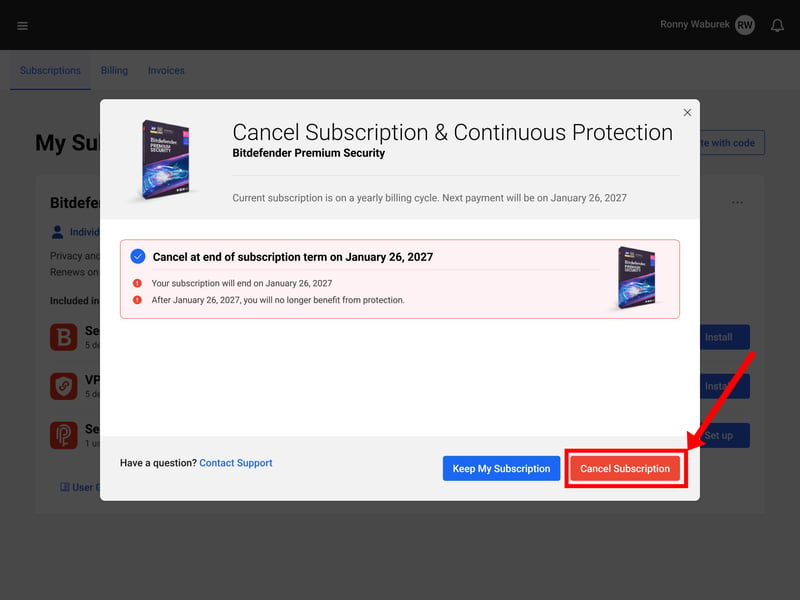
Complete the cancellation.
Your subscription remains active until the end of the current billing period, but it won’t renew automatically after that.