Encrypt Your Emails: Introducing 3 Email Encryption Methods

Despite the widespread use of WhatsApp, Twitter, and the like, a large proportion of internet users still send private and professional emails on a regular basis. What many of them don't know: emails are unencrypted by default and as a result, can be read or even manipulated—either along the way to their destination or by the email provider. Not only that—there's also a risk that someone could impersonate the sender. All in all, emails present a greater security risk than many people realize.
End-to-end encryption (i.e., encryption from the sender to the recipient) resolves these problems at their core. If you want to ensure that your future emails are sent securely, you're in the right place; this article explains exactly how the process works.

Encrypting Emails With S/MIME
S/MIME (secure/multipurpose) is a standard, proven method for encrypting emails that was introduced back in 1999.
How S/MIME Works and What It Offers
S/MIME relies on "asymmetric encryption," which utilizes pairs of keys. Each pair consists of a public key and a private key.
You share the public key with everyone you send encrypted emails to
On the other hand, the private key is intended only for you and must be kept secret under all circumstances.
Those with whom you exchange emails also have a public and private key.
When you send an encrypted email to a contact, you need the contact's public key. They can only read the message with their private key; no one else will be able to see it.
If your contact sends you a message, they generate an email from your public key, which again, only you are able to decrypt using your private key.
Another important S/MIME feature is that emails can be digitally signed. This ensures recipients where your email originated from (you), and protect against increasingly tricky phishing attacks. In our article on data theft, you'll find more detailed information on the various methods which are used in these.

To get started with S/MIME encryption, you'll need an email client such as Thunderbird, Outlook, or Apple Mail, as well as an S/MIME certificate. The latter can be obtained from various providers. Doubts have been raised about the seriousness of free offers, which often include certificates with short terms or limited features. One way to play it safe is by creating a self-signed certificate with OpenSSL.
Alternatively, you can purchase a paid certificate such as those offered by Sectigo, which will only set private users back $16.99 per year. However, keep in mind that purchased certificates could pose a security risk because they were not generated locally on your computer.
If you have the S/MIME certificate on your computer, double-click it. It can then be imported.
How to Embed an S/MIME Certificate in Thunderbird
Unlike most email clients such as Outlook, Thunderbird manages certificates itself. Start the program and select Extras from the Menu, followed by Account Settings, and lastly, on the left, End-to-End Encryption.
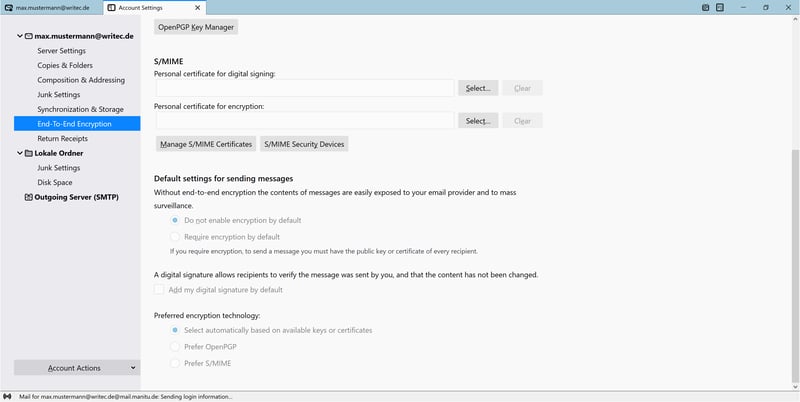
You'll find End-to-End Encryption in the menu on the left.
Click on the Manage S/MIME Certificate button. A Certificate Manager pop-up window will open.
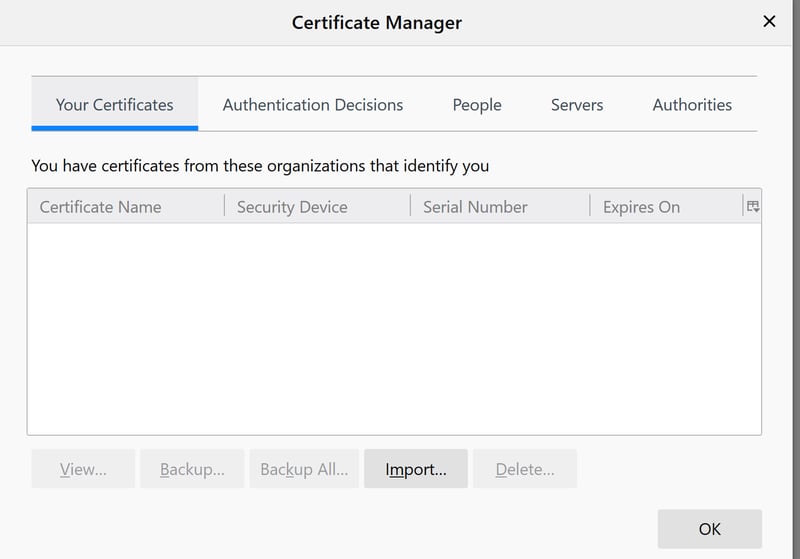
You can import certificates in the Certificate Manager.
Click on the Import button and select the certificate file.
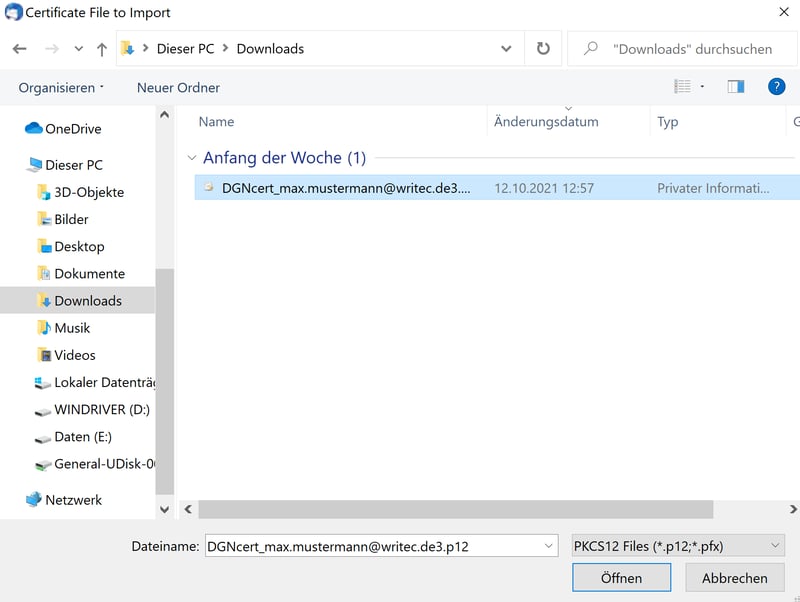
Select the appropriate certificate file.
Then input the password you received (e.g., per text message) and click OK to confirm.
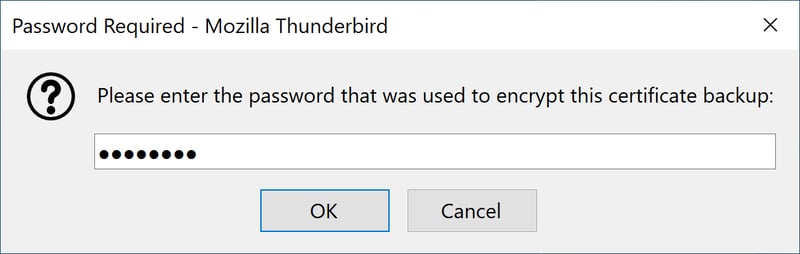
Confirm the entire process with a password.
If completed successfully, the imported certificate will be displayed. Next, click OK.
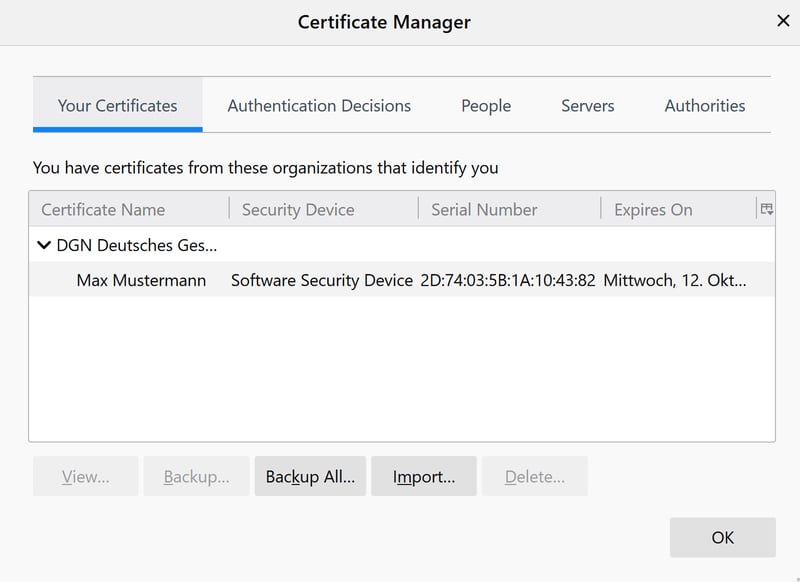
You've successfully imported the certificate.
Click the Select button under S/MIME and Personal certificate for digital signature. Your certificate will already be displayed—all you need to do is click OK to confirm. You now have the option to add a digital signature to your emails, which is a way for the recipient to verify that the email is actually from you.
Thunderbird will now ask if you also want to set up a certificate for encrypted emails you receive from others. Select Yes to confirm, and then OK in the pop-up notification that follows. By default, encryption is disabled in Thunderbird.
You can now send, sign, and also received encrypted emails provided that the required certificates are available for both the sender and recipient. To send an email, click the Security button and select whether the message should be encrypted and signed.

You're now ready to send encrypted emails.
Encrypt Emails With PGP
PGP (Pretty Good Privacy) offers another secure method for encrypting emails. As with S/MIME, PGP also uses asymmetric encryption that relies on pairs of keys, each consisting of a private and a public key.
To exchange emails, you send your public key and signature to the recipients of your confidential emails, and vice versa for those dispatching emails to you. Finally, the private key, which is absolutely confidential, is used to decrypt incoming emails and verify identities.
The recipient's public key is needed to encrypt outgoing messages. The same applies to incoming emails: your counterpart needs your public key to encrypt an email.
Download and Install PGP
PGP is available from various providers. OpenPGP is free and widely available. If you use Outlook, you can integrate OpenPGP by downloading the free GpgWin, after which you can generate a pair of keys and import them into Outlook.
OpenPGP has supported Thunderbird by default since version 78. Open the program and switch to Account Settings. Select End-to-end encryption from the left side, and then click on Add Key.
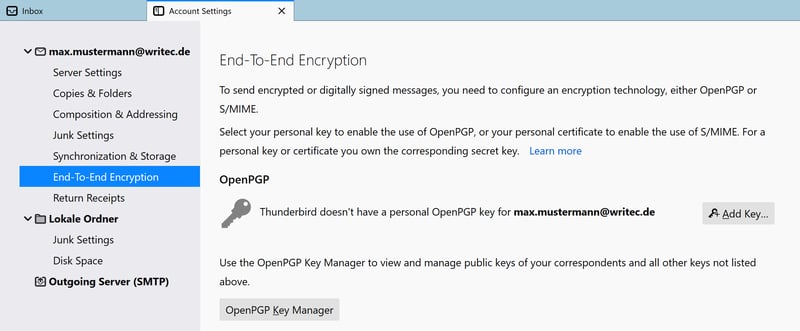
In just a few steps, you can also set up PGP in Thunderbird's account settings.
You can either add an existing pair of keys or generate a new one. If you need a new pair, select Create a new OpenPGP Key and click Continue.
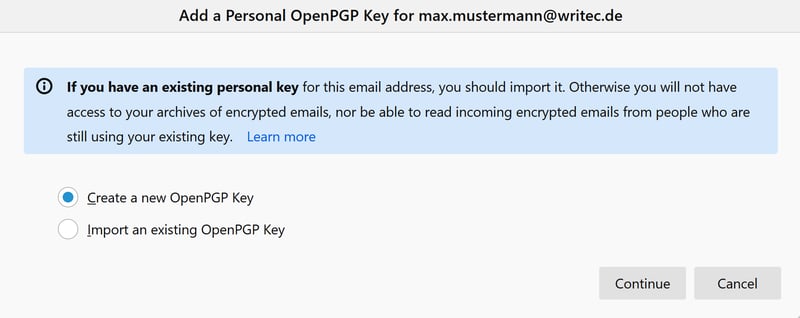
You can create a new key or add an existing one.
Next, specify the expiration date of the newly created key (if desired), and click the blue Generate key button.
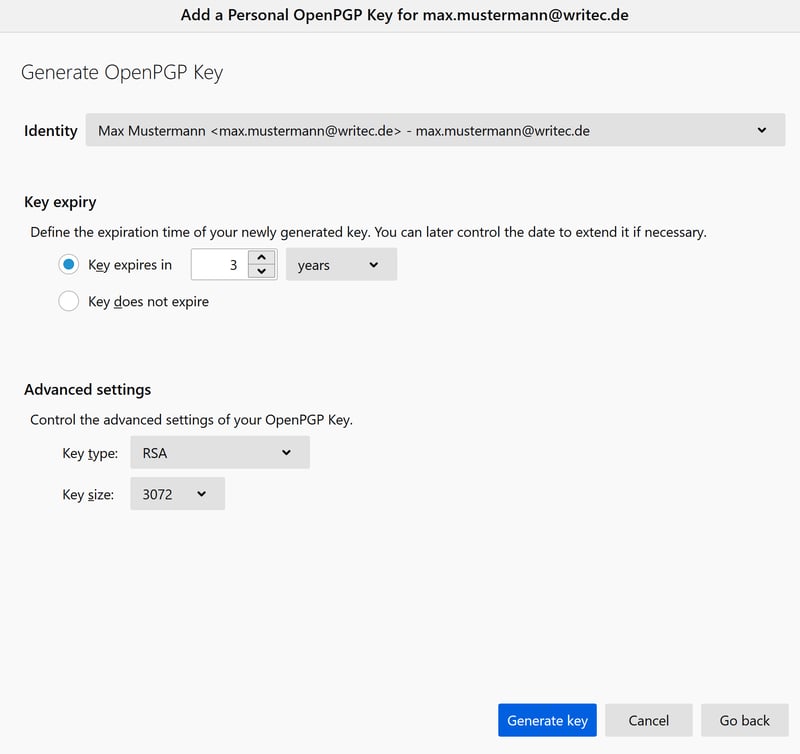
You can add an expiration date, although this isn't required.
Click Confirm to start the process.
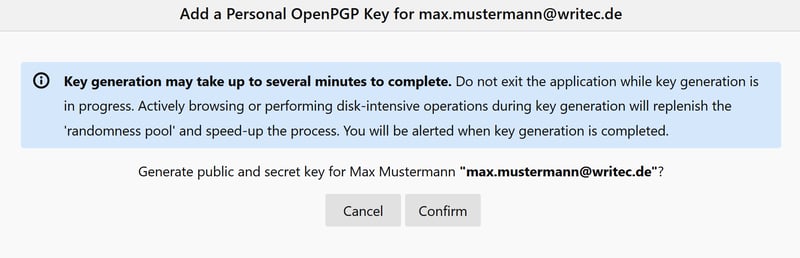
It can take a few minutes to generate your key.
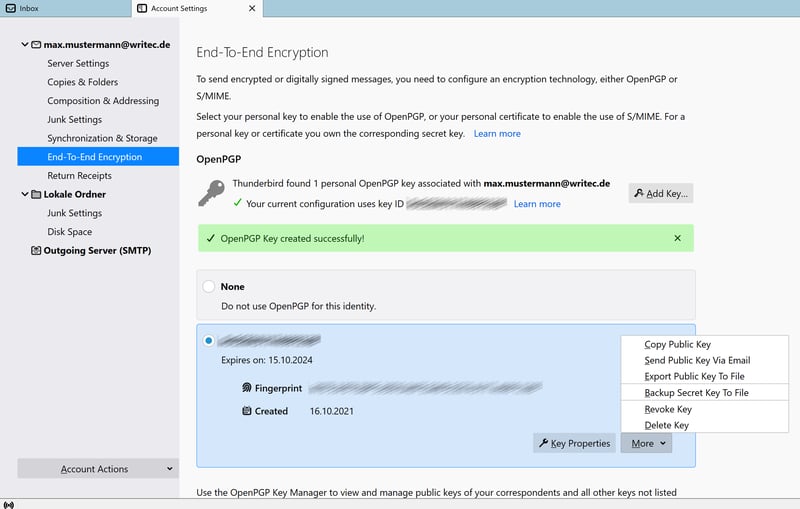
Once finished, OpenPGP is configured.

Setup is complete; you can now use OpenPGP.
Create a Private Key Backup
Creating backup ensures that you'll always have access to your encrypted emails, even if your computer is damaged or stolen.
To create a private key backup, select your OpenPGP key and click on the chevron (two angled dashes) on the far right. The key information section will now be expanded. Click More and then Backup Secret Key To File.
Create a backup copy so that nothing important is lost.
Now save the file with the ASC extension, preferably on an external storage device.
OpenPGP in Thunderbird: Send and Import Public Keys
To send your public key to your contacts, click on More in Key Properties and then on Send public key by email. An email will open with the ASC file attached. All you have to do is specify the recipient and send the email.
If you receive a public key by email, right-click on the ASC attachment and select Import OpenPGP Key. Thunderbird will then ask you if you want to import the key. To do so, click Accepted (unverified).
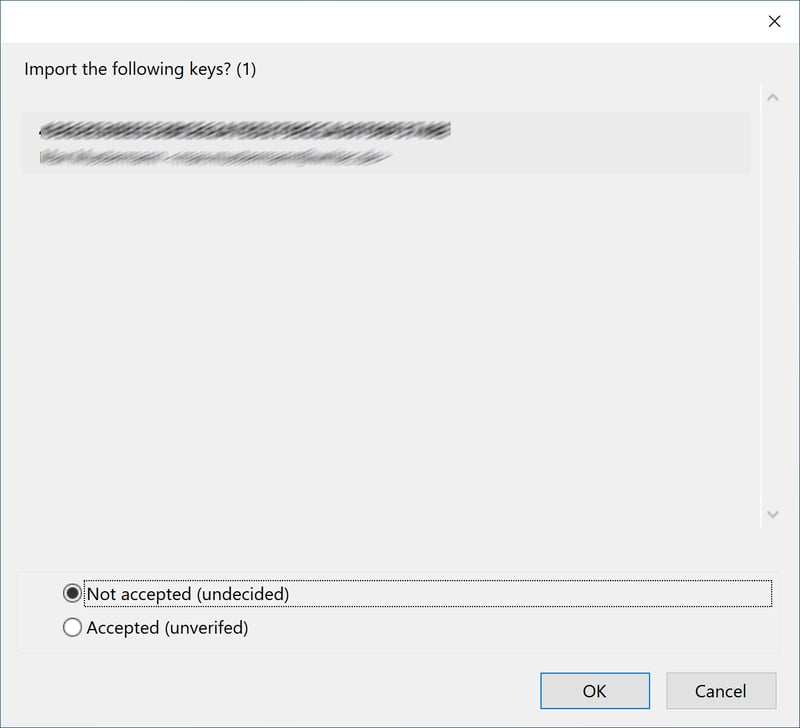
A public key received via email can be imported into Thunderbird.
A message will confirm that the process was successful.

The public key was imported successfully.
Encrypt and Sign Emails With OpenPGP in Thunderbird
To create a new email, click Compose in Thunderbird. If you want to encrypt and/or sign the message, click on the Security button (lock icon).
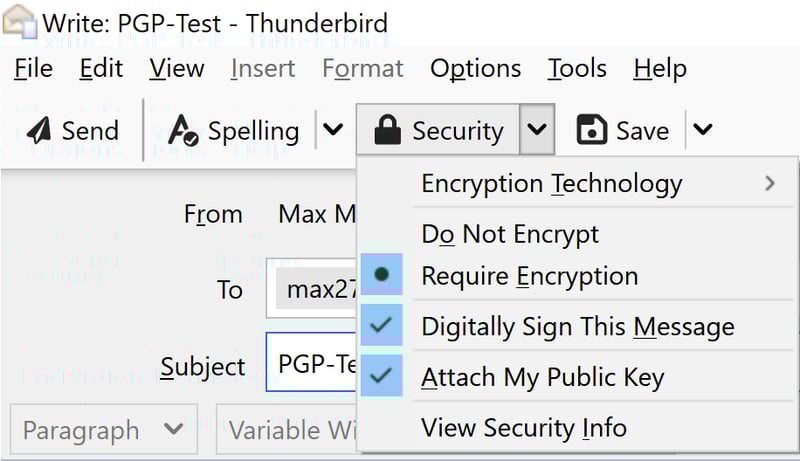
You can now encrypt emails with OpenPGP.
Next, select Require Encryption, Digitally Sign This Message, and/or Attach My Public Key. Once you're finished, you can send your message.
You should still verify that a received public key came from the true sender. To do so, click the OpenPGP icon on the far right and then select Show digital signature key.
Check whether a public key you received really came from the correct sender.
Alternative: Use a Specialized Email Provider
Tutanota and ProtonMail are two email services that aim to simplify message encryption for their customers without compromising on security. Both store the user's private key in encrypted form on their respective servers. Users can access their keys via password.
ProtonMail relies on OpenPGP, while Tutanota uses both a symmetric AES 128 encryption method, as well as an asymmetric AES 128/RSA 2048 one. The latter enjoys an advantage over PGP—not only are the email's content and attachments encrypted, but also the subject line, the sender's name, and the names of the recipients.
Both Tutanota and ProtonMail offer private customers free accounts with basic features. Those in need of more services and storage space can purchase a premium account.
Both providers offer several advantages and disadvantages when set alongside PGP and S/MIME.
Unlike PGP and S/MIME, Tutanota and ProtonMail's email encryption works very well on mobile devices.
Tutanota and ProtonMail customers can also send encrypted messages to recipients who don't use either provider.
Customers somewhat compromise on security in the name of convenience. They have to trust the providers not to store the passwords for their private keys and spy on their emails. However, the risk of fraud is reduced in that the source code of both services is open source, and can therefore be viewed by anyone.
One thing's for sure: you'll have much greater security with either provider compared to using unencrypted email. In the next segment, we'll show how email encryption works using ProtonMail as an example.
What's Possible With ProtonMail?
First, you'll need to register with the provider. After your first login, an assistant will guide you through the most important steps in setting up your account.
Generally speaking, you can do four things with ProtonMail:
Send unencrypted emails
Send encrypted emails to other ProtonMail users
Send encrypted emails to recipients who are neither ProtonMail customers nor use PGP
Send and receive encrypted emails using OpenPGP
Sending Unencrypted Emails
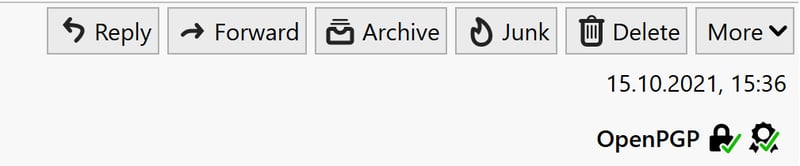
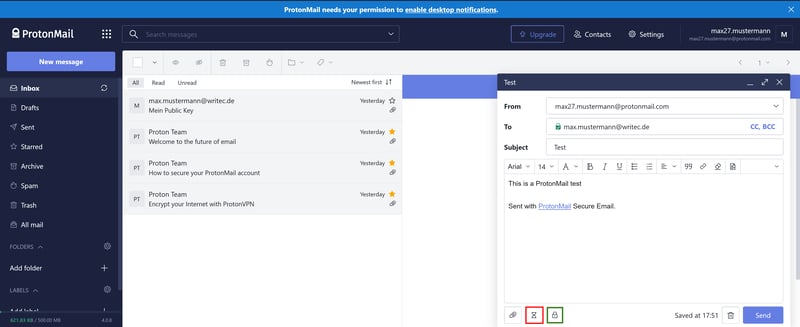
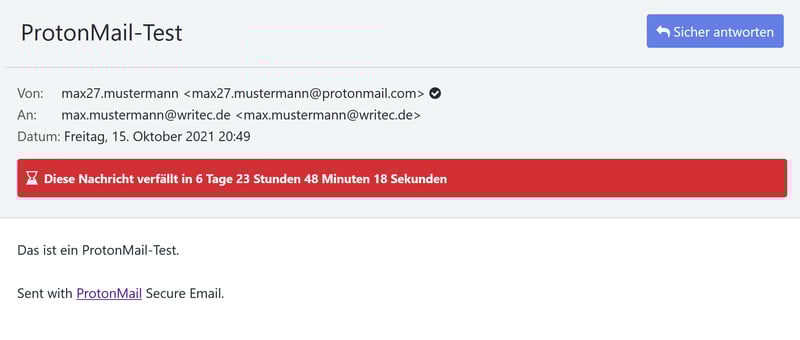
To send an unencrypted email, click the blue New Message button. Compose your message and when finished, click Send. Note that messages sent with ProtonMail to non-ProtonMail customers have an expiration date. For non-encrypted messages, this entails seven days, however, it can be altered. To change when a message expires, click on the hourglass icon (marked red in the image below).
You can set the expiration date of your encrypted emails yourself.
Encrypting Emails for Recipients Without a ProtonMail Account
If you're sending an encrypted message to a non-ProtonMail user, click on the lock icon in the message window (highlighted in green in the image above). The Encrypt for non-ProtonMail users pop-up will open. Enter a password, confirm it, and add a password hint if desired. Click Set, and then Send.

You can also send encrypted emails to non-ProtonMail users.
Recipients can read the message by clicking on the blue View Message button.

If recipients don't have a ProtonMail account, they'll see the above message.
The web browser opens and the recipient is prompted to enter a password.

Now all recipient needs to do is enter the correct password.
If the password matches, the email will be decrypted.
The email is now decrypted.
Sending Encrypted Emails to Other ProtonMail Users
Emails sent to other ProtonMail users are automatically encrypted. Once received, they are automatically decrypted for the recipient, allowing them to be read immediately.
Sending and Receiving Encrypted Emails With OpenPGP
To send a PGP-encrypted message to another (non-ProtonMail) PGP user, select New Message and then click the chevron on the far right of the formatting icons bar. Select Attach Public Key. This will share your public key with your intended recipient.
You must attach your public key so that it's accessible to your recipients.
When someone sends you their public key, click Trust Key in the accompanying message. A pop-up will ask you if you trust this key. If you do, click on Trust Key.
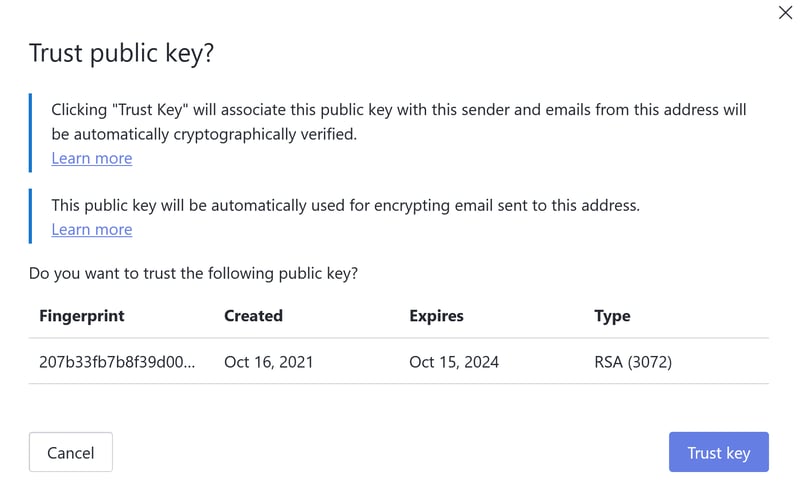
If you're sure you want to proceed, click Trust Key.
The green lock in the "To" field tells you that you're sending an email to a contact whose public key you've imported.
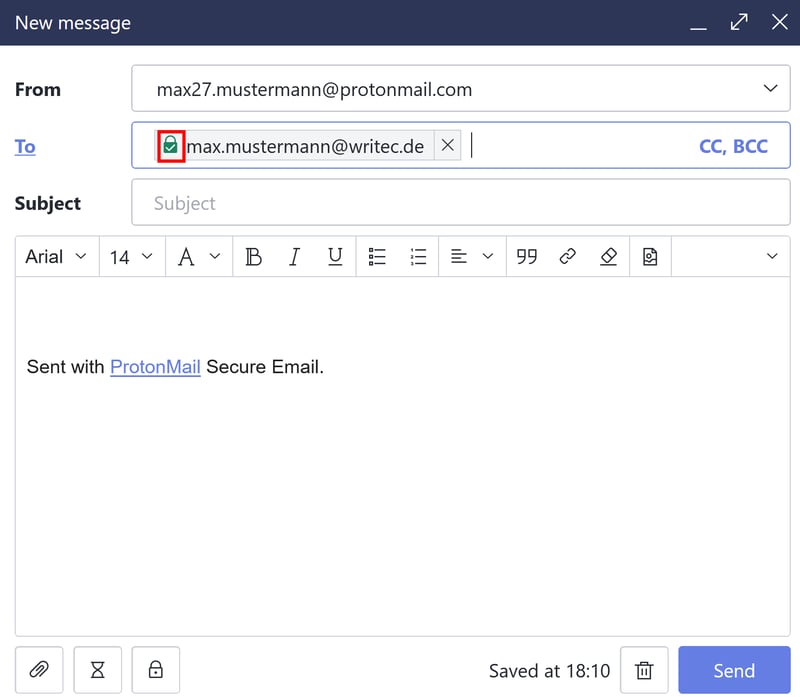
The green lock indicates that you possess the recipient's public key.
The email is now encrypted with PGP. If you want to automatically encrypt all outgoing emails, click the Settings button in the upper right corner, then Go to settings, and finally on Encryption and key on the menu to the left.
Conclusion
In this article, we've introduced you to some ways you can shield your emails from prying eyes. But is it really necessary for everyone to encrypt their emails? Isn't that a bit overkill? Ultimately, email encryption is about protecting your personal data. Therefore, if you are sending potentially sensitive information and want to avoid issues, it is highly recommended to encrypt your emails. On the other hand, if what you're sending is not privileged or personal, then encryption is not necessary.
Should you have a serious need for security, go for PGP or S/MIME. If your priority is simple and secure encryption for everyday use, then ProtonMail will serve you well.