VeraCrypt is open-source software that enables anyone to effectively and safely protect their files, drives, or system partitions, from prying eyes. In this article, we'll show you what VeraCrypt is capable of and how you can use it to encrypt your data. Should you be asking yourself why it's necessary to do so in the first place, we recommend starting out with our article on encrypting Windows, Mac, and external hard drives.

What Encryption Options Does VeraCrypt Offer?
With VeraCrypt, you'll have three options to encrypt files:
File container: With this method, you'll create a digital vault for storing sensitive data. This container can be made available both online and offline on hard drives or removable storage devices like USB sticks, network drives, or even in the cloud.
Encrypt a non-system partition/drive: Should your hard drive or solid-state drive (SSD) be divided into partitions, use this option to fully encrypt it. The same method can be used for removable storage devices like USB sticks or smart cards.
Encrypt the system partition or entire system drive: Finally, you can also encrypt your system partitions using VeraCrypt.
To get started, download the latest version of VeraCrypt from its developer. Then, decide whether you want to install the program or use its portable version. VeraCrypt is compatible with Windows, macOS, Linux, Raspberry Pi, and FreeBSD. Below, we'll walk you through the Windows version.
Encrypt Files With VeraCrypt
Below, we've provided a step-by-step guide that shows how you can encrypt sensitive data using VeraCrypt. To start, open the program and click on Create volume.
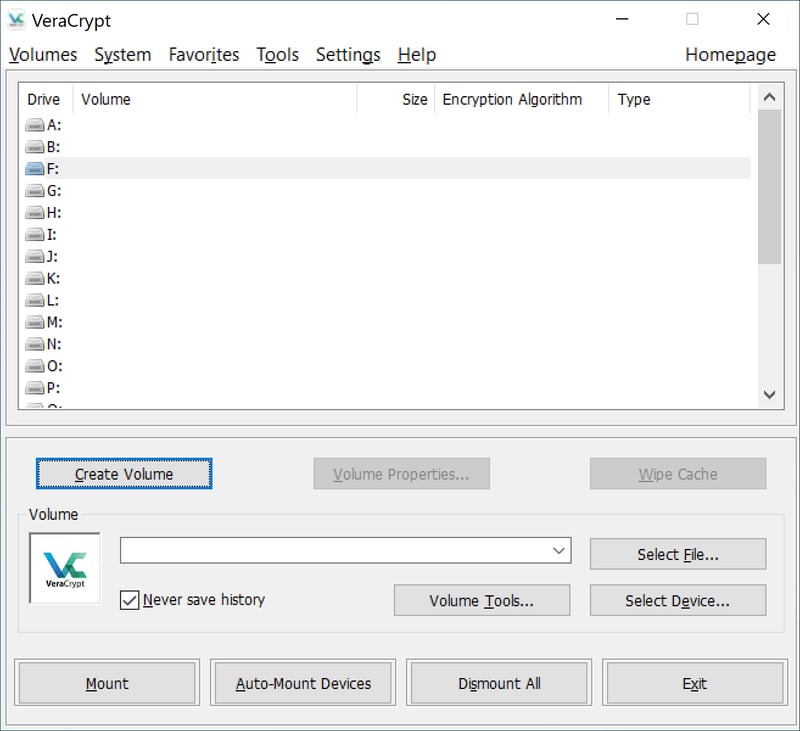
To start encrypting your files, launch VeraCrypt and click on Create volume.
Make sure that Create an encrypted file container is selected and click on Next.

In the Volume Creation Wizard, you can select how and what you'd like to encrypt.
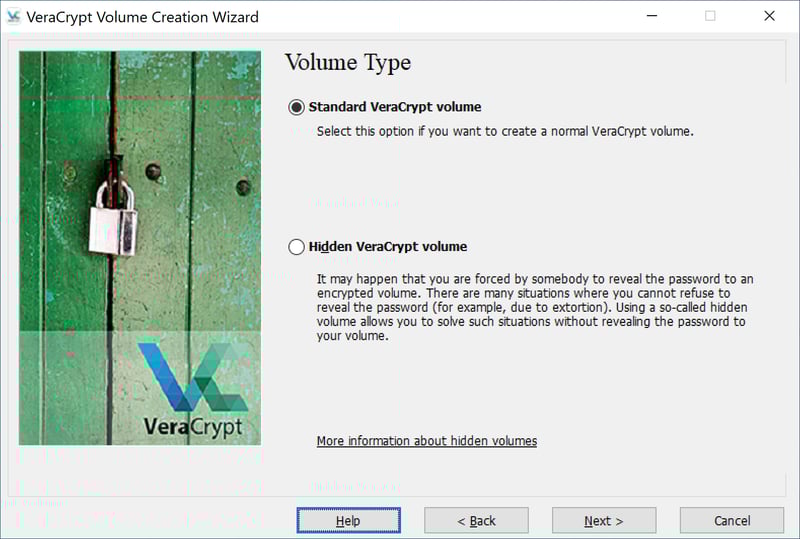
In the next step, select Standard VeraCrypt Volume, which should be the default option. Alternatively, you can create a Hidden VeraCrypt Volume. For this, no one will know that the volume exists apart from you. This means that you won't be vulnerable to pressure about revealing the password.
To continue, click on Next.
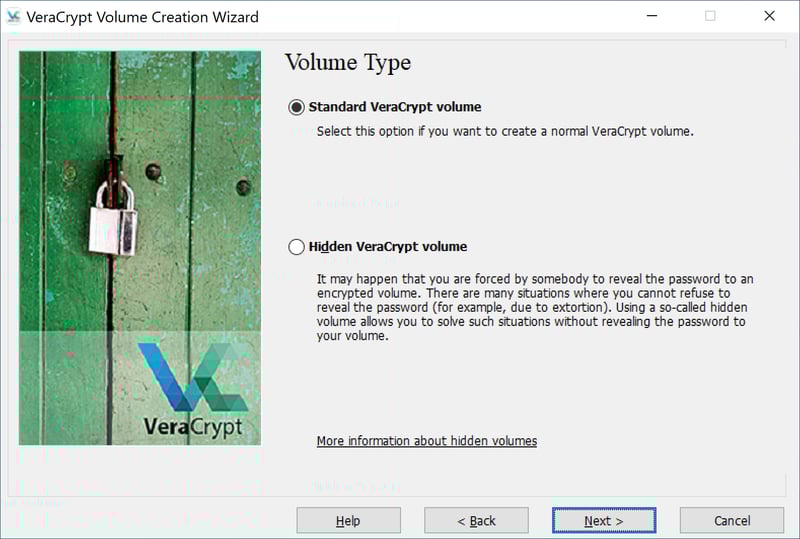
VeraCrypt allows users to create both regular or hidden volumes.
Click on the File button, input the volume's name, and specify where it should be saved. When finished, click on Save.
Note: Don't select an existing file since this will be deleted and replaced with the container file.
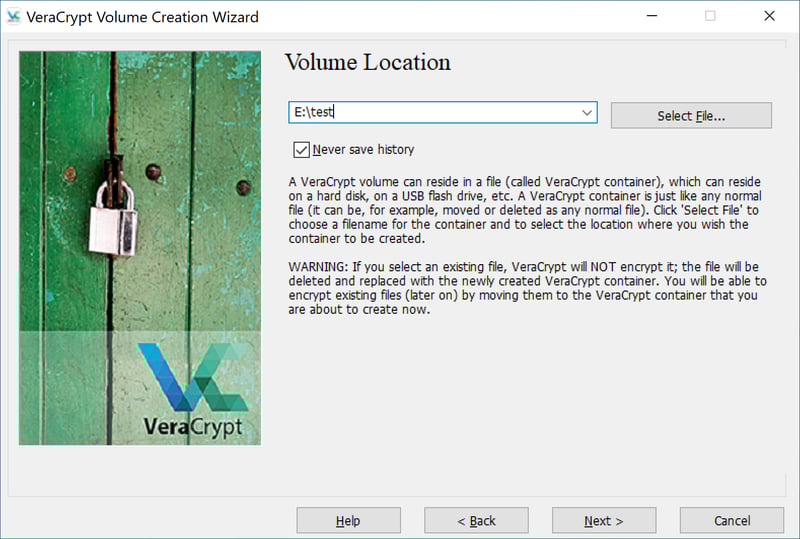
Make sure that you don't save to an existing file since it will be replaced with the container file.
The previously empty volume form should show the location you've specified. After clicking on Next, you'll be taken to the Encryption Options page.
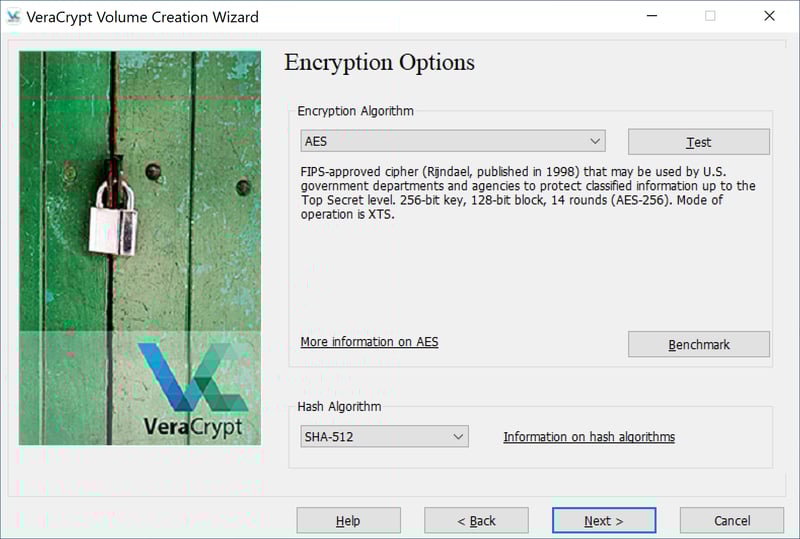
Next, you'll be able to configure your container file's encryption options.
Now select the encryption and hash algorithms you'd like to use. The default settings for these, AES and SHA-512, are considered highly secure and don't need to be changed.
Click on Next and specify the size for your file container, from 292 KB (depending on the file system, this can be slightly larger) all the way up to multiple terabytes.
The upper limit depends largely on the storage medium you're using. Dynamic sizes are also possible, however, this has some disadvantages, particularly in terms of performance and security.
Confirm your selection by clicking on Next.
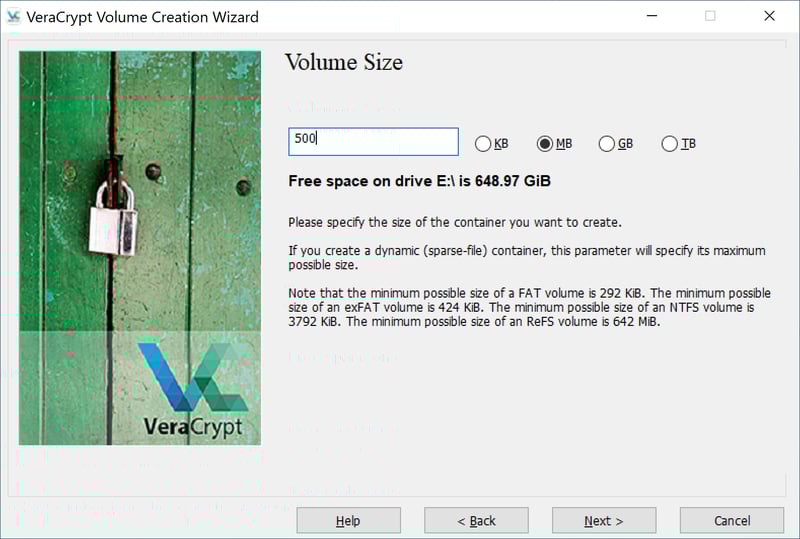
You can specify what size your file container should be.
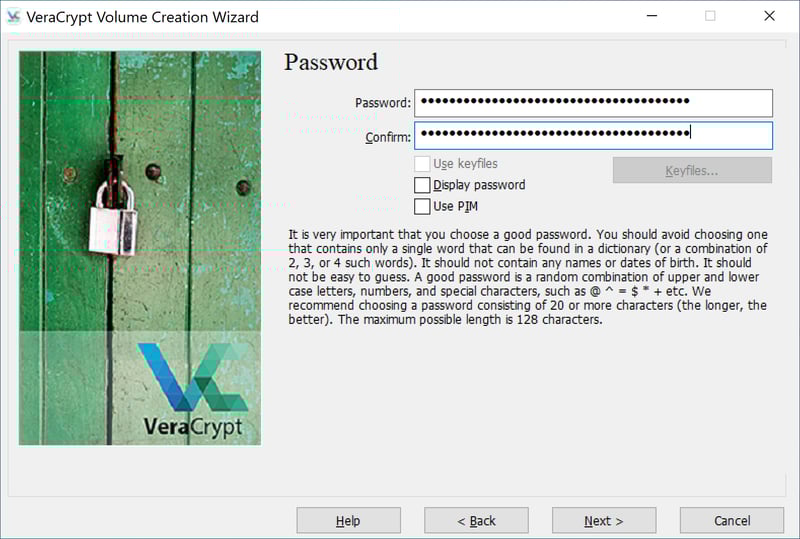
In the next step, you'll assign your VeraCrypt volume a secure password. Make sure that the password is long enough and comprised of a random mix of upper- and lower-case letters, numbers, and special characters (for more detailed instructions on creating a secure password, check out our comprehensive password manager assessment). VeraCrypt recommends at least 20-character passwords.

VeraCrypt recommends a minimum password length of 20 characters.
VeraCrypt warns you if your password is too short.

Should your password be too short, VeraCrypt will alert you, asking you to confirm that you want to use the password you've input.
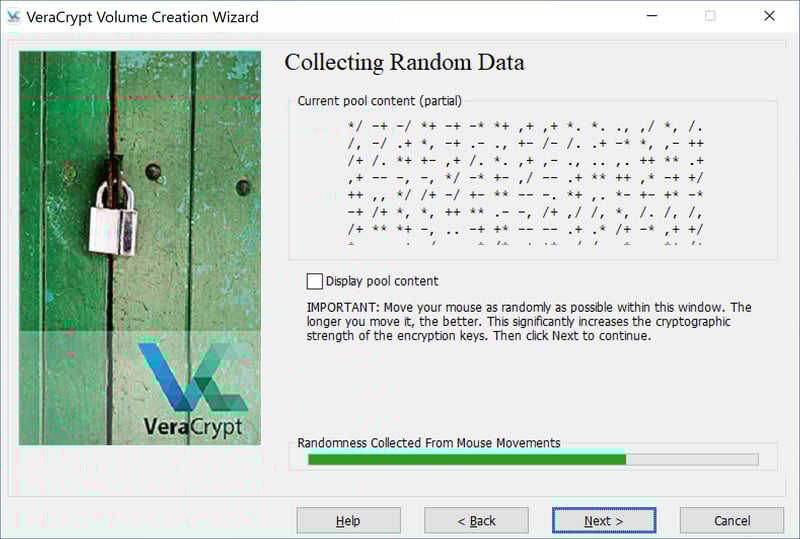
After you've set your password, you'll need to specify what sort of file type the container file should be: FAT, exFAT, or NTFS. Next, you'll be prompted to move your mouse randomly for at least 30 seconds to create as much entropy as possible. While this sounds odd, it will enhance the encryption. Once the Randomness Collected From Mouse Movements bar at the bottom of the dialogue box turns green, you can stop.
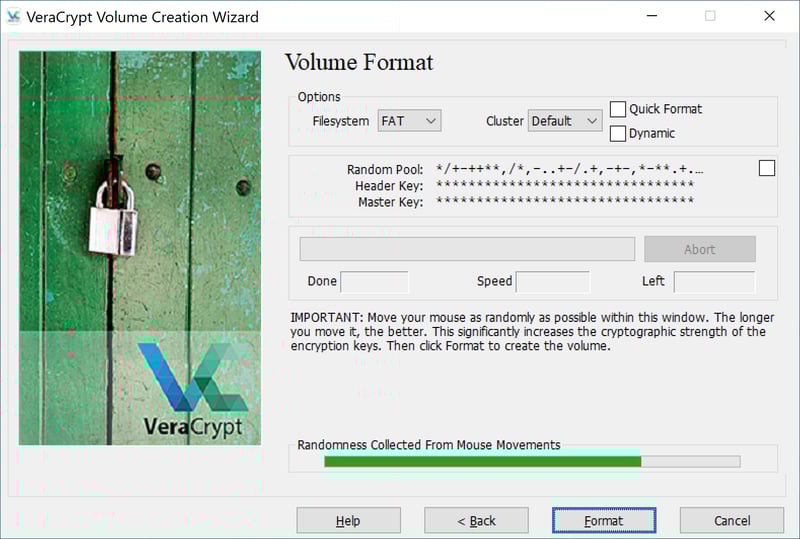
VeraCrypt will ask you to move your mouse around randomly for at least 30 seconds to enhance its encryption.
By clicking on Format at the bottom of the dialogue box, your VeraCrypt volume will be created. Should you not want to create any additional volumes, you can click on Done to leave the program.
Now, return to VeraCrypt's main window, and look for the drive letters. Select one of these (for example, K), and click on the Select File button to check its contents for the folder where you've saved your VeraCrypt container.
Select the file and click on Mount, entering your password in the pop-up window that opens. Once you've input this, confirm your password by clicking on OK.

Once you've mounted your file container, you'll need to input its password.
The process can take a few seconds, depending on how large the file container is, so it's important to be patient.
Once the container is mounted, you can use it in Windows like you would a regular drive. In the event that you no longer need your file vault, for security reasons, unmount it. In this way, no one will be able to access it. To do this, click on the volume and select Disconnect. To unmount multiple VeraCrypt containers, click Disconnect All.
Encrypt Hard Drives and USB Sticks With VeraCrypt
To encrypt a hard drive or another type of storage device, select Encrypt a non-system partition/drive followed by Next in VeraCrypt's main window. A Windows pop-up will open requesting administrator rights. Confirm these with Yes.

To encrypt an external hard drive or USB stick, select Encrypt a non-system partition/drive.
Leave the default Standard VeraCrypt Volume option and click on Next.
Keep the default settings on the Volume Type page.
On the next page, click on Select Device. In the pop-up that opens, specify the drive that you'd like to encrypt and confirm your choice with OK. Once the pop-up closes, click on Next.

Click on Select Device and choose the drive you'd like to encrypt.
At this point, you'll be able to select between Create encrypted volume and format it or Encrypt partition in place.
Select the second option if you want to encrypt an entire drive and all of the data on it. You should note that these drives will have to be compatible with the NTFS file system. Should your drive use another data system, you'll have to utilize a somewhat tedious workaround, which VeraCrypt elaborates upon in a warning notification.
We're going to move forward here with the first option, Create encrypted volume and format it. It's important to note here that all existing data on the volume will be deleted! For that reason, should the drive contain important information, make sure that you transfer it to another storage device before continuing.
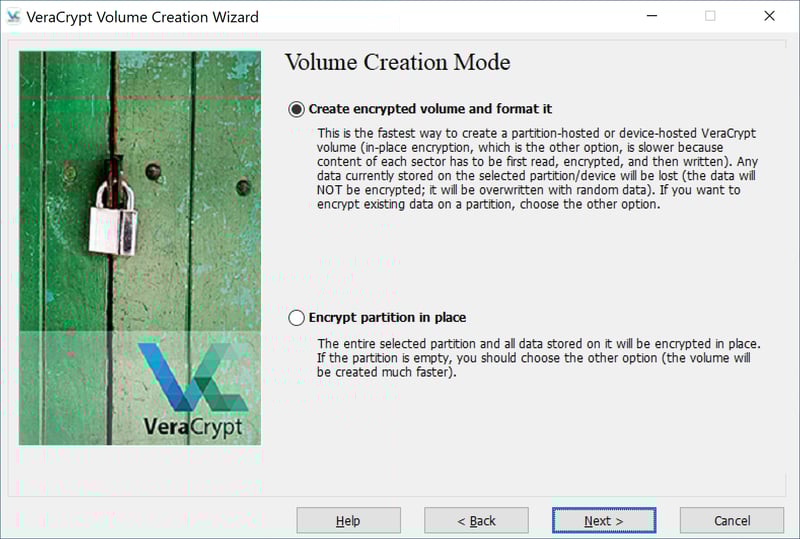
Select the first option, but make sure that you've transferred any files you want to save from the storage medium in question.
Once the storage device is ready, click on Next, which will bring you to the Encryption Options page. As in the first example, the program's encryption and hash algorithm presets (AES and SHA-512, respectively) are secure, and can be left as they are.

You can leave VeraCrypt's encryption and hash algorithm presets.
After clicking on Next, you'll be able to view the size of your storage medium and specify how large you want the file container to be.

You can see how much space is available on your storage device and specify how large you'd like the file container to be.
After clicking on Next again, you'll be prompted to create and confirm a password by re-entering it. The password should be as secure as possible.

Make sure the password you create for your volume is secure enough.
Click on Next and specify which file system your storage device uses (NTFS, FAT, exFAT, or ReFS). Alternatively, you can leave the program's presets. Next, move your mouse around randomly to create entropy, ensuring solid encryption for your device.
When the bar below turns green, click on Format after which a pop-up will open with a warning that details the consequences of formatting the drive in question. If you're certain that you want to begin this process, click on Yes.

Before encrypting your storage device, VeraCrypt will give you a last warning, detailing the consequences of formatting the medium.
Depending on the drive's size and speed, formatting and encryption can take a few minutes, so it's important to be patient. Once the process is finished, you'll receive a notification that the storage device can't be mounted with the same drive letter as previously.

You won't be able to use your newly encrypted non-system drive with the same letter it previously had.
Click OK and the pop-up will disappear. Should you not want to encrypt any additional devices or drives, you can conclude the process by clicking on Done.
Now, open the program's main window and choose one of the free drive letters (i.e. "J") and click on Select File. In the pop-up window that opens, select the data storage device where you've just created an encrypted file container by clicking on its internal drive name (for example, Device\Harddisk3\Partition1 LW I:).
By clicking on Mount you'll be able to access your encrypted drive after supplying the correct password. It can be readily accessed in Windows Explorer via the drive letter that you selected earlier.
Your new file vault is now ready: If you don't need it, make sure to unmount it in the VeraCrypt main window.
Encrypt a System Partition With VeraCrypt
Should you want to encrypt a system partition, select Create a Volume in VeraCrypt's main window, followed by Encrypt the system partition or entire system drive.
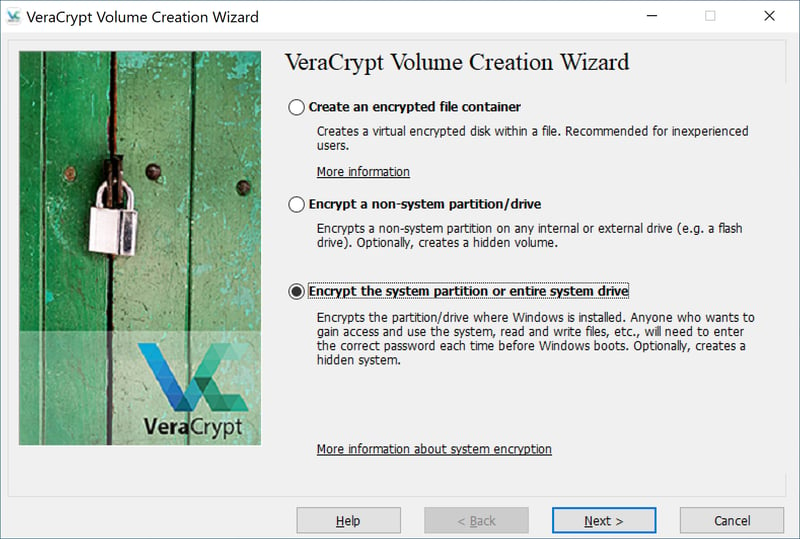
You can also encrypt a system partition or drive with VeraCrypt.
Click on Next and grant VeraCrypt administrator rights. After this, confirm the system encryption presets (Normal) and click on Next again.
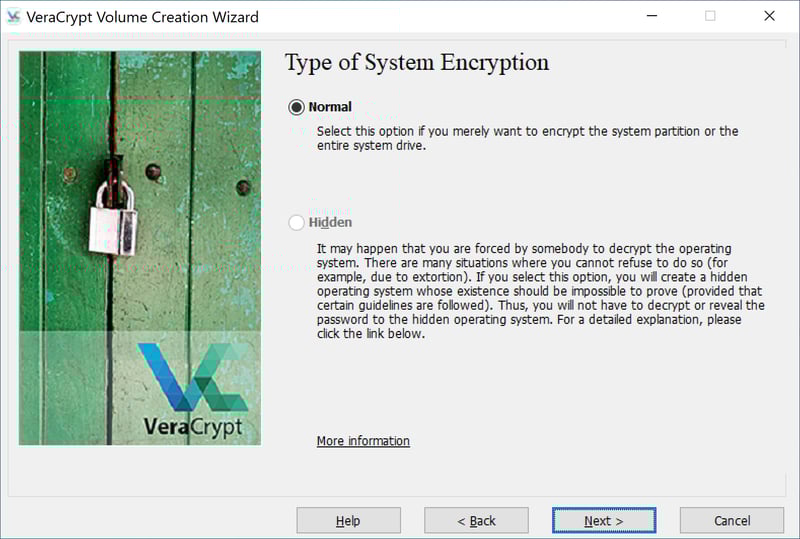
Leave VeraCrypt's system encryption presets as they are.
The preset, Encrypt the Windows system partition, should also be left as is. Click on Next.
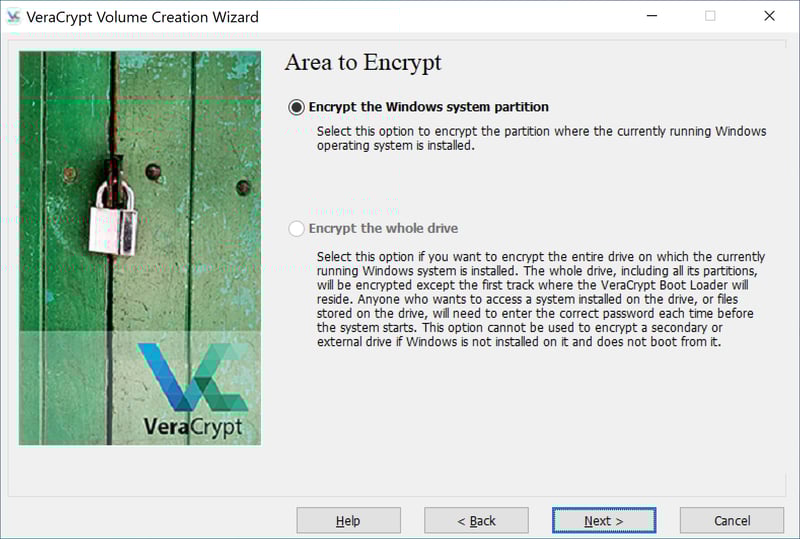
Encrypt the Windows system partition should be left as is.
Unless you want to encrypt multiple operating systems at the same time, make sure that Single Boot is selected and click on Next.
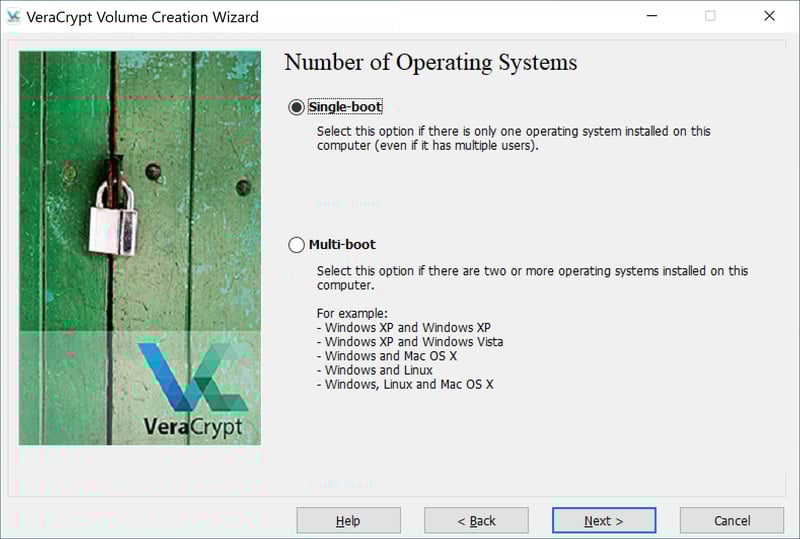
Unless using multiple operating systems, make sure that Single Boot is selected.
In the next step, you can specify the encryption and hash algorithms, however, we recommend leaving these as they are (AES und SHA-512). When finished, click on Next.
As in the previous two examples, we recommend leaving the program's algorithm presets as they are.
Now, assign and confirm a secure password for your system partition. Make sure that VeraCrypt uses the US keyboard layout since no other keyboards are available in the pre-boot environment (directly after turning on your computer). You can continue by clicking on Next.
Enter and confirm your system drive's new password.
At this point, VeraCrypt should have returned your keyboard layout to how it was before the last step. Start moving your mouse randomly until VeraCrypt has generated solid encryption. When the bar at the bottom of the interface turns green, you can click on Next.
You'll need to randomly move your mouse around for a minimum of 30 seconds to generate robust encryption.
VeraCrypt lets you know once the key has been generated. After this, click on Next.
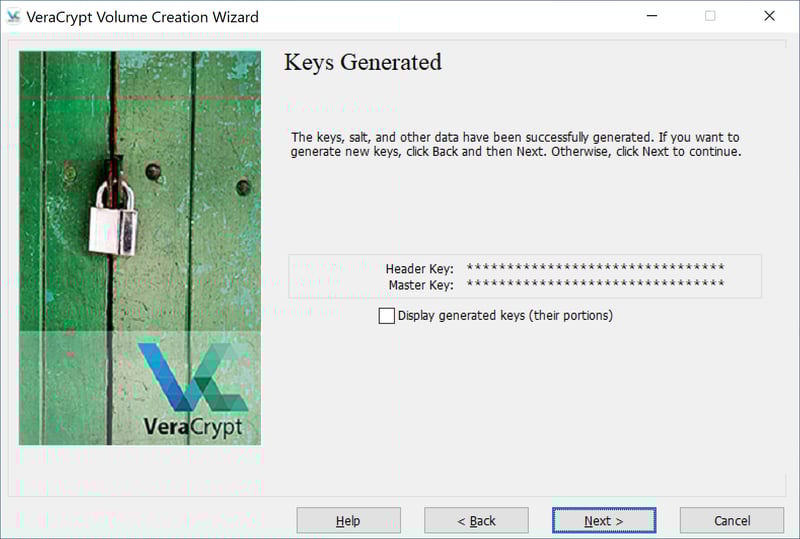
The program will let you know once it has generated an encryption key.
Now you'll be asked to create a VeraCrypt rescue disk, which is important in the event that critical VeraCrypt data is damaged or if Windows has boot-up problems.
You can leave the program's default path or select your own. After clicking on Next a ZIP file will be created containing all of the rescue disk's essential data.
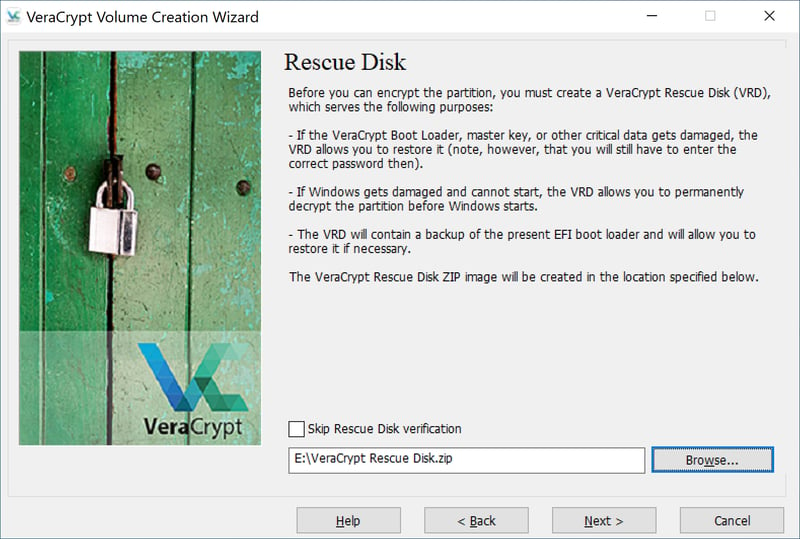
VeraCrypt's rescue disk makes sure that you won't have any difficulties accessing your encrypted partition if Windows becomes damaged or experiences any problems.
The file's content can be copied into the root directory (the highest folder level) of a USB stick that has been formatted with FAT or FAT32.
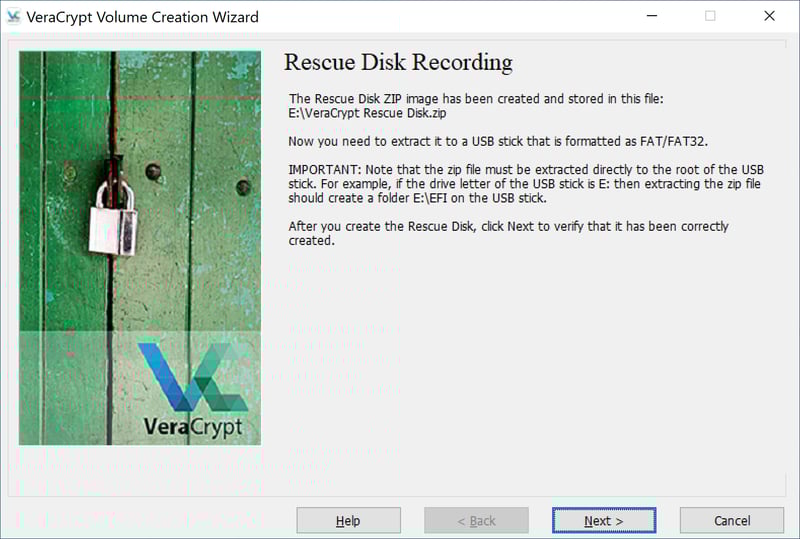
VeraCrypt stores all of the essential files for recovering access to encrypted partitions in the rescue disk.
Once you've transferred the rescue disk, click on Next and VeraCrypt will check if the disk has been successfully created. If it has, disconnect it from your system and remove the storage drive from your computer. After that, click on Next.
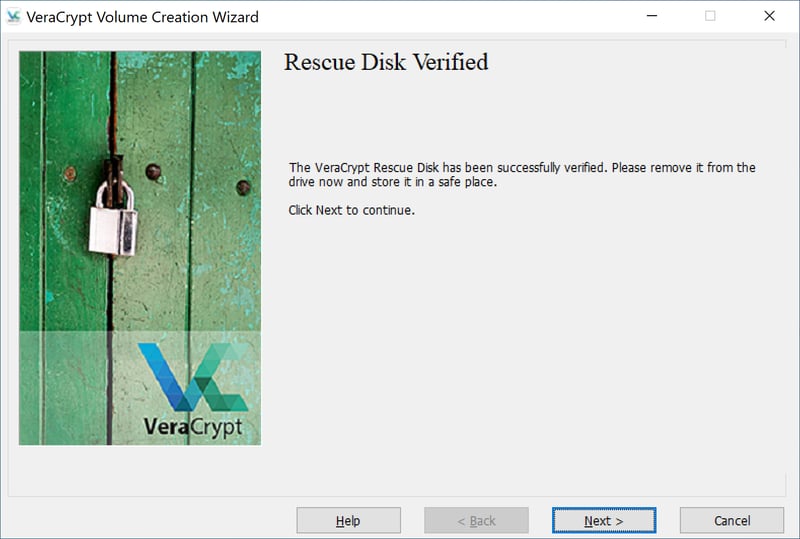
Once VeraCrypt has verified that the rescue disk works, you can remove it from your computer.
Now, in Wipe Mode, you can safely delete any overwritten files on the system partition without worrying about data loss. Should this not be necessary, click on Next.
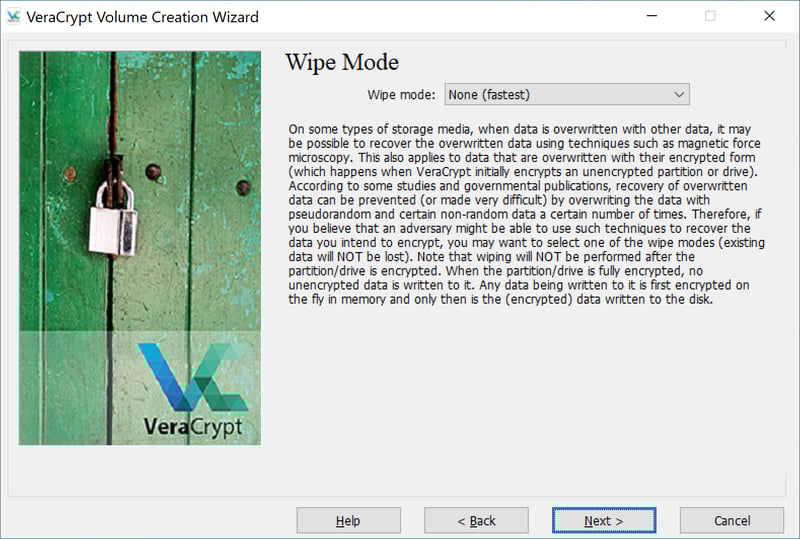
In VeraCrypt's Wipe Mode, you can safely delete any overwritten files from your drive prior to encrypting it.
Before the system partition is encrypted, VeraCrypt will perform a pretest to make sure that everything is working correctly. After clicking on Test, a pop-up window will open that you should read carefully. Confirm that you want to proceed by clicking on Yes.
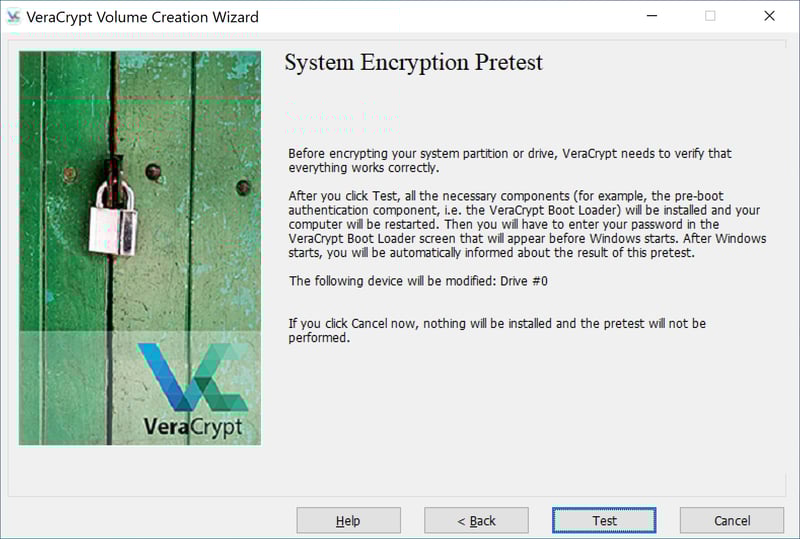
VeraCrypt's System Encryption Pretest ensures that everything is working properly before encrypting your drive.
Read the next security notice as well and click on OK. Once finished, confirm that you'd like to restart your computer and Windows will restart. Input your password, leave the PIM field empty, and confirm by pressing Enter.
Should there be a problem when inputting your password, and you're unable to log in, press the Escape key on your keyboard.
After this, Windows will start as usual. Once loaded, the VeraCrypt assistant will ask if it should perform the test again, or if the pre-boot authentication component can be uninstalled.
If logging in worked as usual, Windows will boot normally. Once your computer has loaded, VeraCrypt will launch, informing you that it has successfully completed its pretest.
Click on Encrypt and grant VeraCrypt administrator rights once more. Although it can take a few minutes, the ensuing encryption process can be interrupted or paused at any time. The VeraCrypt assistant will let you know once the process has concluded, after which you'll only have to click on Close.
You can revert your system partition's encryption at any time. To do this, click on System in VeraCrypt's menu and then on Permanently Decrypt System Partition/Drive.
Conclusion
VeraCrypt is well-suited for encrypting files and drives, being both user-friendly and easy to navigate.
Encryption does take a while, meaning that a large drive with multiple terabytes of stored files can require several days to encrypt. The process can be sped up by encrypting an empty drive and saving or transferring data to it afterward.
One of VeraCrypt's biggest advantages is its open-source code, which can be checked by anyone. To compare, BitLocker, which is Microsoft's popular tool, doesn't have open-source code, meaning that you'll have to trust Microsoft with the security of your files. Understandably, not everyone is ready or willing to do this. With VeraCrypt, you won't have to worry about the developer's security owing to their transparency.
FAQs
According to a study by the Fraunhofer Institute for Secure Information Technology (SIT) VeraCrypt is safe for anyone to use. The SIT only found a few minor issues, which it shared with VeraCrypt's developers. These have been rectified (at least in part) in the newest version of the software.
VeraCrypt is developed by IDRIX1, a French company that offers a range of free encryption tools.
VeraCrypt is non-commercial, open-source software, meaning that its source code can be viewed by anyone. In contrast, BitLocker is proprietary Windows software and only offered to Pro and Enterprise users of Windows 10.
This depends both on how large the drive is and how many files it contains. The quickest way to encrypt a drive is to transfer all of the files off of it, encrypt it, and return the files.
VeraCrypt is compatible with all versions of Windows since XP. You can also use the tool on macOS, Linux (Ubuntu and Debian), as well as Raspberry Pi, and FreeBSD.