WordPress Migration: How to Move Your WordPress Site

Better performance, lower costs, or faster support—there are plenty of good reasons to move your WordPress site to a new hosting provider. But how do you do it right?
This guide walks you through migrating your website either automatically through your new host or manually with a plugin. We’ll use Hostinger as an example for the automated migration process.


There are several ways to migrate a WordPress site. You can let your hosting provider handle the move or migrate the website yourself using a plugin.
Many hosting providers offer a free migration service and handle most of the work for you. All you need are your WordPress login details.
With a migration plugin such as Duplicator, you can handle the move yourself. The plugin exports your site and imports it to the new server.
Both methods have pros and cons. Migration through your host is easier, while the plugin method gives you more control.
How to Migrate Your WordPress Website
Moving a WordPress website to a new server isn’t as complicated as it used to be. In practice, two methods work well:
- 1.
Use the migration service offered by your new hosting provider. They’ll handle the entire move automatically, saving you time and reducing the risk of errors. All you need are your WordPress login credentials.
- 2.
Migrate your site yourself with a plugin like Duplicator. This option gives you more control and flexibility but requires some technical know-how and hands-on work.
We’ll compare the pros and cons of both methods and show you how to migrate your WordPress website to a new server step by step.
Option 1: Migration via Hosting Service
Many hosting providers now offer automated WordPress migration services. Your new host transfers your entire website, including your files and database. This is now the standard approach at most major hosting companies.
The process is similar with most providers: You provide the login details for your existing website, and the provider handles the rest. The main differences are how each host handles the migration process and how quickly its support team responds.
Using a Migration Service: Pros and Cons
The biggest advantage is how simple it is. You don’t have to worry about any technical details. The hosting provider takes care of the entire process for you.
Free Service
The migration service is usually free, and many providers don't limit the number of WordPress websites you can transfer.Automatic Process
The hosting provider handles the entire migration automatically. In most cases, you only need to provide a few details, such as your domain and the login credentials for your existing site.Works for Complex Setups
This method works well for larger websites with lots of images, pages, themes, and plugins.Guided Migration Process
You start the migration from the hosting provider’s dashboard, where a step-by-step guide walks you through the process.
The downside is that you're handing over control. Automated migration tools often can't handle custom configurations, and once the process starts, you can't make any changes.
Takes Time
The migration process takes time. For smaller websites, migrating with a plugin is often faster.No Control During Migration
Once the transfer starts, you can’t step in. You’ll have to trust the hosting team to finish it.No Support for Multisite
Most providers don’t support WordPress Multisite installations. If you use Multisite, you’ll need to migrate manually or use a specialized tool.
How to Migrate WordPress to Hostinger
We'll walk you through the migration process using Hostinger's free WordPress migration service. Other providers follow a similar process, but their interface and terminology may differ.

Before you start your WordPress migration, make sure you can access your current website's backend. Hostinger needs one of the following to migrate your site:
Your website URL
Your WordPress admin login credentials
Or a backup of your website, including the database
You'll either provide Hostinger with your website URL and WordPress admin login credentials or upload a recent backup.
Run the Migration Using Hostinger’s Migration Assistant
To start the migration, log in to your Hostinger account and open hPanel. In the sidebar, go to “Websites” and select “Transfers”.
Hostinger’s migration assistant will guide you through the next steps:
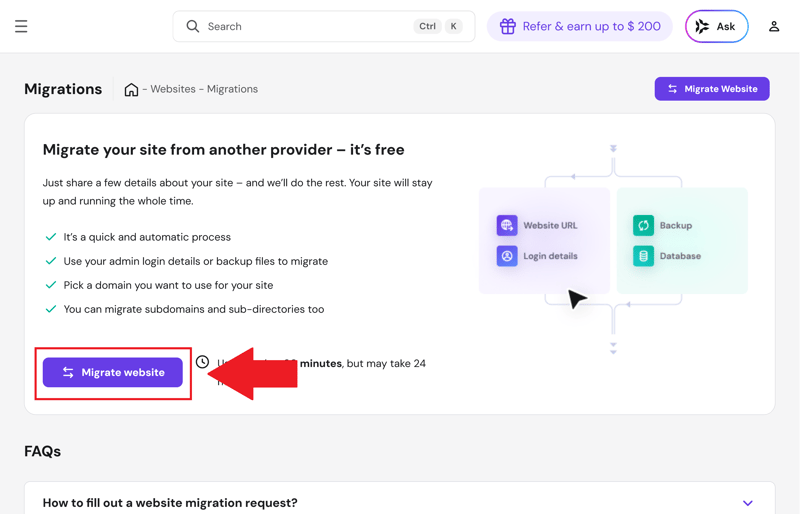
Hostinger’s migration assistant.
Hostinger will ask how you want to transfer your website. You can choose “Use login details” or “Upload backup files”.
In this example, we’ll use the WordPress login details:
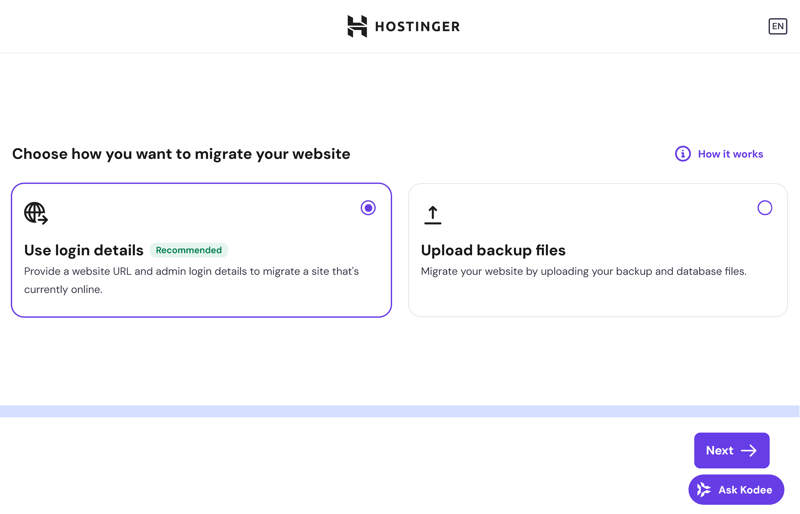
Migrating a website using login credentials.
If you choose to use login credentials, enter the URL of your current website:
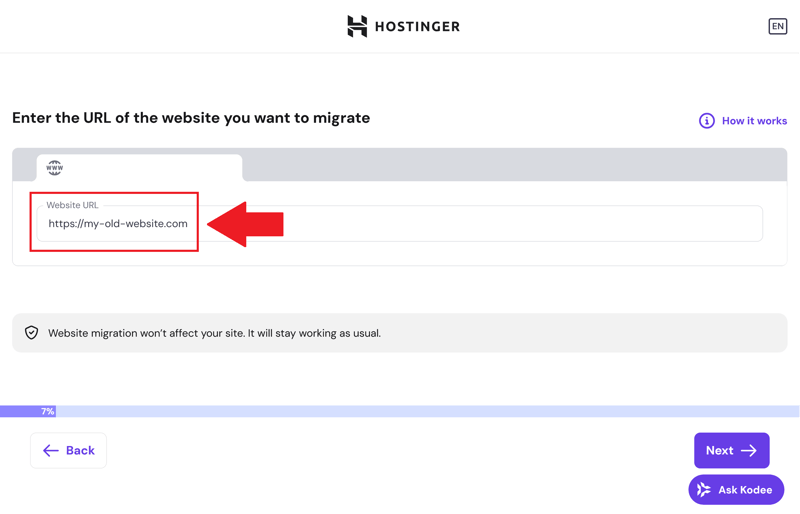
Enter your website’s URL.
Next, choose how you want to grant access. Hostinger lets you use your login credentials or cPanel, a control panel for managing web servers:
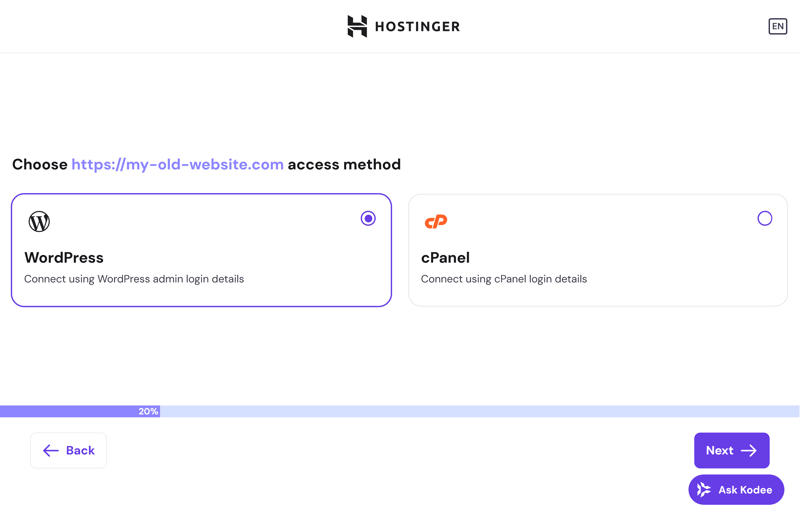
Access your website using login credentials or cPanel.
If you selected the login credentials option, enter them in the next step. The WordPress account you use must have administrator rights.
Also, double-check that the URL and path to your WordPress backend are correct. By default, this is /wp-admin:
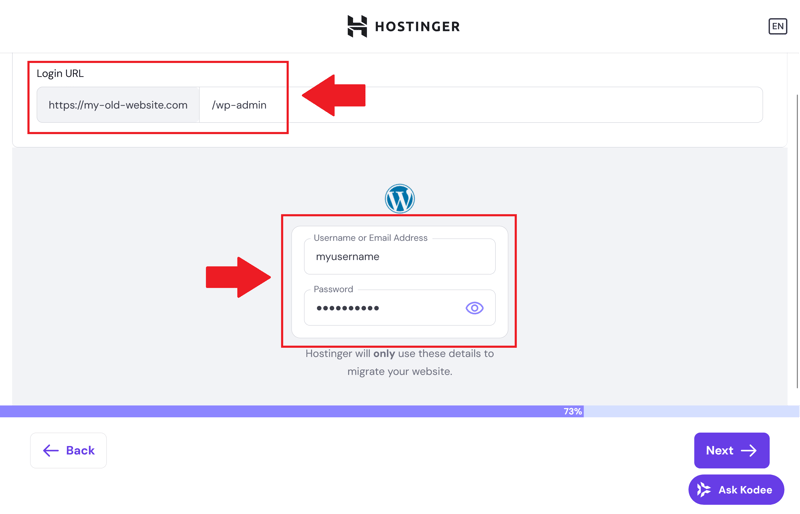
Login credentials and the path to the WordPress backend.
Hostinger will verify your details. If everything checks out, you’ll see a summary of your migration request:
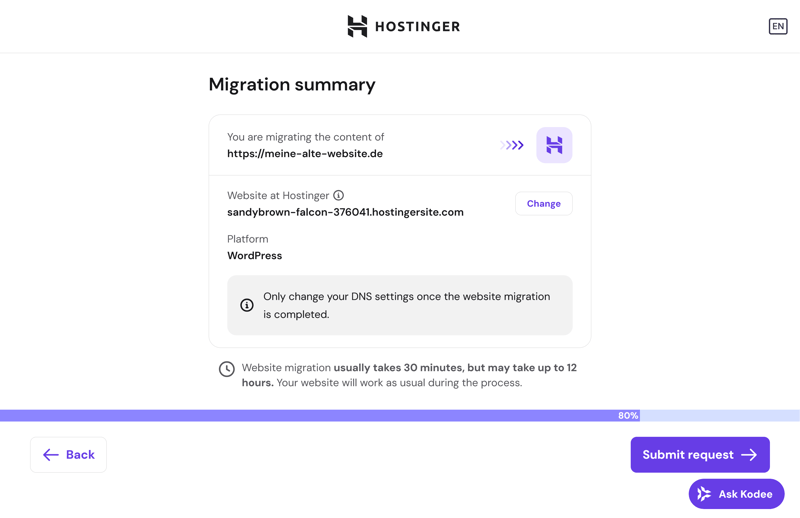
Summary of your migration request.
After you submit your request, Hostinger starts the migration. For smaller websites, the transfer usually finishes within an hour. Larger sites may take up to 12 hours.
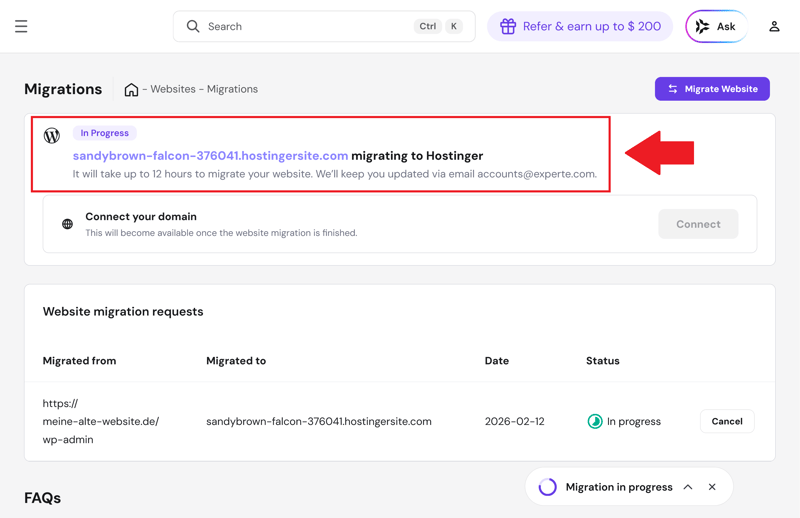
Hostinger starts the transfer process.
When Hostinger finishes, you’ll get a confirmation email and a notification in your hPanel. Now test your migrated site on Hostinger’s server. Check all pages, features, and plugins to make sure everything works.
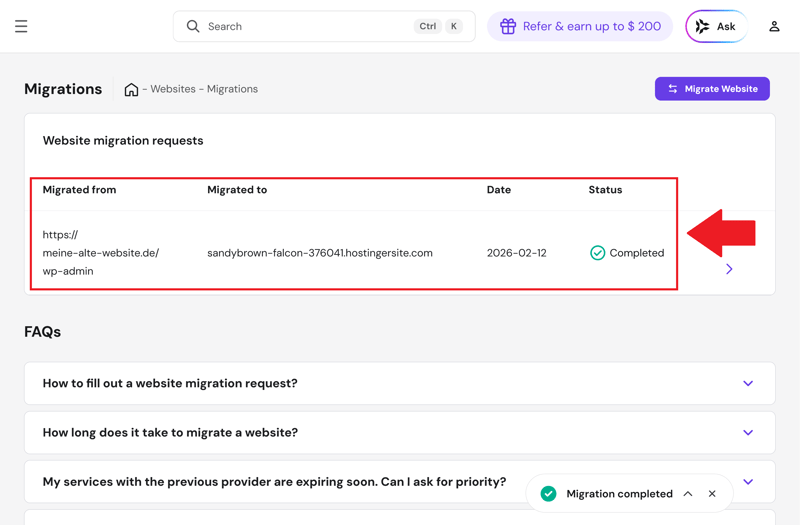
The migration is complete.
Update Your DNS Settings
If everything checks out, the last step is to update your domain’s DNS settings so they point to Hostinger’s server.

First, check where your domain is currently managed. It could be with Hostinger (if you registered it there) or another provider like IONOS or GoDaddy.
- 1.
Log in to your current domain provider and open the DNS management section.
- 2.
Update your domain’s A record to point to the IP address of the Hostinger server that now hosts your migrated website.
You can find the IP address in your hPanel under “Hosting Plan” details.
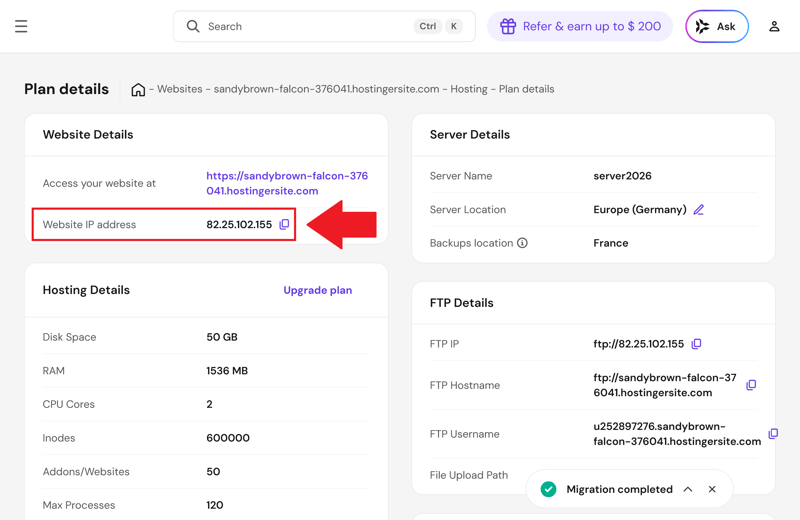
The IP address of your migrated website.
The change can take up to 24 hours to take effect worldwide. During this time, visitors might see either your old or new website. You can track the process using a DNS checker.
Once the DNS update is complete, don’t delete your data from the old host until you’re sure everything works.
You did it: Your WordPress website is now fully migrated to the new server. All content has been transferred, and your domain now points to the new host. Your site is ready to go live on its new server.
Option 2: Migrate Your WordPress Website Manually
A manual WordPress migration means you handle every step yourself: exporting your files, transferring them to the new server, and setting everything up.
Unlike an automated service, you won’t have a guided assistant. You control the entire process and see exactly what’s happening at every stage.
Tools like Duplicator can simplify the process by packaging your entire website for export and restoring it on the new server.
Manual WordPress migration: Pros and cons
Whether you use a plugin or not, a manual migration takes more effort than an automated one. But it gives you more control. You can track every step, pause or repeat tasks as needed, and handle special requirements directly.
For users with less technical experience, all these small steps can feel overwhelming.
Full control over the move
You manage every step yourself, from exporting your site to restoring it on the new server.Works with any hosting provider
A manual move works with any host. Your new provider doesn’t need to offer a built-in migration service.Export as a complete package
A migration plugin creates a full backup of your website, including the database. You can also keep this backup for safekeeping.Automated restore
After you upload the files, the plugin handles almost everything: importing the database, updating URLs, and configuring settings.
Basic technical knowledge required
Using FTP and entering MySQL credentials takes some experience.Prone to errors at each step
A manual move involves several steps. One wrong database setting, an incomplete upload, or a missed adjustment can break your website.Time-consuming for larger websites
Exporting, uploading, and setting up your site can take a while, especially for large projects or slow connections. It often takes longer than using an automated service.
Step-by-Step Guide: Migrate Your Website Using a Plugin
If you want to handle the move yourself, you can use a migration plugin like Duplicator.
Duplicator creates an exact copy of your website and restores it on your new server. This works whether or not your new host offers a WordPress migration service.
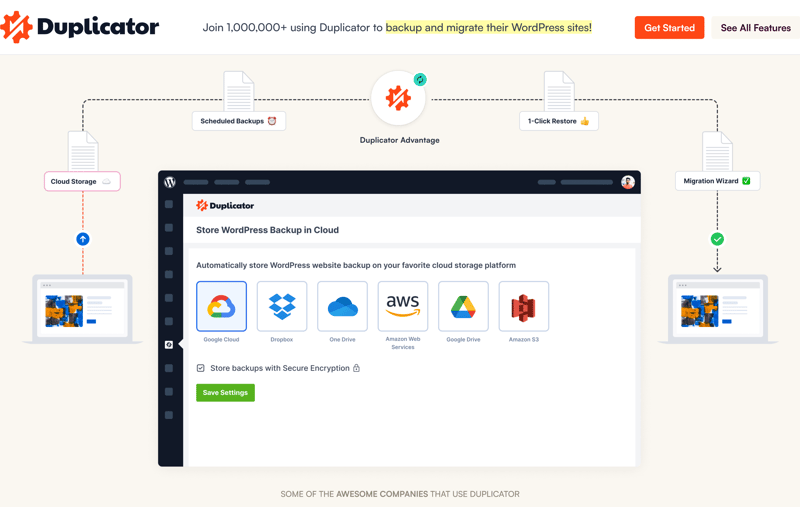
The WordPress plugin Duplicator.
Duplicator creates a .zip archive with all your website data, including the database, themes, plugins, and media files. It also generates an installer file that helps you unpack and set up the archive on your new server.
Export your website with Duplicator
Install the Duplicator plugin on your current WordPress site. You'll find it in the plugin directory in your admin area under Plugins → Add New:
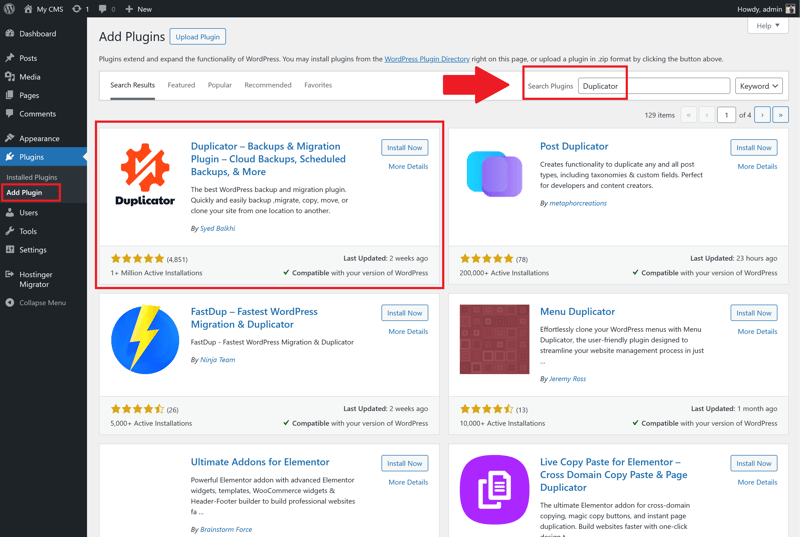
Duplicator in the plugin directory.
Activate the plugin, then go to the sidebar and select “Duplicator” → “Backups.” On the right, click “Create New”.
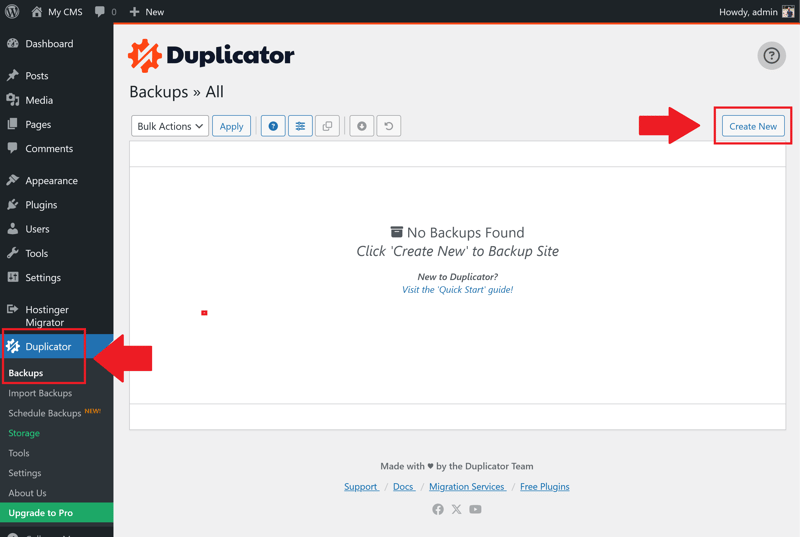
Duplicator’s start screen.
Now choose which components to back up. By default, all the essentials are already selected:
- 1.
all WordPress files (including core, themes, plugins, and uploads)
- 2.
the MySQL database
- 3.
an installer file to restore your site on the new server
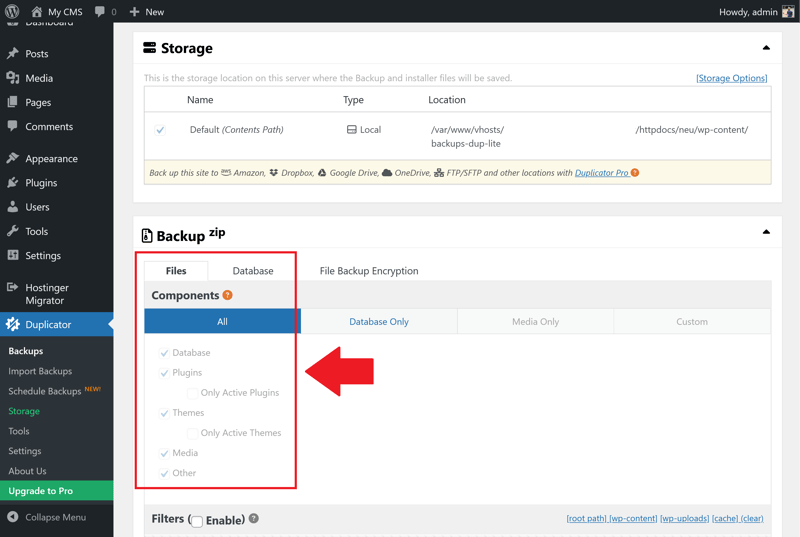
All components are selected for backup by default.
Click “Next” to run an automatic server scan. If the scan succeeds, click “Build” to create a copy of your website.
Once the package is ready, download these two files:
- 1.
a .zip file containing all your site’s content
- 2.
the installer.php file from the Duplicator plugin, which unpacks and installs the archive later
Duplicator lets you download both files with a single click:
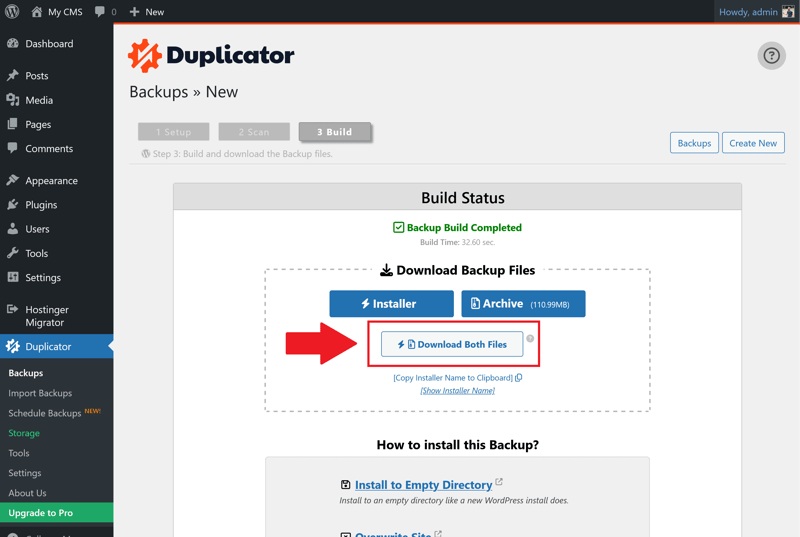
Your backup is ready to download.
Duplicator has created a copy of your site, and you've downloaded it. Now you just need to set it up on the new server.
Import your website with Duplicator
To import your website, you'll need FTP access to your new hosting provider. At Hostinger, you'll find these credentials under “Plan Details” in the “Hosting Plan” section.
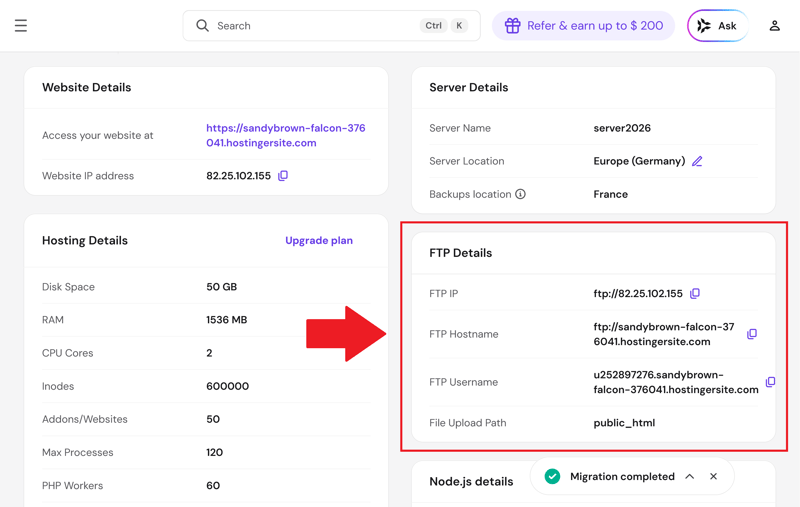
FTP credentials at Hostinger.
Use these credentials and an FTP client like FileZilla to connect to your new server. Then upload the two Duplicator files you downloaded earlier to an empty target directory.
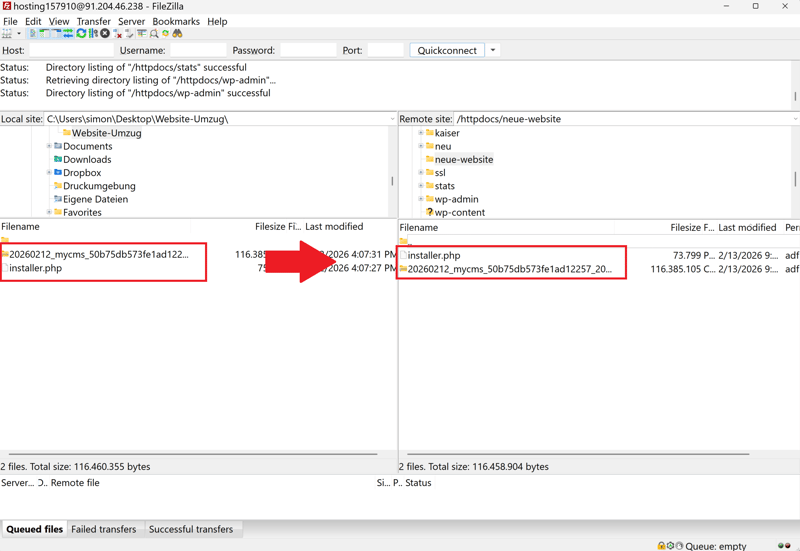
Upload the website copy to the new target directory.
The upload may take a few minutes. Once it's done, open your new website in a browser and add /installer.php to the URL to launch the Duplicator setup:
Enter the database credentials Duplicator should use for your new WordPress site. If you haven't set up the database yet, do that now in your new host's control panel.
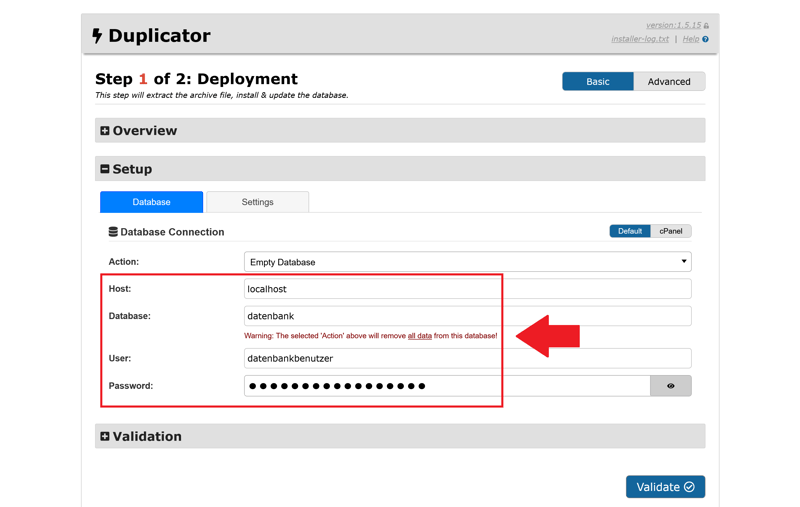
Database access details in Duplicator.
You’ll need:
- 1.
Database host (usually localhost)
- 2.
Database name
- 3.
Database username
- 4.
Database password
Warning: Duplicator overwrites all content in the selected database during import. Make sure you use an empty database.
Now Duplicator runs the import. It unpacks the .zip archive, copies the files to the directory, and imports the database. This may take a few minutes.
Once the import is complete, log in to your new site’s WordPress admin area with your existing credentials. Duplicator will prompt you to remove the installer files you no longer need:
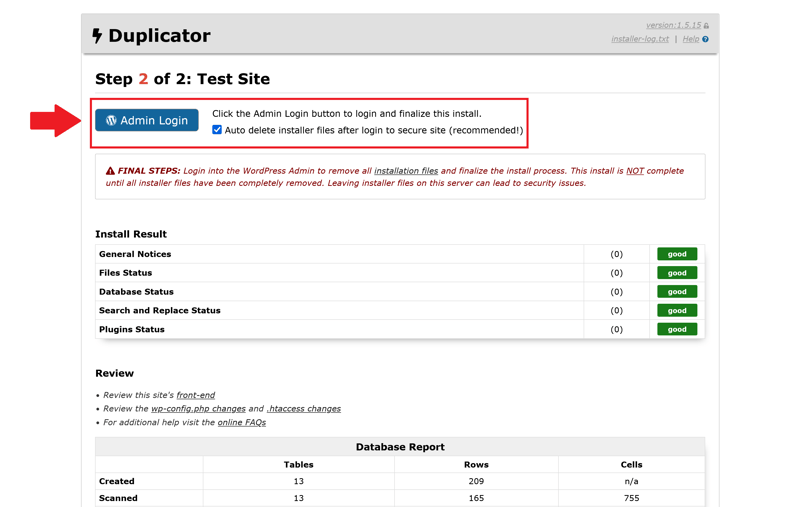
The import is complete.
The WordPress dashboard shows a summary of the import. Your migration with Duplicator is now finished:
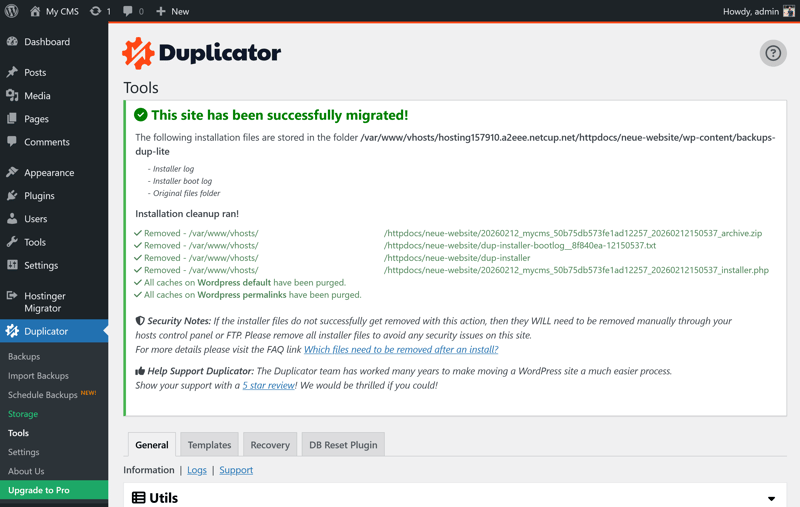
The website migration is complete.
After checking your new site, update your domain’s DNS settings so it points to the new server. To do this, change the A records with your domain provider. We’ve already explained how to do this above.
Your website has been successfully moved. All content is now live on the new hosting, and your domain correctly points to the new server.
WordPress Migration: 2 Options to Consider
To move your WordPress website, you have two main options: let your new hosting provider handle the migration or do it yourself with a plugin.
A hosting provider’s migration service is a good choice if you want to save time. It's automated, needs minimal input, and handles most standard setups reliably. Nearly all hosting companies offer this service today.
If you need more control, go with a manual migration using a plugin like Duplicator. You'll need some technical know-how and should allow extra time for preparation.
Both methods work. The key is to test your site thoroughly afterward so everything runs smoothly and your visitors can access your website without any issues.