How to Back Up WordPress: 5 Easy Backup-Methods

You've invested too much work in your WordPress website to risk losing everything. That's why regular backups are essential: They allow you to restore your site to a previous state and fix issues quickly.
In this article, you'll learn about different ways to back up your WordPress site. We'll also show you how to restore your data step by step in case of errors or data loss.


How to Create a WordPress Backup: 5 Easy Methods
There are several ways to back up your WordPress site. In addition to manual backups via FTP and phpMyAdmin, you can use dedicated plugins or backup solutions from your hosting provider. Another option is fully automated backups via a third-party service.
The best method for you depends on your specific needs. We've created a detailed guide for each option, including its pros and cons.
Backup Through Your Web Host
Most web hosts offer manual or automatic backup options. Specialized WordPress hosts typically create a full backup once a day, although these are often only stored for a limited time.
The exact steps vary from provider to provider, but the general process is similar. Below, we’ll show how it works using Hostinger as an example:
Step 1: Open the Backups Menu
In your web host's dashboard, navigate to the "Backups" section.
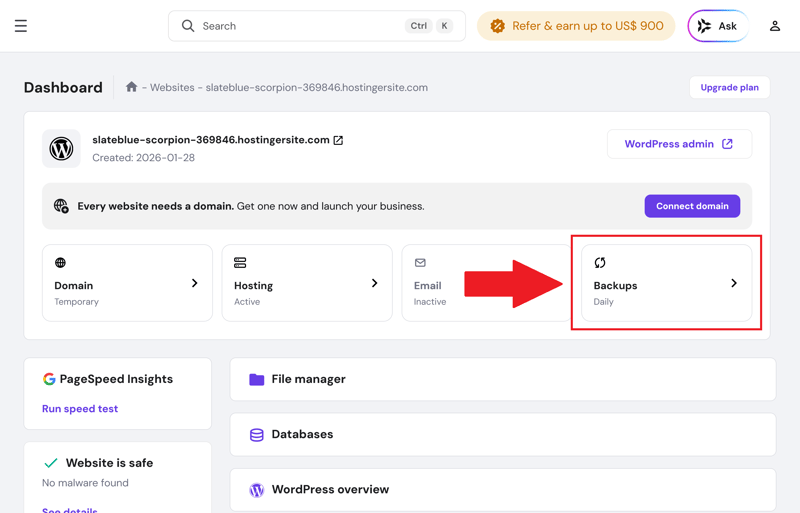
Dashboard with backup menu in Hostinger.
Step 2: Create a Backup
Hostinger lets you create a manual backup every 24 hours. Daily automatic backups are also available.
Select "Manual backups" from the menu. The system will then create a backup of your files and database.
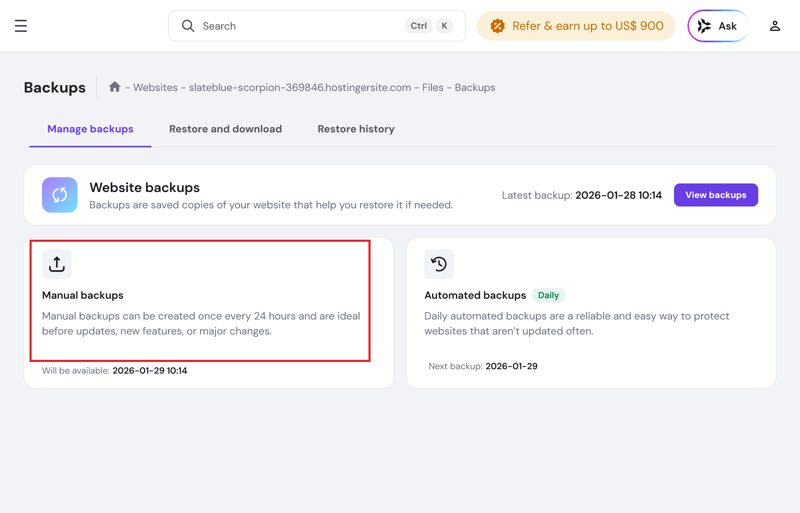
Manual and automatic backups in Hostinger.
Once the backup is complete, it will appear in the list along with the creation date and included data:
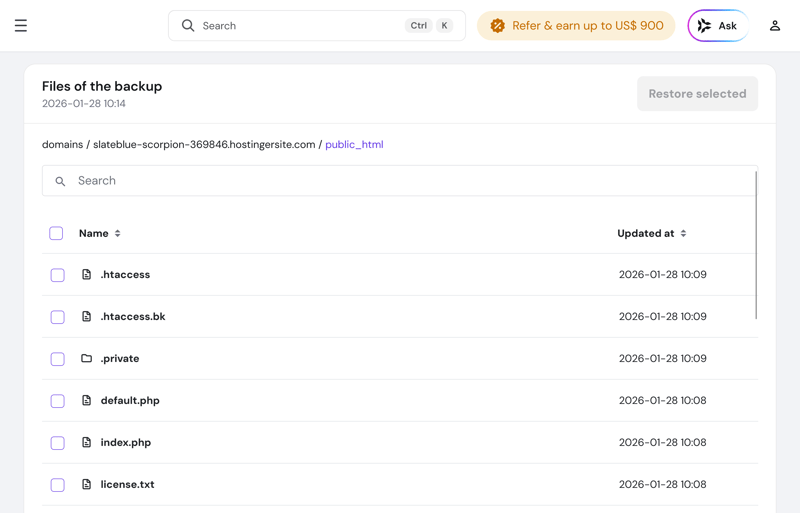
Contents of a WordPress backup in Hostinger.
Don't rely solely on your web host's backups. They are often stored on the same server as your WordPress site. Always download a copy or store it externally, for example in the cloud.
Pros and Cons of Host-Based Backups
Automatic backups
Many hosts create daily backups automatically without any action on your part. However, some charge extra for this feature.Central management via hosting panel
Backups can usually be managed through your hosting dashboard and restored in just a few clicks.Technical safeguards from the provider
Many hosts offer professional backup infrastructure with redundancy and safeguards against data loss.
Dependency on the provider
You're relying on the host's reliability and support.Limited control and flexibility
In some cases, you can’t freely choose the timing, scope, or exact storage location of your backups
For Advanced Users: Create a Manual WordPress Backup
Backing up your files alone isn’t enough. To create a complete backup, you also need to export the database. It stores your site structure, global settings, links, as well as plugin and theme data. You can use the phpMyAdmin tool provided by your hosting provider to export the database.
Step 1: Connect to the Server via FTP Client
Open your FTP client and enter your login credentials (server, username, port, and password). You'll find these in your web host's customer area, usually under "FTP."
Once you've entered the details, connect to the server where your WordPress installation is hosted:
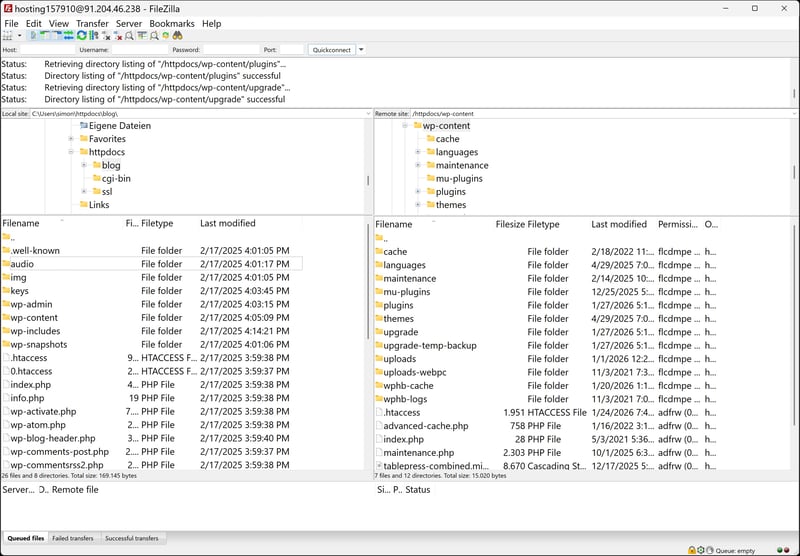
Use your login credentials to connect to the server via FTP.
Step 2: Back Up Your Files
Once connected, you'll see all your WordPress files on the right side of the FTP client. Simply drag and drop them into a folder on the left side to save them to your local machine.
Depending on the size of your site, this process may take some time.
The most important files are:
Your own data (uploads, plugins, and themes). These are located in the wp-content folder.
Database credentials, security settings, and other configuration data stored in the wp-config.php file.
Custom settings and server directives in the .htaccess file in the root directory of your installation.
The other folders and files only contain standard WordPress core files and don’t necessarily need to be included in every backup. That said, for your first full backup, it’s a good idea to back up everything once.
Step 3: Log In to phpMyAdmin
To back up the database, open phpMyAdmin and log in with your username and password. You can find these either in the "Database Management" section of your hosting provider or in the wp-config.php file.
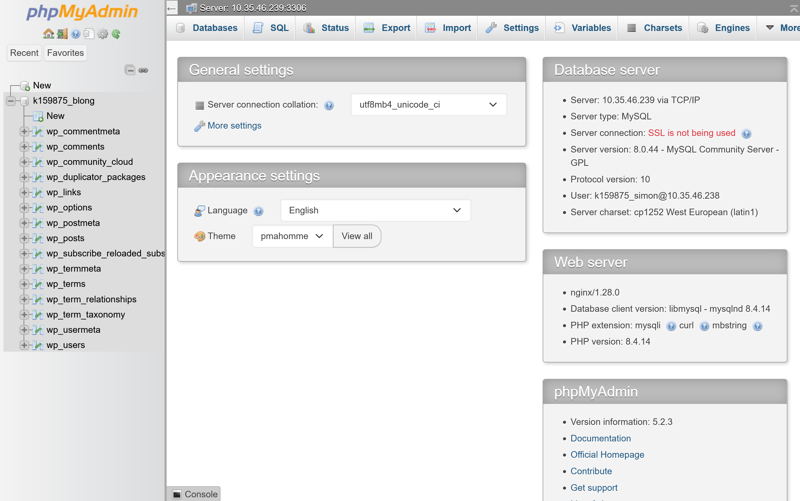
The phpMyAdmin home screen.
After logging in, select the database you want to back up from the left-hand panel:
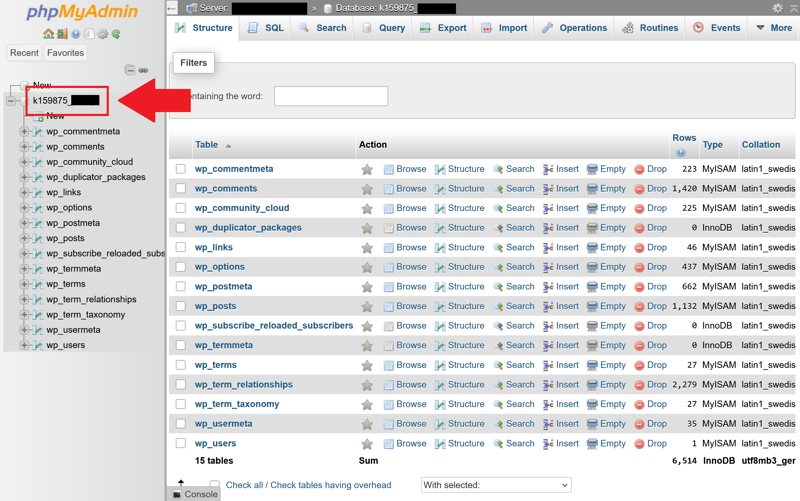
After clicking on the database, you'll see its structure.
Step 4: Back Up the Database
To back up the database, click the "Export" tab at the top. Select SQL as the format and choose the quick export method to export all entries.
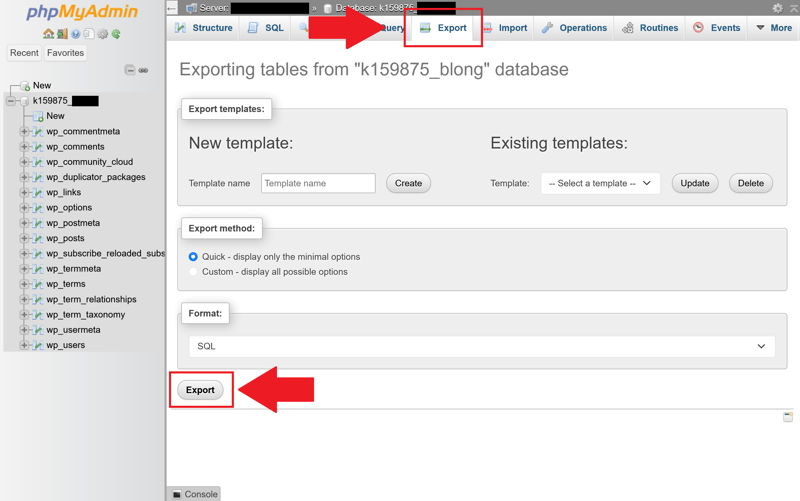
Click "Export" to download the database.
Together with the database, the downloaded files form a complete WordPress backup.
Pros and Cons of Manual Backups
Full control over the backup process
You decide exactly which files and database tables to back up and when the backup runs.No dependency on plugins
You don't need any third-party WordPress plugins. They can become outdated, introduce security vulnerabilities, or come with additional costs.Direct access to files and database
You have direct access to all WordPress files and database tables, and you can use the backup data however you need.
More time-consuming and error-prone
The manual process requires technical knowledge and comes with a higher risk of human error.No automated scheduling
You have to remember to create backups manually. There's no way to automate them.Restoring is more complicated
The restore process is also manual, which increases the risk of errors.
The Easier Way: Backup With a Plugin
If you want to skip the manual effort or don’t feel comfortable doing it yourself, you can install a WordPress backup plugin instead. There are many free and paid plugins you can add to your WordPress installation.
One of the most widely used WordPress backup plugins is UpdraftPlus. Even the free version offers a solid set of features.
Step 1: Install and Activate the Plugin
Choose a backup plugin in your WordPress dashboard, then install and activate it. For this guide, we're using UpdraftPlus.
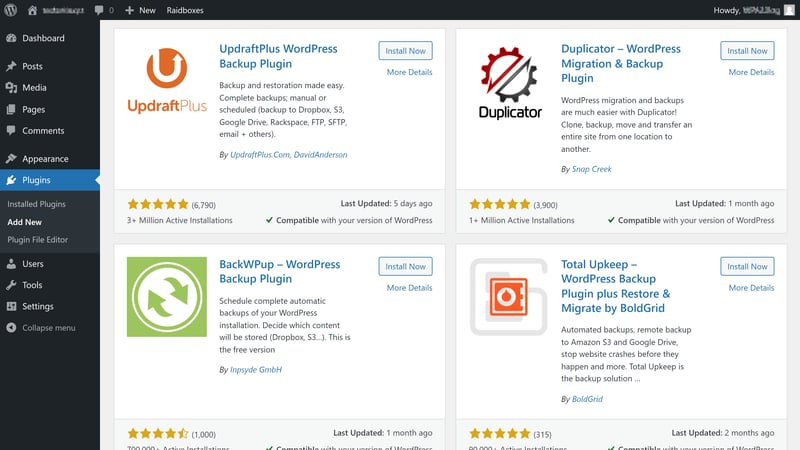
The UpdraftPlus backup plugin in the WordPress plugin overview.
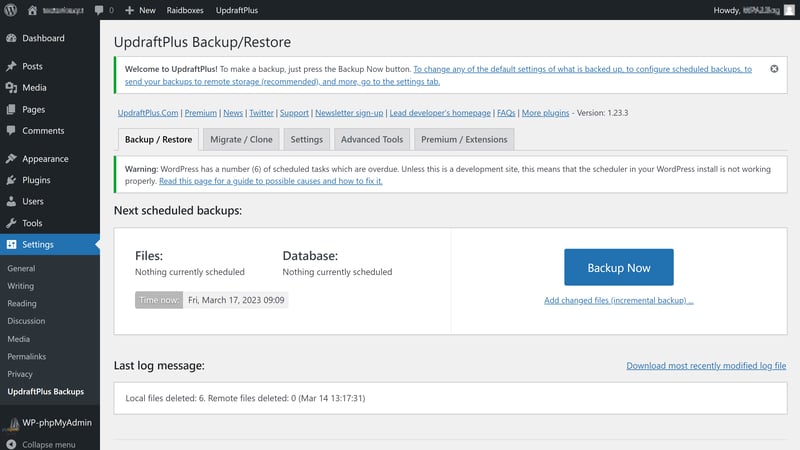
In the plugin settings, you’ll find the "Backup / Restore" section. From there, you can start a backup immediately.
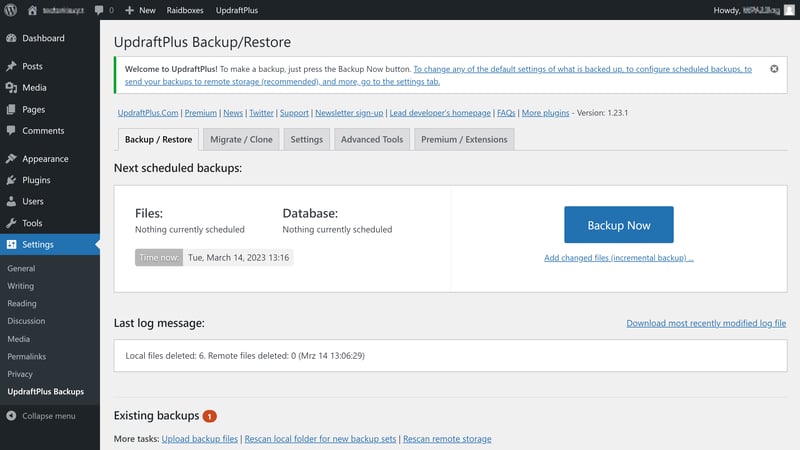
Start a new backup.
Step 2: Create a New Backup
Select both files and the database to create a complete WordPress backup.
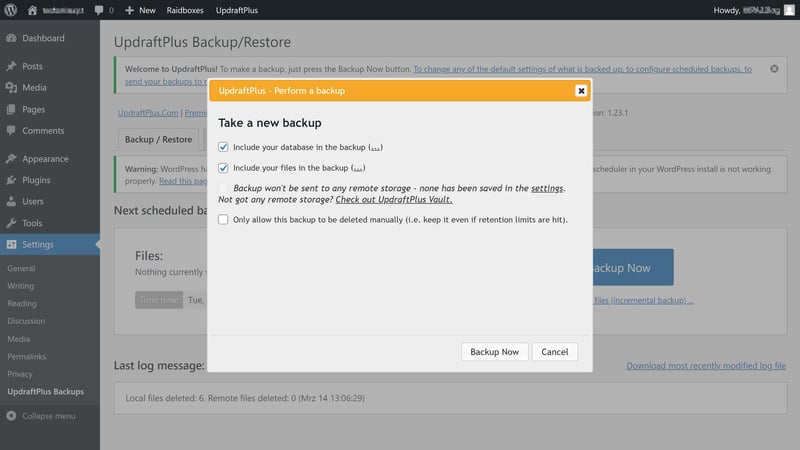
UpdraftPlus starts the backup process.
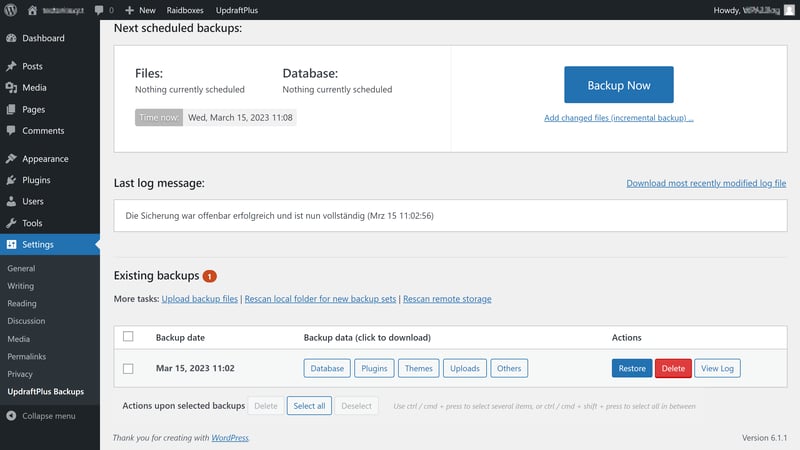
Depending on the size of your WordPress installation, the backup may take some time. Once the backup is complete, you’ll see the following message:
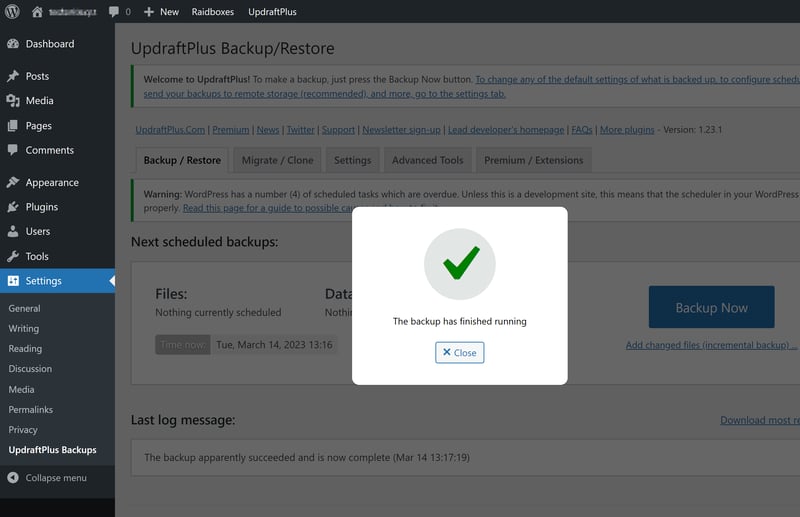
The data backup was successful.
The backup you just created will appear in the plugin along with the backup date:

The backup with its creation date shown as an existing backup.
Step 3: Download Your Backup
By default, backups are stored in your web space, meaning on the same server as your WordPress site. If the server goes down, those backups will also be inaccessible.
That’s why you should also download the backup and store it locally on your computer. To do this, click the “Download to your computer” button:
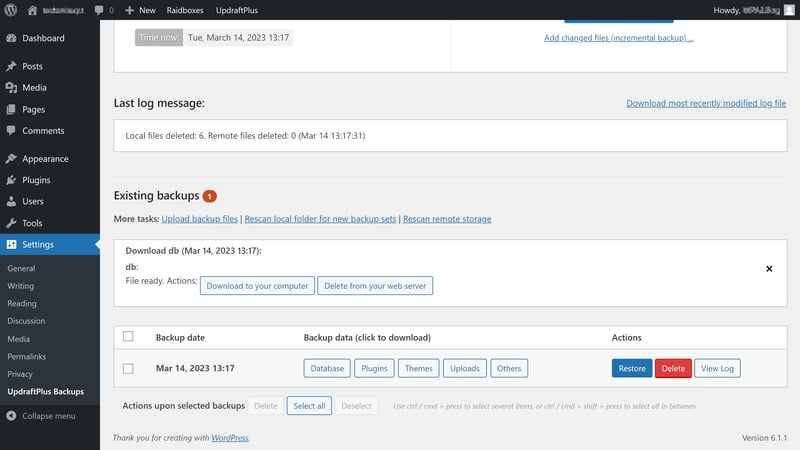
Save copies of your files to your local hard drive as well.
The plugin also offers additional features, such as automated backup schedules with custom intervals and automatic backups to cloud storage service like Dropbox or Google Drive.
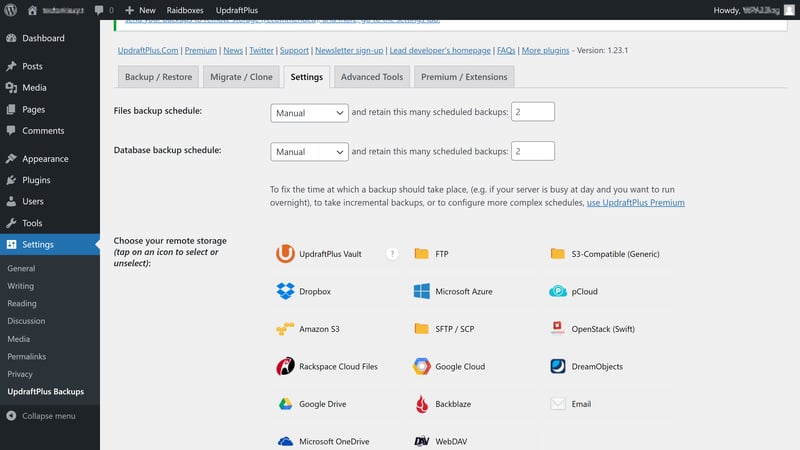
Backup schedules run backups automatically at intervals you choose.
Paid versions often include additional features, such as backups to multiple storage locations or incremental backups.
Plugins are particularly well suited for creating incremental backups. An incremental backup only saves data that has changed since the last backup or was newly added.
Depending on the size of your website, this reduces both the required storage space and the time needed to complete the backup.
Pros and Cons of WordPress Backups via Plugin
Automated backups
Many plugins let you schedule backups that run automatically without manual effort.Easy to use with no technical knowledge
You can create backups in just a few clicks, even without knowledge of FTP or databases.Built-in restore features
Many plugins include a restore option that lets you recover backups directly from the WordPress dashboard.
Dependency on the plugin developer
Functionality and compatibility depend on the plugin’s updates and ongoing support.Full features often require a paid version
Many backup plugins lock important features like cloud storage or restore options behind a paywall.Increased security risk from plugins
Every additional plugin increases your attack surface, especially if it is not regularly maintained or has known vulnerabilities.
Use a Backup Service Provider
Backup services like BlogVault or VaultPress Backup (formerly VaultPress) go beyond standard WordPress plugins. They offer additional features and often support real-time backups.
Backups are encrypted and stored in external cloud storage. Depending on your plan, they are stored permanently or for an extended period.
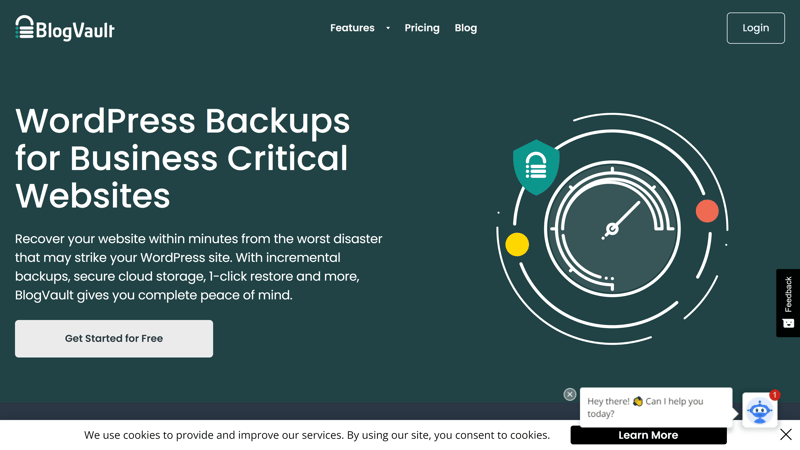
BlogVault is one of the most popular backup services for WordPress.
Most of these services let you restore backups with a single click. You also get access to professional support that can help you quickly if something goes wrong.
Due to their relatively high cost compared to regular plugins, backup services are not the right fit for everyone and are not strictly necessary.
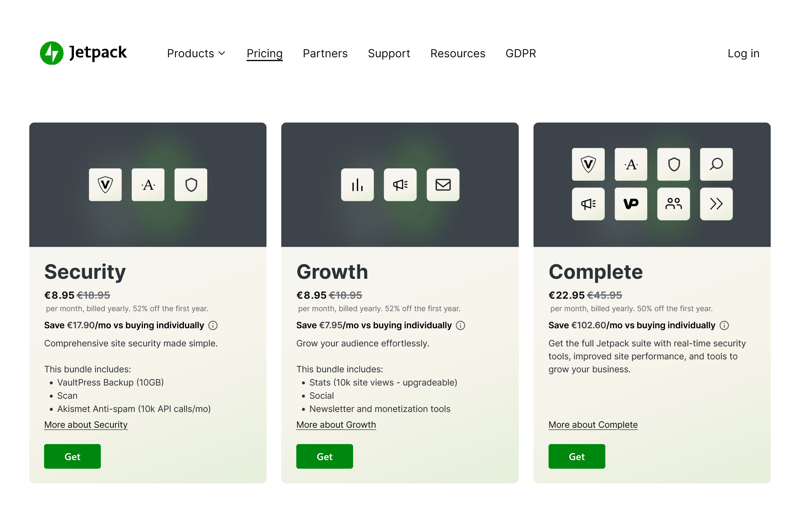
Jetpack VaultPress Backup is another popular backup service.
If you’ve invested a lot of time in your WordPress website or run a business site, an external backup service can still be worth the investment.
Pros and Cons of Backup Services
Real-time backups with off-site storage
Backups are created automatically and stored on external cloud servers.All-in-one solution with extra features
Many services also offer features such as malware scans, automatic restoration, staging, or migration tools.
Paid subscription model
Reliable backup services typically require a paid subscription.Dependency on the provider and its availability
Access and functionality depend entirely on the service provider.If there’s an outage or you cancel your plan, access to your backups may not always be guaranteed.
Backing Up Specific WordPress Components
You can also back up individual components of your WordPress installation. For example, if you’re tweaking your site’s design and testing different themes, there’s often no need to create a full backup.
Many plugins let you choose exactly which components to include in the backup. This saves time and reduces storage requirements. Below, we’ll show you how it works using UpdraftPlus as an example.
Step 1: Create a New Backup
In your WordPress dashboard, go to the “Backup / Restore” section and start a new backup.
Click “Backup Now” as usual to open the selection menu.
Step 2: Select Components
Open the advanced options and select the components you want to include in the backup. In this example, we’re creating a backup of the theme:
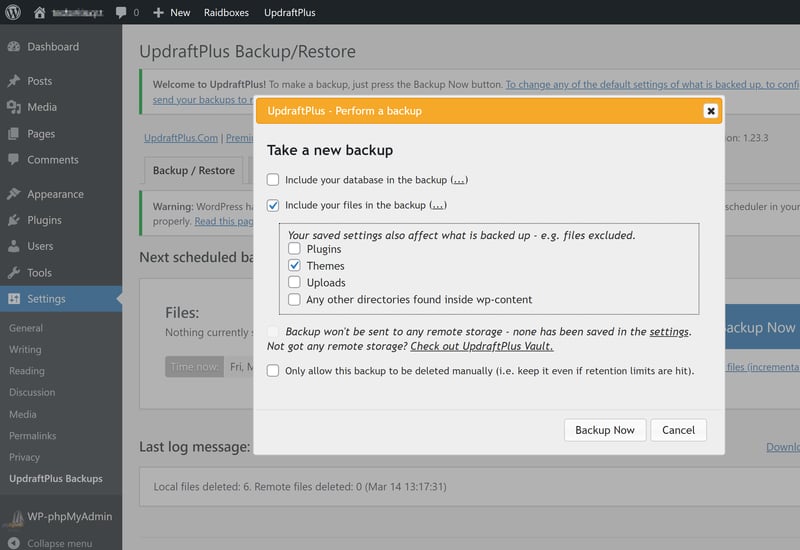
After selecting the components, start the backup process.
Once the backup is complete, the component copy will appear under your existing backups:
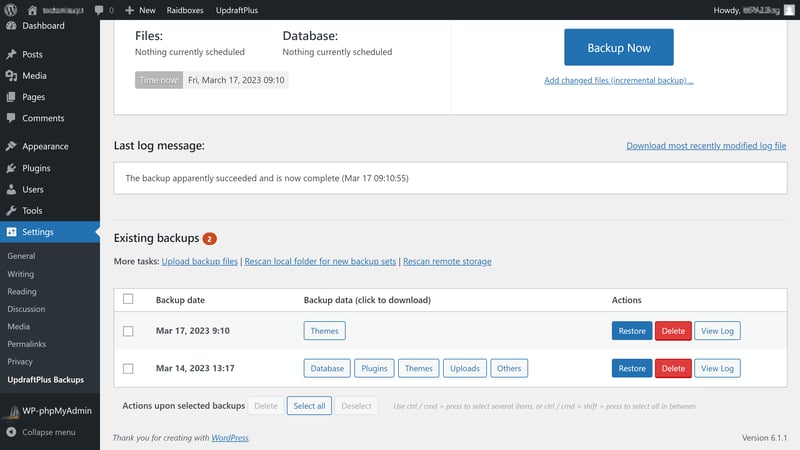
As expected, only the theme files from the WordPress installation were backed up.
Pros and Cons of Partial Backups
Requires less storage space
When you only back up selected components such as the database, themes, or uploads, the backup file is much smaller.Faster to complete
Partial backups finish much faster, especially for large media libraries or complex installations.Flexible use based on your needs
Individual components can be backed up or restored separately, for example after theme updates or database issues.
More complex restoration process
Partial backups require more careful coordination when restoring individual components.No protection against total failures
If your entire hosting environment is deleted or compromised, a partial backup won’t be sufficient to fully restore your site.
How Do You Restore a WordPress Backup?
Now you know how to create a WordPress backup. But even the best backup is useless if you can’t restore it when you need it.
Even if there’s no urgent need right now, you should test the restore process at least once. That way, you’ll know everything works as expected when it really matters.
Restore a Manual Backup
Restoring a manual backup is essentially the reverse of creating one: first, you upload the files, then you import the database.
Step 1: Connect to Your Server via FTP Client
Open your FTP client and connect to your server. Then drag and drop the backed-up WordPress files from your backup folder onto the server. Replace any missing or corrupted files.
Connected to your server via FTP client.
Step 2: Import the Database
Open phpMyAdmin and log in. Select the "Import" tab and upload your saved database file in .sql format:
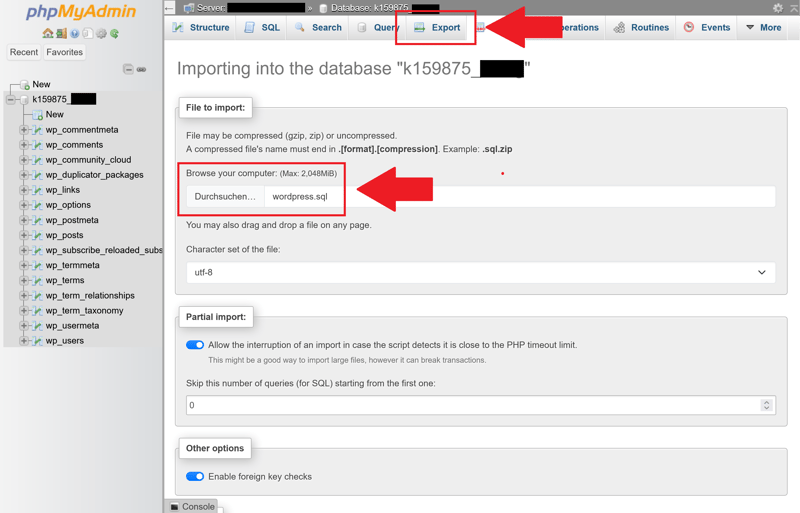
The database import screen in phpMyAdmin.
Once the import is complete, the database will be restored on your server.
Restore a Plugin Backup
Restoring a backup using a plugin is even easier:
Step 1: Open Your Existing Backups
Open your backup plugin's settings and go to the "Backup/Restore" section.
Here you can see your existing backups and the available actions.
Step 2: Select Components
Click "Restore" and select the components you want to restore:
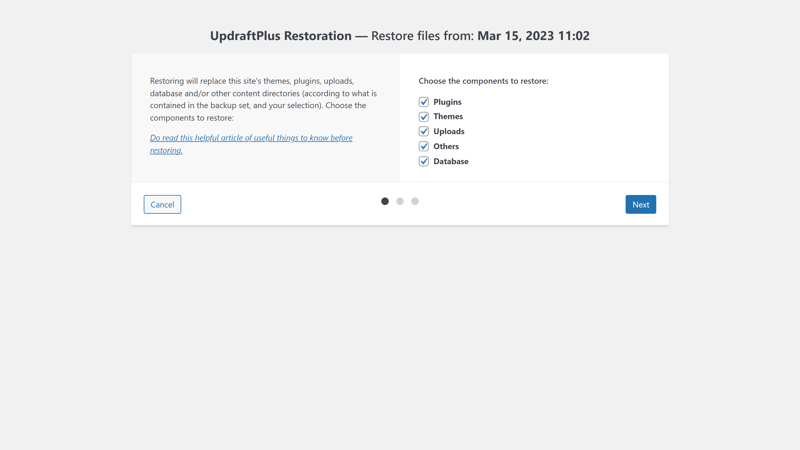
For a full restore, check all the boxes.
Step 3: Start the Restore Process
Click "Next" to start the restore process. Once it’s finished, a confirmation message will let you know the restore was successful.
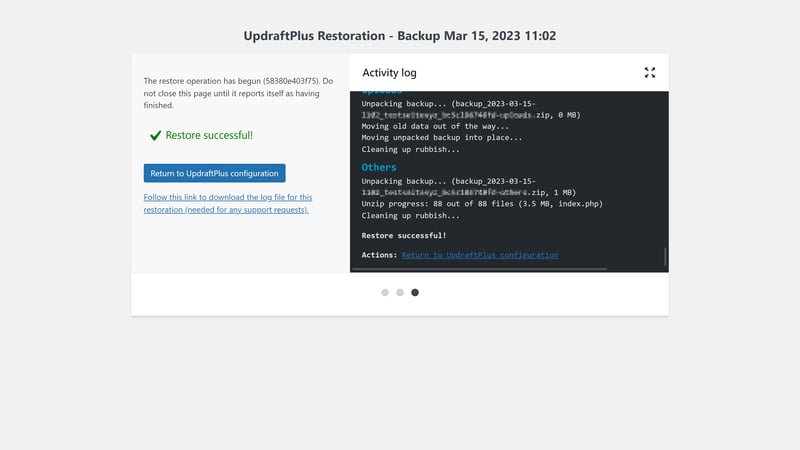
The restore was successful.
Restoring a Web Host Backup
Backups from your web host can usually be restored just as quickly. Simply go to the backup section, select the backup you want, and start the restore process. Here's what it looks like with Hostinger:
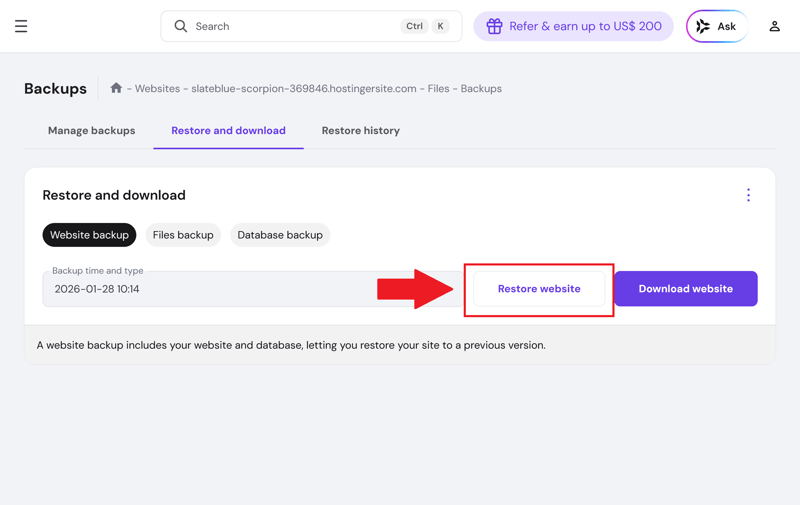
Available backups and restore options.
After a confirmation prompt—usually warning that any changes made after the backup will be overwritten—you can start the restore.
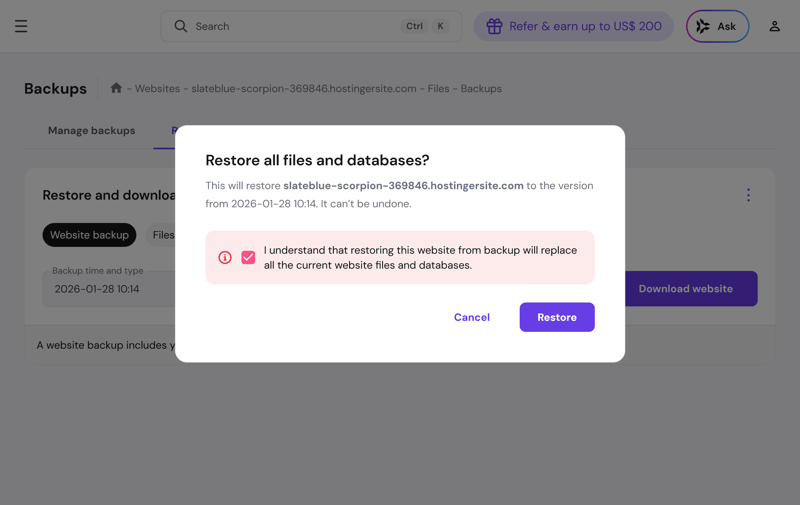
To prevent accidental overwrites, you’ll need to confirm the restore once more.
What to Keep in Mind With WordPress Backups
To make sure your WordPress backups work when you need them, there are a few key things to keep in mind.
To avoid wasting storage space, it’s a good idea to clean up your WordPress installation regularly. Remove unused plugins and inactive themes before creating a backup.
Also make sure your backups meet the following criteria:
- 1.
Organization
Use clear naming conventions such as "WP-ProjectX_BackupY_DateZ" so you can easily keep track of your backups. - 2.
Completeness
Make sure your backups are complete. Only a full copy of your website allows you to fully restore it after data loss. - 3.
Regularity
Create backups at regular intervals based on your needs.
When and How Often Should You Back Up?
The most important thing is to always have at least one up-to-date and complete backup of your WordPress website. As a general rule, you should create a backup before and after updating WordPress, plugins, or themes.
How often you should back up your site depends on how frequently you make changes. It also depends on whether you run your WordPress site for personal or business purposes.
A good rule of thumb: The more often you update your site, add new content, or make changes, the more frequently you should back it up
What About Data Privacy?
The GDPR does not specifically address how backups should be handled. However, several requirements can be derived from it. If you collect or process personal data from your site visitors, that data will also be included in your backups.
Make sure your backups are stored securely and protected from unauthorized access. If you store backups locally or on external drives, you are responsible for securing them.
Things are different if you store your backups with a cloud provider like Dropbox or use a third-party service to manage them. In that case, it’s a good idea to have a data processing agreement (DPA) in place. This ensures the provider meets and follows all relevant data privacy requirements.
Beyond the points already covered, here are a few more proven best practices for WordPress backups:
Keep at least three copies of your backups in different locations—for example, on your local computer, in cloud storage, and on an external drive. That way, you can still restore a working backup even if one or two copies are lost.
Keep older backups as well. Problems don’t always show up right away and can go unnoticed. If you only rely on your most recent backup, there’s a chance the issue has already been included in that copy.
Protect your backups with a password. This adds an extra layer of security against unauthorized access and helps prevent accidental deletion.
Conclusion: Finding the Right Backup Strategy for Your WordPress Website
Regular backups are essential to maintain the long-term security of your WordPress website over the long term. If you experience data loss or technical issues, you’ll be able to restore your site quickly.
The best backup solution depends on your preferences, your requirements, and the type of website you run.
A manual backup works well for small, personal websites that don’t change often. For larger projects, you should use automated backups via a plugin or your web host’s built-in backup tools. If you run a business website or a more complex project, a professional backup service from a third-party provider may be worth considering.
Frequently Asked Questions
There are several ways to create a WordPress backup. You can back up your website manually, use a dedicated plugin, or use your web host’s backup features. You can also use an external backup service that handles the process automatically.
There are many plugins that make WordPress backups easy. Free options like UpdraftPlus work well for most small to mid-sized projects. For larger websites or more complex requirements, a paid plugin with advanced features may be worth the investment.
A WordPress backup can be completely free if you do it manually or use a free plugin. Paid plugins typically start at around $70 per year, depending on the included features. Professional backup services and third-party providers can cost significantly more, depending on the plan.
At a minimum, you should create a backup whenever you install updates or make important changes. Beyond that, it’s a good idea to set up a regular backup schedule that fits your needs. Rule of thumb: the more frequently you add or change content, the more often you should create backups.