The great thing about WordPress is that you can create any kind of website with it. Programming and design skills are certainly a plus, but not required. Still, getting started with WordPress can be tricky for beginners. But don't worry, we're here to help.
In this guide, we'll walk you through the process of creating your first WordPress website in eight, easy steps. Along the way, we'll let you know what you need and the kind of costs that you can expect.


Your Own WordPress Website in 8 Steps
There are many ways to create a fully functional WordPress website. The content management system's flexibility is one of its biggest strengths, but, it also makes the tool challenging for beginners and newcomers. Unlike more straightforward solutions that automate site creation, like website builders, WordPress requires significantly more initiative.
With that said, beginners shouldn't be afraid of WordPress. All that's needed is a bit of patience. Before we start with our detailed guide, here are a few things to keep in mind:
WordPress is open-source and free to use.
To publish your WordPress website online, you'll need web space and a domain. Both can be purchased from a hosting provider.
There are plenty of hosting options. Managed WordPress hosting is by far the easiest option for beginners, and so, we used it in this guide.

We'll start our guide exactly where you should begin your WordPress journey: Selecting the right hosting service.
Choose a WordPress Host
Solid and reliable web hosting is the foundation of a good website. This isn't just about renting storage (or web space) on a server for your website's data and content. Instead, think of web hosting as the virtual plot of land that your website is built on.
There are several different kinds of hosting:
Self-hosted: It's possible to manage a server and all of the accompanying hardware and infrastructure on your own. This offers considerable flexibility but is also the most labor-intensive option.
Shared hosting: With this, multiple websites are hosted on the same server. Resources (like bandwidth and storage space) are jointly used by all of the hosted websites.
Dedicated hosting: Unlike shared hosting, this option provides every customer with their own physical server. This guarantees optimum performance and security for your website, as well as maximum control.
VPS hosting: Virtual private server (VPS) hosting is a mix of shared and dedicated hosting: Multiple customers share the same physical server but have their own isolated virtual server on it. In this way, every customer receives a certain amount of dedicated resources.
Managed hosting: Managed hosting includes server space, as well as site management and administration. Security and performance are optimized automatically by the host, and they also handle updates for you.
WordPress websites can take advantage of specialized managed WordPress hosts that focus entirely on the needs of sites created with the CMS. Since you won't have to worry about your site's technical setup and management, they're a great choice for beginners.
We tested 9 managed WordPress hosts to help you find the best option for your needs. Here's our favorite:
SiteGround: EXPERTE.com's Winner

SiteGround is a hosting provider from Bulgaria that provides web space to 2.8 million domains. The company offers a wide range of services, including classic web hosting, cloud and reseller hosting, as well as managed WordPress hosting.
SiteGround took the top spot in EXPERTE.com's review of managed WordPress hosts.
SiteGround scored high in all of the areas we examined while offering excellent value for money, guaranteeing it a top spot in our ranking. Thanks to its fast loading times, the provider also did extremely well in our performance test.
Find & Register a Domain
Web hosting is important, but only one of the requirements for getting a website online. For visitors to be able to find your website, you'll also need a domain, or unique name and Internet address.
Depending on which provider you select, you'll have two options at this stage: Either the domain is included in your hosting subscription or you'll need to purchase one separately. Whatever the case, neither of the two options is complicated.
Option 1: Your Hosting Subscription Includes a Domain
Many hosts, like SiteGround and Hostinger, give subscribers a free domain for the first year of their contracts. You'll typically register your domain when setting up your account.
With others, you'll "purchase" the domain. First, confirm that your preferred domain is available by using the integrated search tool. After that, add it to your shopping cart, and "check out" to secure the domain and begin your hosting subscription.
Option 2: Domain Is Not Included in Your Hosting Subscription
Perhaps the host you've selected doesn't give subscribers a domain for the first year of their contracts. That's fine: Domains are very affordable and registration only takes a few minutes. The average cost of a .com domain is around $15 per year.
To register your domain, head over to your host's user area and look for a domain option in the menu.
In case the domain that you want is already taken, you still have some options. Similarly, if you'd like to sell or migrate an existing domain that you own, be sure to check out our comprehensive guide to find out how:

Install and Set Up WordPress
After you've secured hosting and a domain, you can start to build your WordPress website. The first thing you'll need for this is WordPress software, which as we mentioned above, is free and open-source. Once you've downloaded it, you'll need to install it on your host's server.
With managed WordPress hosts, the process is even simpler. Although it's often referred to as a "one-click" installation, you'll need a few more mouse movements than that. Whatever the case, you should have WordPress installed in a matter of minutes.
Step 1: Install WordPress
How exactly you install WordPress varies slightly from host to host. Most walk new users through the process to ensure that everything goes smoothly.
With Kinsta for example, you'll start the installation process by clicking on the "Add site" button and then selecting "Install WordPress". After that, just follow the instructions. After specifying your site name, WordPress site title, admin username, password, and data center location, Kinsta handles the rest for you.
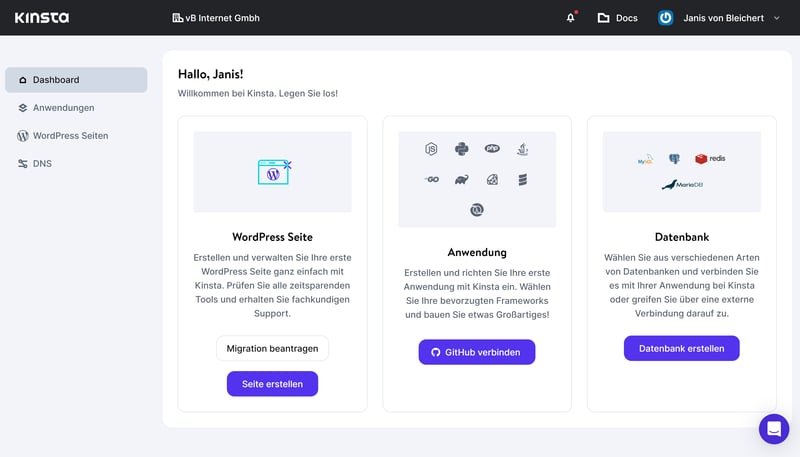
Installing WordPress is particularly easy with managed hosting services like Kinsta.
Step 2: Customize Basic Settings
As soon as you've installed WordPress, you can start designing your website. However, before jumping in, we recommend heading to the admin dashboard's back end and checking a few basic settings and configuration options.
Some of the most important of these include:
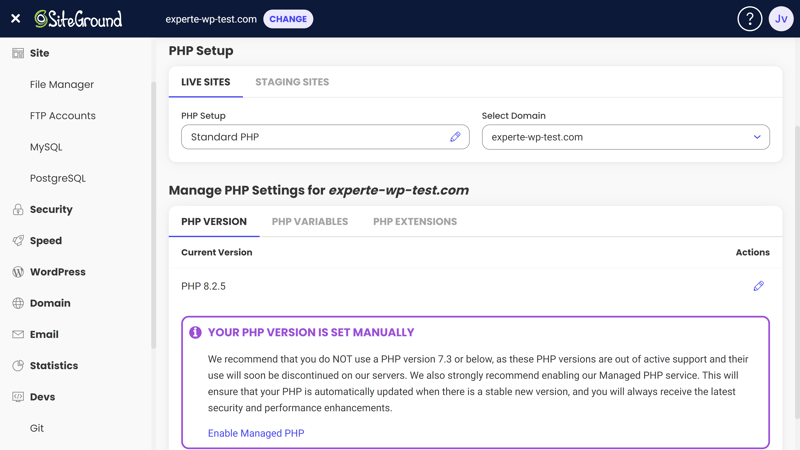
PHP version: PHP is the scripting language WordPress uses. It's frequently updated to optimize the performance and security of WordPress websites. You can check which PHP version your website is using, and change it to a more recent version in the PHP area of the dashboard's settings menu.
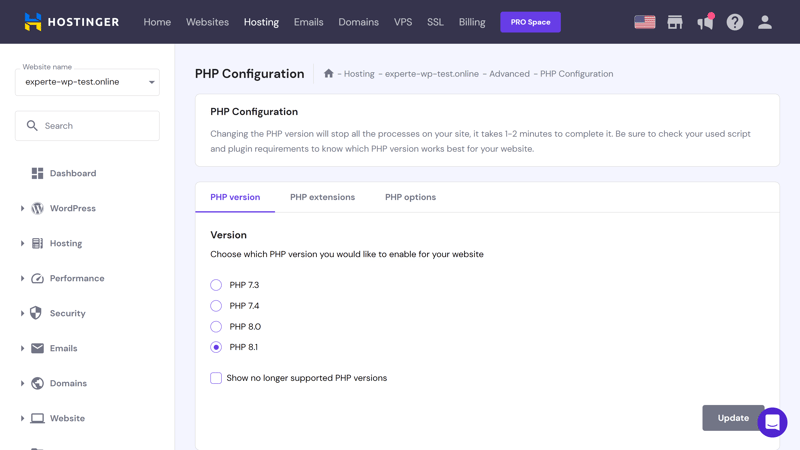
Most of the time, the latest PHP version is installed by default, however, it's a good idea to make sure by double-checking in the back end.
SSL certificate: An SSL certificate shows visitors that your website is trustworthy. In technical terms, it guarantees secure data transfers between your website's server and users who request it and ensures that it's available as an HTTPS website. Hosting services typically use free SSL certificates from Let's Encrypt, however, most of the time you'll need to activate these in the back end.
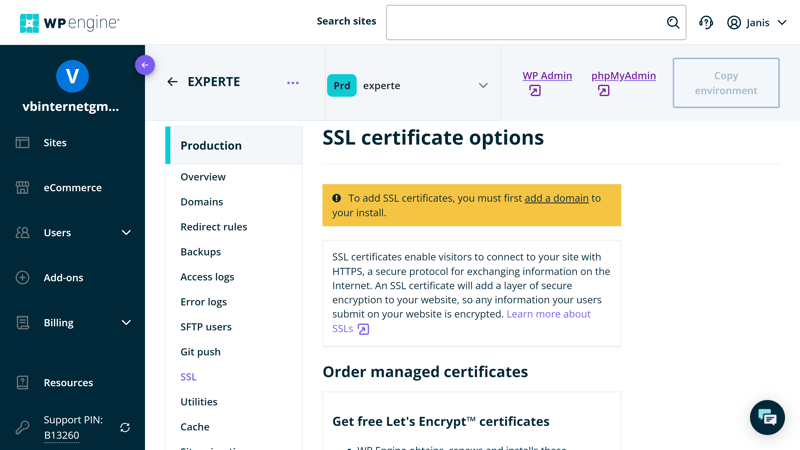
Head over to the SSL area of your host's dashboard and make sure that your website has a valid and active SSL certificate.
Domain settings: Take a look in the domains panel and make sure that your domain is correctly configured and linked to your WordPress installation.
Backups: Regular WordPress backups are your insurance policy against unexpected data loss. Right now, you don't have much to lose, but it's a great idea to make sure that your host will automatically back up your website before you invest time in designing it.
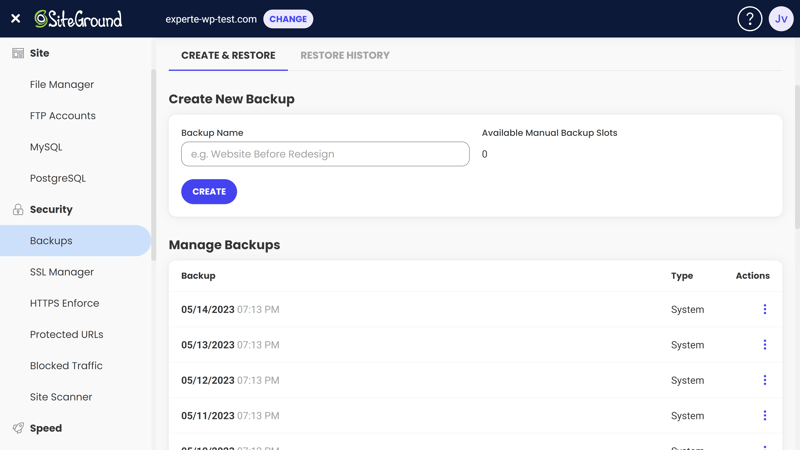
Make sure that your host automatically creates backups of your WordPress website.
Performance settings: Take a look at your hosting service's performance area. Double-check that server-side caching is activated since this will reduce the loading time for your site's visitors.
With most good hosting services, everything should be pre-configured for optimum usage right out of the box. In addition, if something is problematic, such as an outdated or missing SSL certificate, you'll likely be notified. Whatever the case, as a beginner, it's a good idea to familiarize yourself with your host's back-end settings and options.
Find & Install a Theme
Once you've adjusted the most important settings on the server side, you can finally start designing your WordPress website. A WordPress theme provides the blank canvas for this.
Think of a WordPress theme as a toolbox for designing your website. It includes ready-made layouts, elements, and design tools for customizing your WordPress website's look and appearance. Based on the theme you choose, you'll also specify your website's design, such as its color scheme, typography, and more.
The choice is huge: There are thousands of WordPress themes, many of which are free. However, there are plenty of premium options as well. Some themes are specifically designed for certain branches or types of business (such as online stores, restaurant websites, etc.), whereas others are more all-purpose.
Install a WordPress Theme
You can access thousands of themes without leaving the WordPress admin dashboard. Here's how to get started:
Step 1: Open your WordPress admin dashboard. Most hosts offer a direct link to your WordPress backend. Here's what it looks like in SiteGround:

Head over to your WordPress admin dashboard to install themes and edit your website.
Step 2: Go to Appearance > Themes to view themes that are already installed.
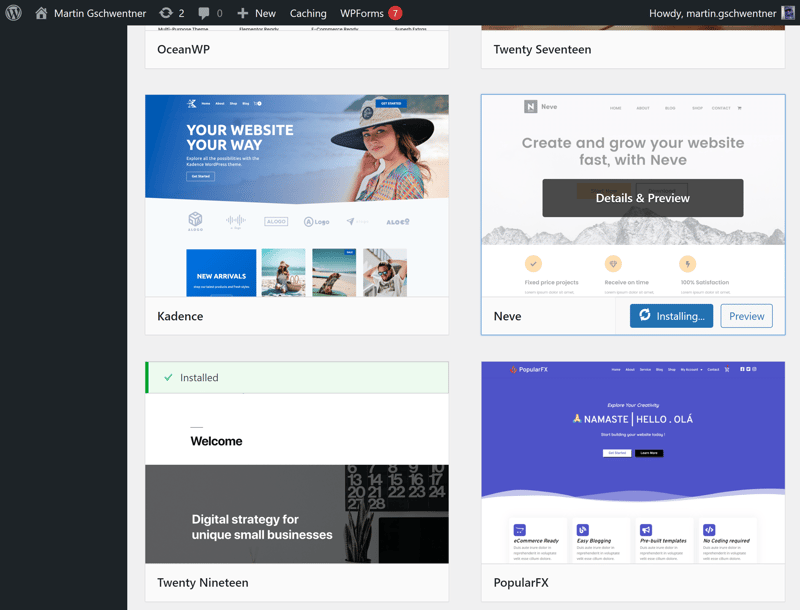
Step 3: Click on "Add New" to open the theme marketplace.

You can easily access thousands of themes in the WordPress admin dashboard.
Step 4: Now you can browse through the WordPress theme gallery and sort available options by their features, intended branches, and layouts. If you like a theme, click on it, and a live preview will be generated along with a brief description.
Step 5: Once you've found a theme that catches your fancy, click on "Install".
Now, install the theme that you like.
Step 6: After the theme has been installed, it will appear on your list of themes in the Appearance > Themes area. Now, you have two options: You can click on the "Activate" button, or open a live preview to see how your website will look after applying the theme. If you like what you've seen, click on "Activate and Publish" to add it to your website.
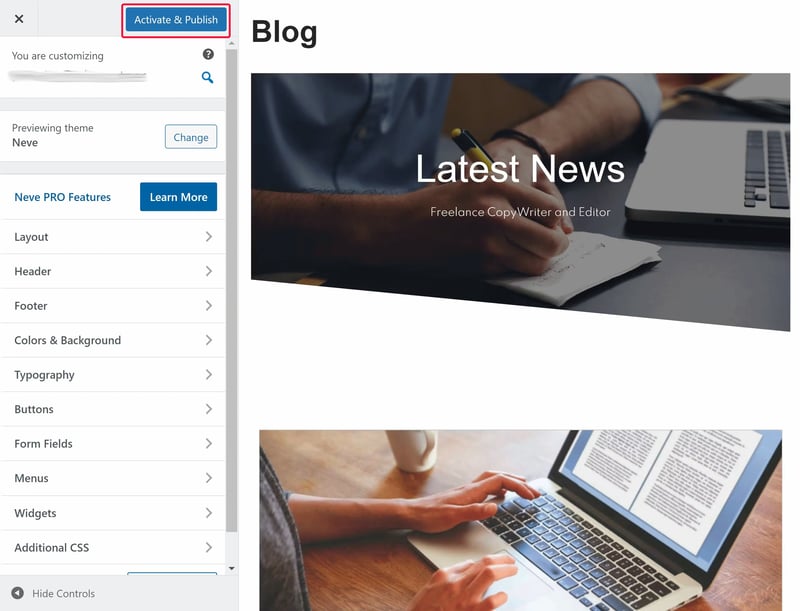
Preview your website's new theme. This is particularly handy if you've already added content to your website and want to see what it will look like.
Would you like more information about how to install external themes, like those that aren't available in the WordPress theme gallery? Be sure to check out our guide for lots of additional information:

Customize a WordPress Theme
Once you've installed your theme, you'll probably want to make a few adjustments. The easiest way to do this is with WordPress's Customizer, which allows you to edit settings for any theme. To open the theme customizer, head to Appearance > Customize.
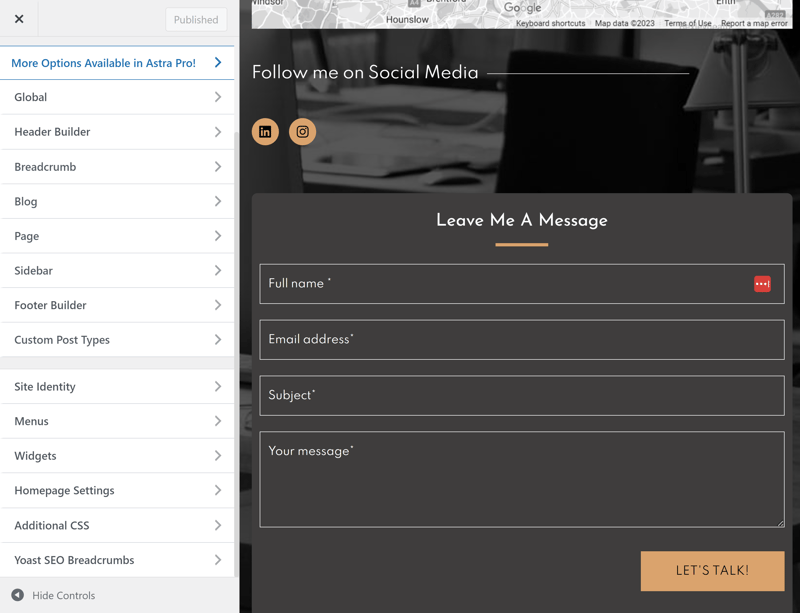
You can further personalize your theme with WordPress's Customizer.
A menu appears to the left with a range of different options. Click on "Global" to adjust colors, typography, or buttons across your entire website. In the "Site Identity" area, you can modify your website's title and logo.
There are nearly endless settings and options here. Try different things out and check what effect they have on your website's look and feel in the live preview. When you're finished, click on "Publish".
Install Important Plugins
The huge selection of plugins offered by WordPress is one of the platform's biggest advantages. If you're unable to find a feature or tool among the CMS's default options, there's a very good chance that it's available as a plugin.
For WordPress beginners, the following plugins might be interesting:
SEO plugins: If your website can't be found, it can't be appreciated. SEO plugins like Yoast or All in One SEO make your website more noticeable to search engines.
Performance plugins: General performance plugins like Jetpack or dedicated caching tools like W3 Total Cache or WP Rocket optimize your website's performance, which also enhances user experience.
Website builder plugins: Would you like to combine the user-friendliness of a website builder with the flexibility of WordPress? You can thanks to website builder plugins like Elementor, Oxygen, and GenerateBlocks. With these, you'll be able to more intuitively and visually design your WordPress website.
Form plugins: A strategically placed contact form can transform visitors into customers. Form builders like WPForms help to create GDPR-compliant forms that match your needs.
Anti-spam plugins: Unfortunately, WordPress websites are magnets for spammers. With Akismet and similar plugins, you can take control of spam problems before they get out of control.
Security plugins: Not every WordPress host provides the most important security features. Plugins like Sucuri more comprehensively protect your website against attacks.
E-commerce plugins: Would you like to create an online store with WordPress and/or sell physical and digital products? If so, you'll need an e-commerce plugin, like WooCommerce.
The above is just a small selection of the kinds of plugins that are available for WordPress. There are tens of thousands of plugins and most can be installed in a minute or less. Like themes, some are free, while others are premium.
Guide: Install a WordPress Plugin
Most of the time, it's possible to directly install plugins in your WordPress dashboard.
Step 1: Click on "Plugins" in your WordPress dashboard's menu, followed by "Add New".
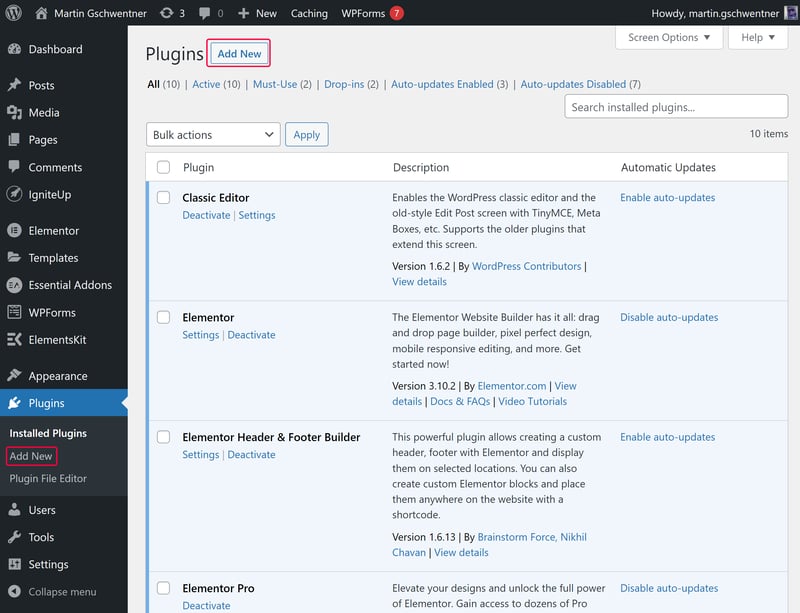
Click on the "Add New" button to access WordPress's plugin area.
Step 2: Welcome to WordPress's plugin index. Here, you can browse all of the available plugins and sort them by category. Once you've found something that looks appealing, click on the "Install Now" button.
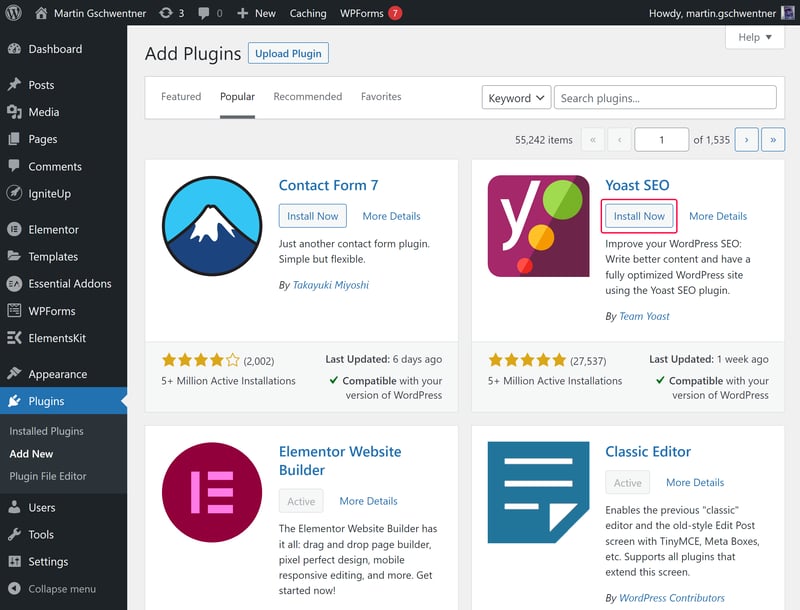
Install the plugins that look appealing.
Step 3: Once installation is complete, a new "Activate" button will appear where the "Install Now" button was. Click on this to activate the plugin.
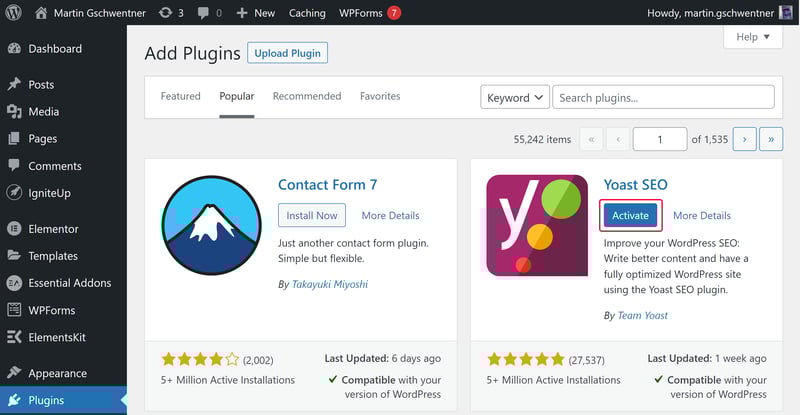
Once the plugin is installed, you'll need to activate it.
Step 4: The plugin has been activated and is ready to use. Head back to your dashboard's plugin area or click on the plugin menu option to see it. There, you'll be able to configure the plugin and adjust its settings.
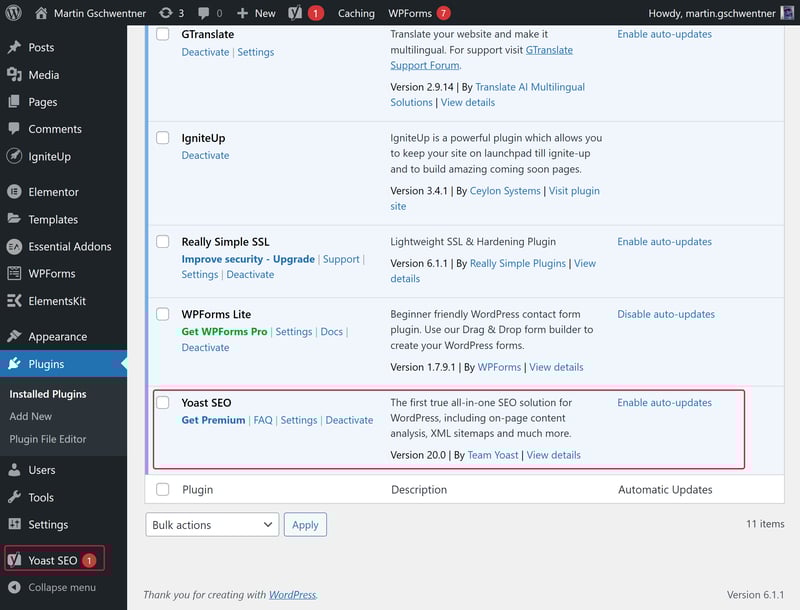
Congratulations: The plugin has been installed.
Make sure that you regularly update your plugins. Most of the time, you'll see when a new version of an installed plugin is available in the plugin area.
Create & Add Content
You've purchased a plot of land (hosting), set up your address (domain), built and designed your home (theme), and connected to the utilities (plugins), but your virtual house is still empty. Let's change that by creating a digital floor plan and furnishing your rooms. There are two options for adding content, pages and posts.
Posts refer to content that's arranged in reverse chronological order (newest first) or sorted by specific categories and displayed on your website. These are best suited for blog articles, updates, news reports, or any other sub-area of a website that needs to be regularly and frequently updated.
Pages are for static content that isn't time-sensitive. These are the parts of your website where its content is presented. Examples include your start page, contact page, or the "About Us" area of your website.
Both pages and posts can be created and edited in WordPress's Gutenberg editor. This includes WordPress's content blocks as well as tools that allow users without programming know-how to visually design the appearance of their pages or posts.
Create and Customize Pages
Let's start with pages since a WordPress website is really nothing more than a collection of pages grouped under a single domain.
Step 1: To create a new page, go to "Pages" in your WordPress dashboard's menu and click on "Add New“.
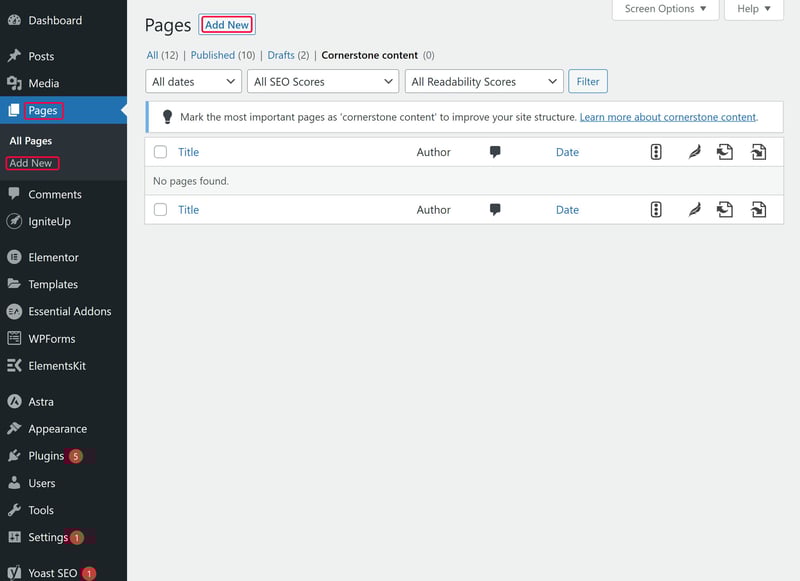
Create a new page in WordPress.
Step 2: Now you'll taken to the Gutenberg editor. At first glance, this looks complicated, so take some time to familiarize yourself with its features and capabilities. If you have prior experience with a website builder, it won't take long to get your bearings.
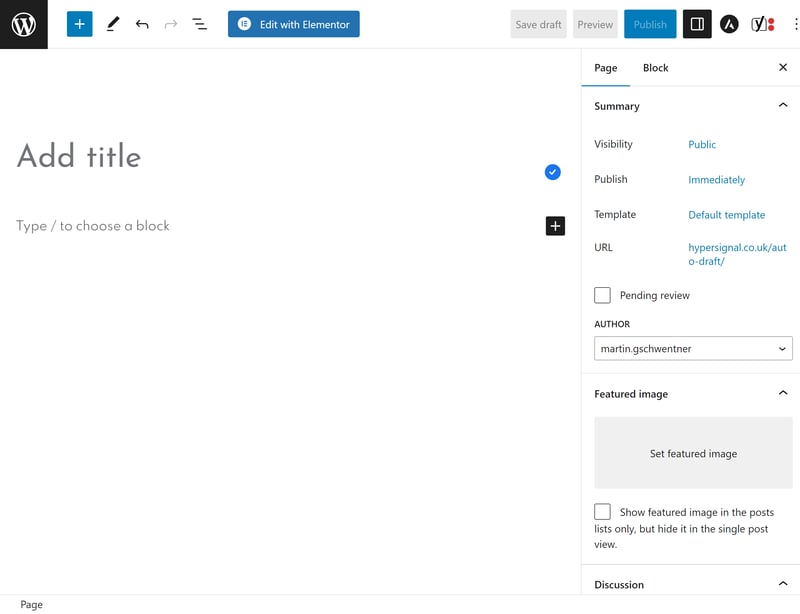
Gutenberg is WordPress's newest page editor.
Step 3: Click on "Add title" to name your page.
Step 4: You'll add content to pages in the form of different blocks. Click on the plus symbol to add a new block from a small selection of the most important blocks. Alternatively, you can click on the symbol in the main menu bar in the upper left to browse through all available blocks.
There are many elements that you can customize further in the next step.
Step 5: Once you've selected a block, drag it into the editor to customize it further. Depending on the type of block that it is, you'll have different options. These include the ability to add filters, captions, or links to images and crop them. You can also divide blocks into different columns to combine different types of content - for example, a photo on one side and a paragraph of text on the other.
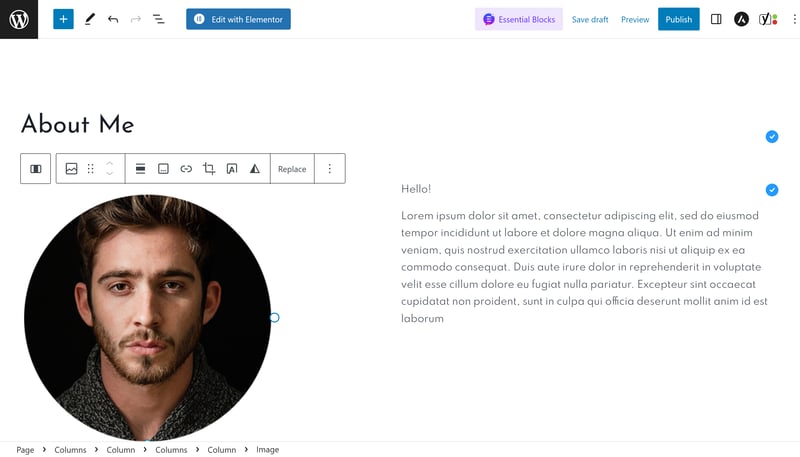
Each block has a variety of different editing options.
Step 6: Page settings can be found in the main menu in the upper right. There, you can adjust a page's URL, its background picture, comment features, and more.
Step 7: When you're satisfied with your page, click on the "Publish" button. If you'd like to work on it later, you can save a draft, or preview it before going live.
Repeat the above steps until you've created all of the pages that you want your website to have. These don't have to be perfect since you will likely want to modify and update them later. To make the next step (site navigation) as straightforward as possible, it's important to have a basic idea of your website's structure and content.
Create and Edit Posts
Posts can also be created with Gutenberg. You'll have the same tools and formatting options as for pages. To create a new post, click on Posts > Add New in the WordPress dashboard.
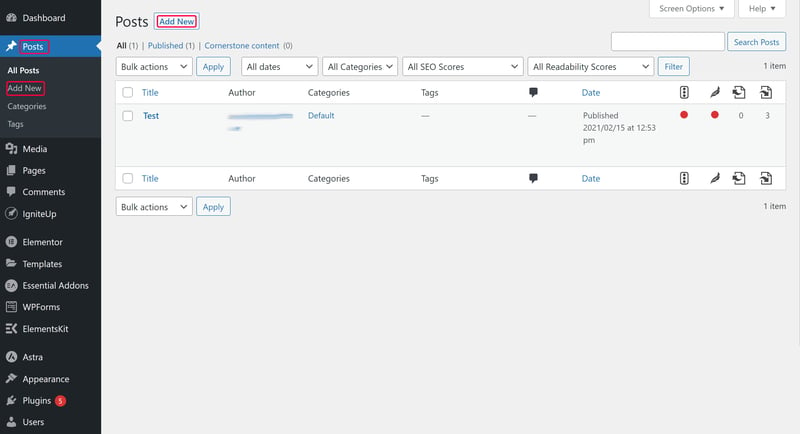
Posts can also be created in Gutenberg.
If your website doesn't have a blog and none of your content is time sensitive, you probably won't need to create posts.
Define Your Page Structure & Add Menus
After you've created your WordPress website's pages, you'll need menus to help visitors access them. Making these only takes a few clicks:
Step 1: Go to Appearance > Menus.
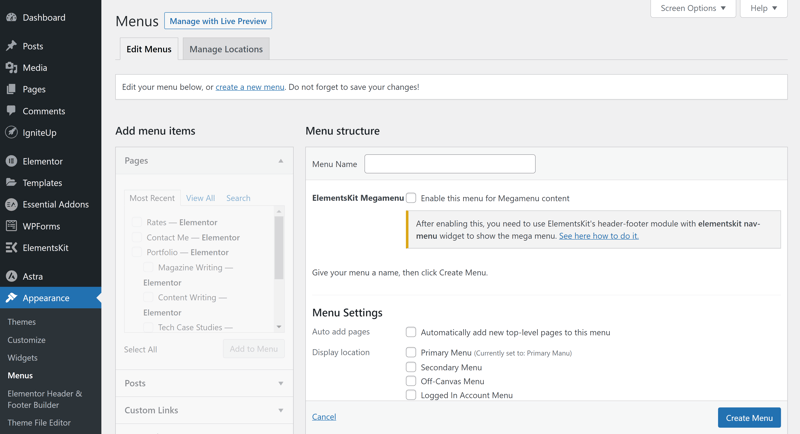
In WordPress's Menus area, you can create or edit page menus.
Step 2: Give your menu a name and specify its position in your theme. If it's a main menu that your visitors will use to access the most important areas of your site, check the box next to "Primary Menu".
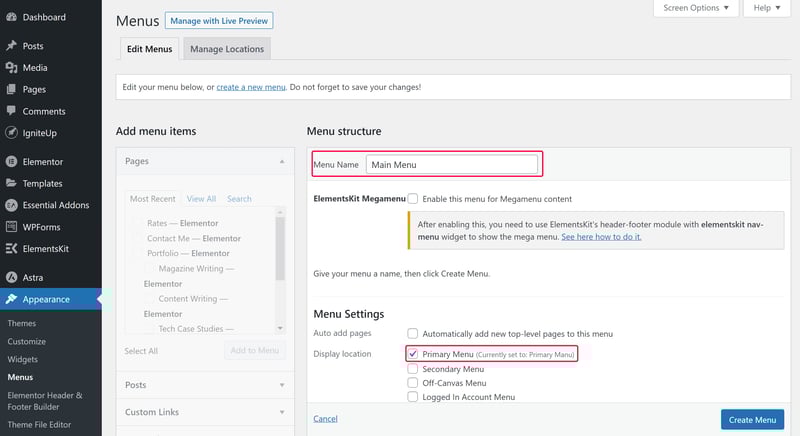
Now your website needs a main menu.
Step 3: Let's start organizing your menu. This is easiest if you've already created your WordPress website's most important pages. Click on "Add Menu Items" and under "Pages" select the pages you want to assign to the menu. Once completed, click on the "Add to Menu" button.
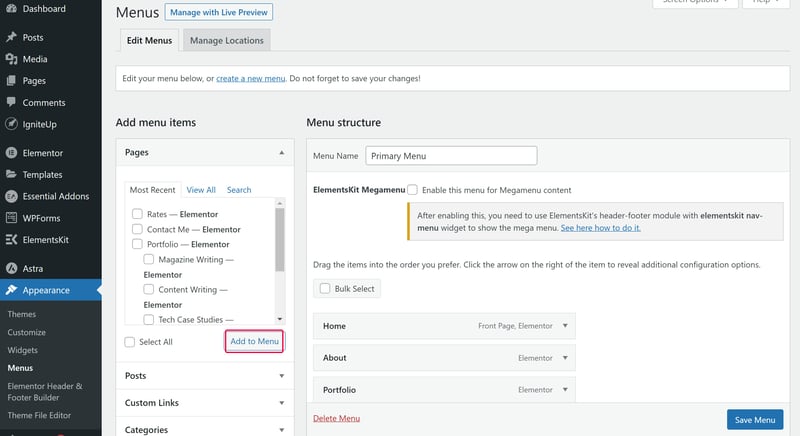
You can easily add pages you've already created to your WordPress website's menus.
Step 4: Your pages are now in the menu structure. You can adjust their placement by dragging and dropping them, or modifying their hierarchy. By moving a menu to the right, it will become subordinated to the menu above it. In this way, it's possible to create submenus of submenus - just make sure not to overdo it for the sake of clarity.
Step 5: When you're satisfied with your menu structure, click on the "Save Menu" button in the bottom right.
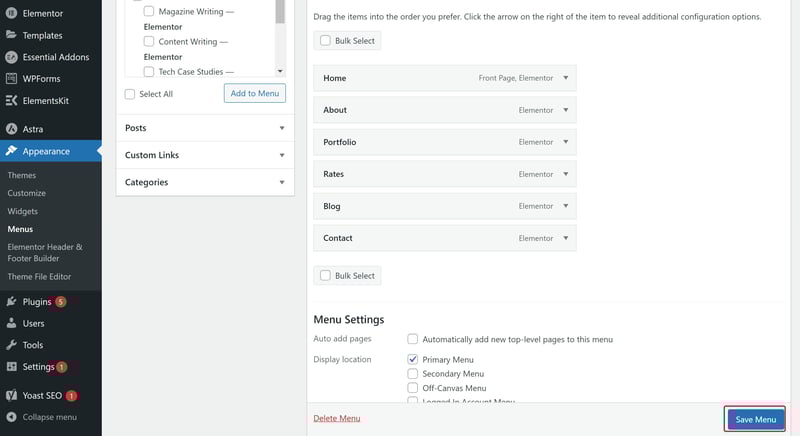
All that's left to do now is to save the menu you've designed.
At this point, your WordPress website has everything it needs: Solid hosting, a good domain, a theme, plugins for extra features, content, and a clear main menu.
Fine Tuning: A WordPress Website Is Never Finished
Of course, this doesn't mean that your WordPress website is "finished". Over the next few days and weeks, you'll probably notice small things that you'd like to change or adjust. After that, you'll want to start thinking about optimizing your content and designs, especially after getting feedback from friends, colleagues, clients, and visitors. We'll leave the exact details of this up to you, but here are a few tips:
Optimize your SEO settings
Search engine optimization (SEO) is a key factor in determining a website's success. Make sure that you use appropriate keywords and meaningful meta descriptions, and that your content is easy for search engines to find. Plugins that we mentioned above, like Yoast or All in One SEO can help.Check your website's mobile-friendliness
A large number of visitors will access your website on their smartphones. This makes it important that your website is optimized for mobile devices. Check how your website looks on different devices and screen sizes, and make changes if necessary.Stay on top of data privacy and legal aspects
Make sure that your website complies with all legal requirements. This includes a privacy policy, a cookie notification banner, and, in some countries, a legal notice or disclosure. There are WordPress plugins that can help you to create these for your website.Performance optimization
Long loading times discourage visitors from returning to your website. For that reason, it's a good idea to frequently check that your website is performing as well as it should. There are different ways to do this for your WordPress website. You can optimize images, start using a caching plugin, and reduce the number of installed plugins.
Conclusion
With WordPress, even beginners without any design or programming know-how can create their very own website. Doing so takes some effort and patience since there's a lot of work that goes into a good WordPress website: You'll need to organize technical aspects like hosting and come to terms with WordPress's tools and features.
For those just starting out, managed WordPress hosting is the most straightforward option. Once you've organized this, you can start using all of WordPress's tools, including its themes, plugins, and Gutenberg, to customize your website to your exact preferences.
You can find detailed guides, tips & tricks, and best practices in the WordPress area of our website.
FAQs
The exact cost of a WordPress website depends on the hosting subscription you book. The most affordable options from our sample range from around $3-30 per month, however, there are plenty of pricier plans as well. Hosting isn't the only cost though: You'll also need to pay for a domain and potentially for themes, plugins, add-ons, and other services (web design, copywriting, development, etc.).
Yes, WordPress is suitable for beginners. Programming or web design know-how can help but isn't necessary to create a website with the CMS. Managed WordPress hosts make things even simpler since they handle most of the technical aspects associated with launching and managing a website.
WordPress is a content management system, whereas Wix is a website builder. This makes WordPress both more versatile and more complicated than Wix. If you'd like to create your own website and value flexibility and customization, WordPress is the better option. On the other hand, if you want to create a professional website as quickly as possible, Wix will likely get you the desired result.