How to Install WordPress in 2026: Automatic and Manual Setup Made Easy


When it comes to self-hosted WordPress, there are two options: manual installation or automatic setup using a one-click installer. But which method is the better choice?
We break down both options, highlight their key pros and cons, and show you how to install WordPress step by step.


Automatic installation through a hosting provider gets you online faster without requiring technical knowledge. The manual method takes more effort but gives you full control.
For most WordPress projects, automatic installation works just fine. It lets you get your website or blog up and running quickly.
Manual installation gives you a deeper understanding of how files, databases, and servers work together. This knowledge helps later when you need to maintain or troubleshoot your website.
Both methods lead to the same result. What matters is how much control you want and how deeply you want to dive into the technical side.
How to Install WordPress: 2 Methods
If it can be done automatically with the click of a button, you might ask: Why would anyone still install WordPress manually?
Because both methods have pros and cons, and each has its place. Which one works better depends on your project, your technical background, and how much control you want.
Install WordPress Automatically
With automatic installation, your hosting provider sets up WordPress for you. You launch the installation wizard from your account dashboard, enter a few basic details, and the rest runs in the background.
Quick to get started
Setup usually takes just a few minutes. The database and files are created automatically, so you can start building your site right away.No technical skills needed
No prior knowledge is required. Even beginners can install WordPress without using FTP or database settings.Lower risk of errors
Common mistakes like incorrect credentials or missing connections are avoided. The hosting provider handles the basic configuration for you.Stable default setup
The installation runs in an already optimized server environment. That means everything usually works right out of the box.
Limited customization options
During installation, only standard options are available. Any customization has to be made afterward.Depends on your host and plan
Not every hosting plan includes a 1-click installer. Available features and settings vary depending on the provider.Fixed system structure
Folders, databases, and user permissions follow preset structures. Custom setups are only possible to a limited extent.
Install WordPress Manually
With a manual installation, you handle every step yourself. You download WordPress, upload the files via FTP, and set up the database yourself.
Full control
You decide exactly where and how WordPress is installed. Every step is under your control.Flexible configuration from the start
You can make custom adjustments before and during installation. This is especially important for more complex projects.Deeper technical understanding
You’ll learn how files, servers, and databases work together. This knowledge pays off later when maintaining, migrating, or troubleshooting your site.No installer required
Even if your hosting provider doesn't offer a 1-click installer, you can still set up WordPress without issues.
Takes more time
The installation involves several manual steps. Compared to the 1-click method, it takes longer.Basic technical knowledge required
Without an understanding of FTP, databases, and server access, the setup can quickly become challenging.Higher chance of errors
Configuration mistakes or small typos can cause issues. You’re responsible for fixing them yourself.More responsibility for security
You need to ensure your settings are correct and your access credentials are secure. Your hosting provider won’t manage this for you.
Which Option Is Better?
The right choice depends on your project and how hands-on you want to get:
For simple websites or blogs, automatic installation is usually more than enough.
If you need special configurations or want to make deeper changes to the system structure, the manual installation is the way to go.
Here's a side-by-side comparison of the key aspects of both methods:
Criteria | Automatic installation | Manual installation |
|---|---|---|
Effort | very low | medium to high |
Time | a few minutes | about 10–30 minutes |
Technical knowledge | not required | basic knowledge needed |
Control | limited | full |
Risk of errors | low | higher for beginners |
Best for | standard projects | custom projects |
How to Install WordPress Automatically
The exact steps vary slightly depending on your hosting provider, but the process is generally the same. Below, we’ll walk you through automatic WordPress installation using Hostinger as an example:

Step 1: Log in to your Hostinger account and go to the "Websites" section. Select the website list and click "Add Website" in the top-right corner.
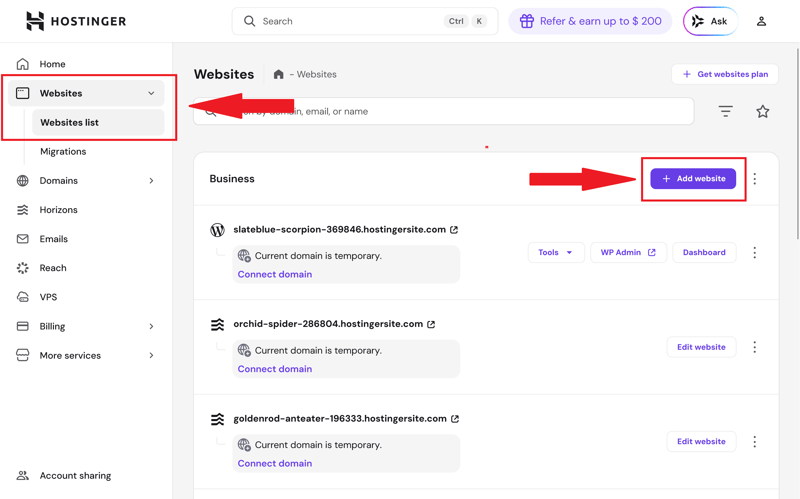
Add a new website.
Step 2: Select "WordPress" from the dropdown menu. This takes you to the installation wizard, where the actual setup begins.
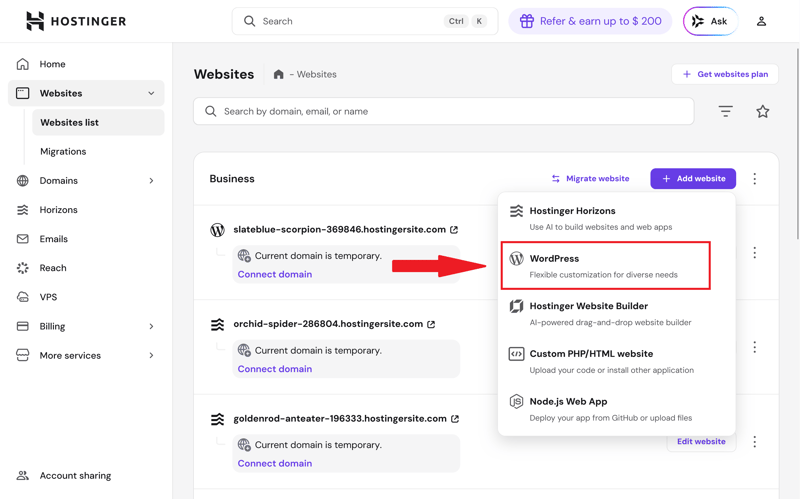
Select WordPress.
Step 3: Set up the login credentials for your WordPress admin account. Choose the installation language, enter your email address, and create a strong password.
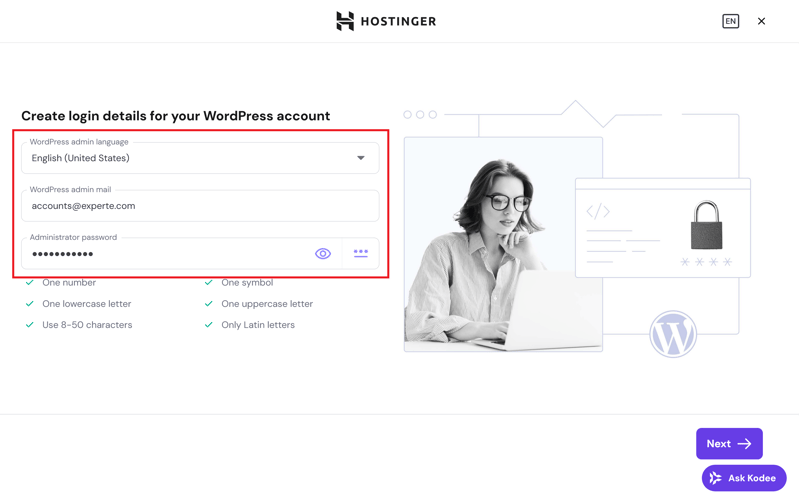
The login credentials for your WP admin account.
Step 4: Choose how Hostinger should create your website. You have three options:
- 1.
Build a website with AI: Hostinger automatically generates a complete website structure, including design and content, based on your input.
- 2.
Pre-built websites and themes: You pick an existing WordPress design and customize it later.
- 3.
Start with a blank website: WordPress is set up without a theme template, giving you full control over the design and structure.
You can always choose a different WordPress theme later. Check out our recommendations here:

In this example, we’ll select "Pre-built websites and themes" and continue without using AI:
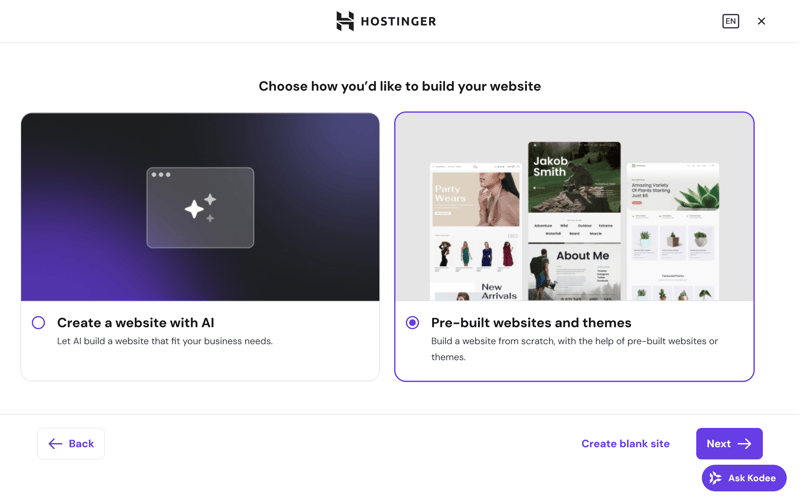
Choose how Hostinger builds your website.
Step 5: Pick a design template as the starting point for your project. Click on a theme to select it and continue the setup. You can also preview each design before deciding.
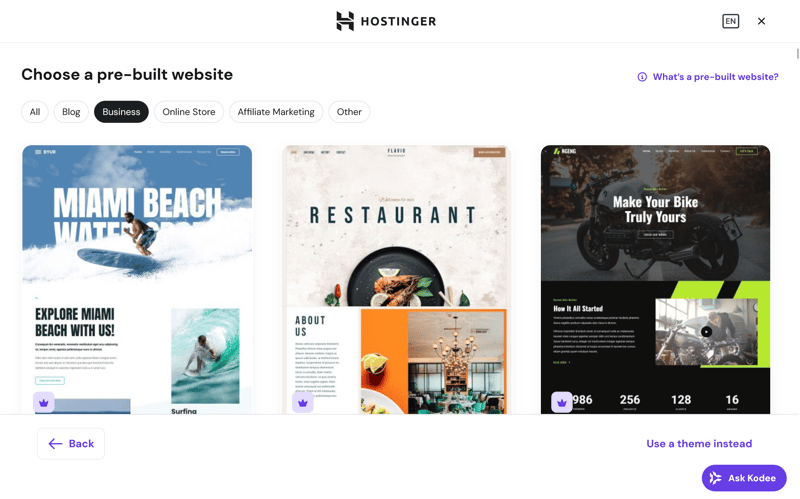
Hostinger offers a wide range of templates.
Step 6: Choose which WordPress plugins should be installed right away. You can select individual plugins or skip this step and continue without extras.
Hostinger offers the following options:
All in One SEO: Optimizes your website for search engines and helps with metadata and sitemap creation.
WPForms: Creates contact forms, simple surveys, or payment forms.
Google Site Kit: Connects your website with Google services like Analytics or Search Console.
MonsterInsights: Integrates Google Analytics directly into your WordPress dashboard.
Akismet: Filters spam comments and protects your forms from abuse.
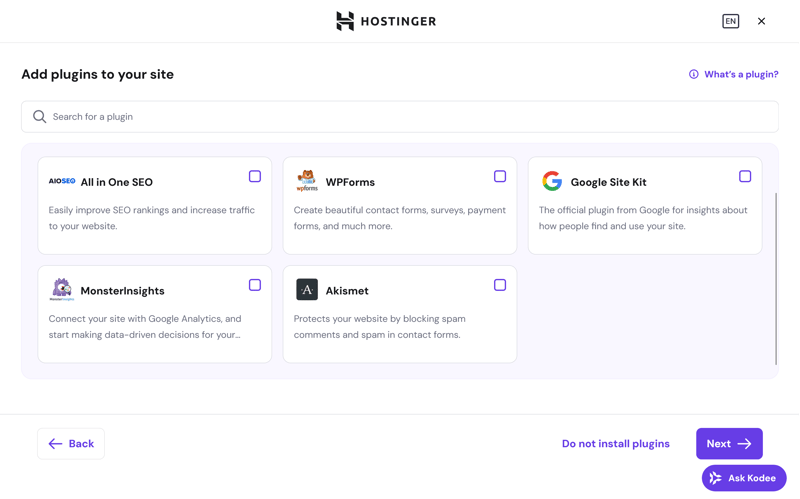
You can install these plugins if needed.
Step 7: Choose which domain your website should be accessible under. You can either register a new domain or transfer an existing domain. Enter your desired domain name in the field.
You can also use a temporary domain if you want to choose your final web address later.
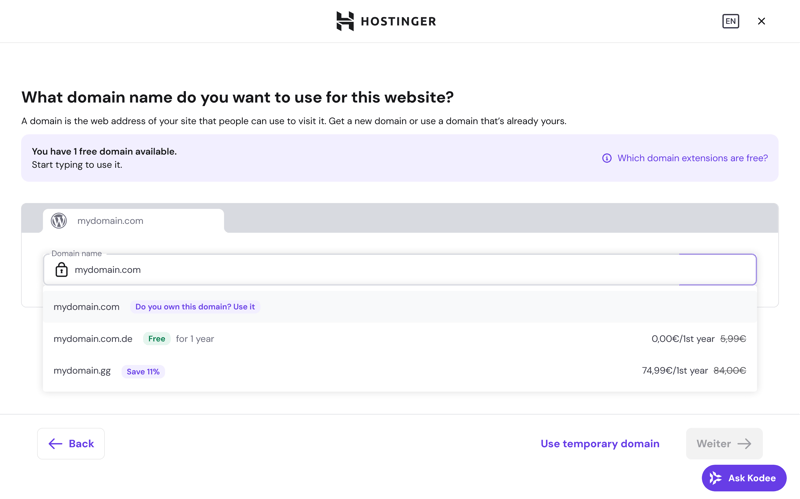
Enter your desired domain.
Step 8: Hostinger automatically installs WordPress and sets up your website in the background. It transfers the files, creates the database, and links everything to your domain.
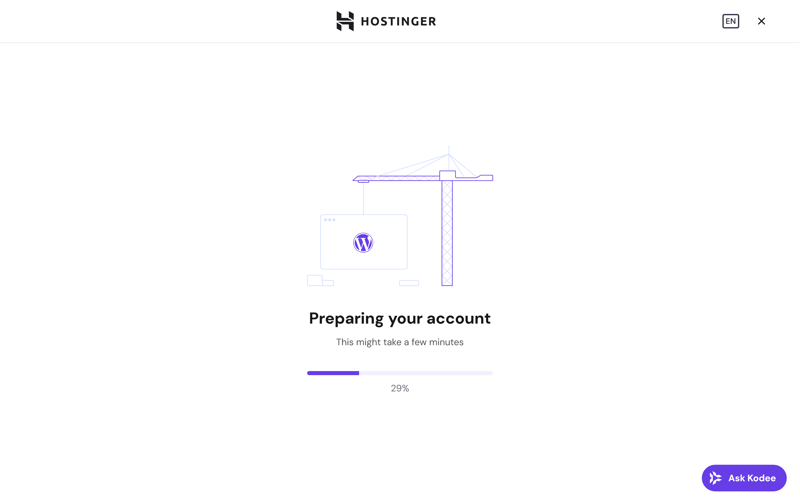
Hostinger installs WordPress for you.
The installation usually takes just a few minutes. Once it’s done, Hostinger automatically redirects you to your new WordPress dashboard:
The auto-installation is complete.
That's it for the automatic WordPress installation on Hostinger. Your website is set up, your login credentials are active, and the dashboard is ready to go. You can now start designing your site, creating content, and adjusting settings.
How to Install WordPress Manually
The automatic installation is the fastest and easiest option for most projects. However, if you need more control or have specific requirements, a manual installation might be the better choice. It takes more effort, but it also gives you more flexibility.
With a manual installation, you download WordPress yourself, upload the files to your web space via FTP, and connect it to a database you created beforehand.
Make sure your hosting meets the WordPress requirements:
We’ll walk you through the manual installation using Hostinger as an example:
Step 1: In your Hostinger dashboard, go to the "Websites" section and click "Add Website." Then select "Custom PHP/HTML Website" to prepare for manual installation.
This creates an empty website structure where you’ll upload WordPress via FTP in the next steps.
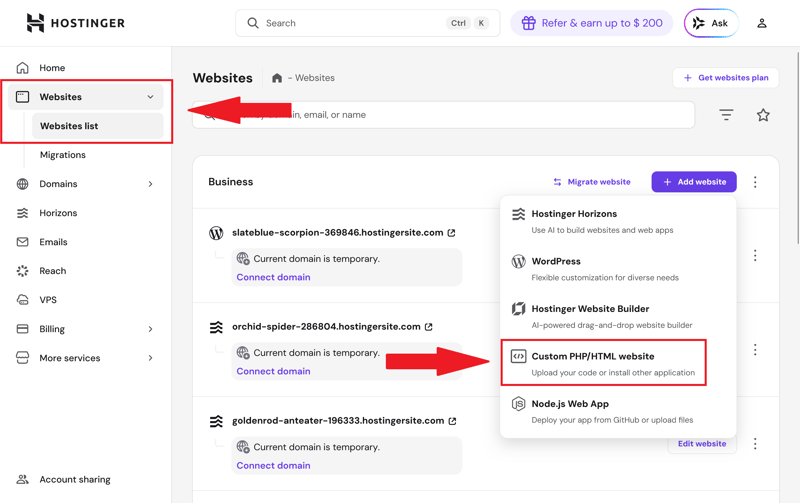
Select a PHP/HTML website.
Step 2: Enter your desired domain name. If you already own a domain, you can connect it here.
Alternatively, you can use a temporary domain from Hostinger. In that case, you’ll connect your actual domain later.
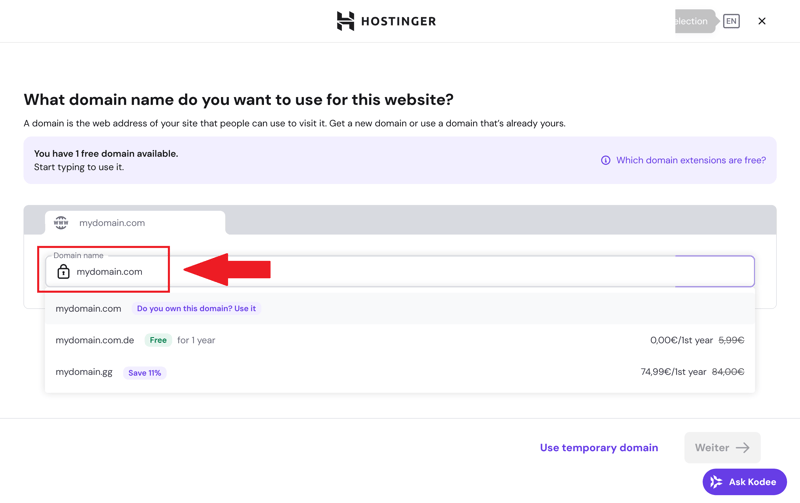
Add a domain.
Hostinger now creates the website structure for you. WordPress isn’t installed yet, but the foundation for the manual setup is in place.
Step 3: Back in the Hostinger dashboard, go to the "Databases" section of your newly created website. Create a new MySQL database by entering a database name, username, and a strong password.
Write down these credentials. You’ll need them later to connect WordPress to the database.
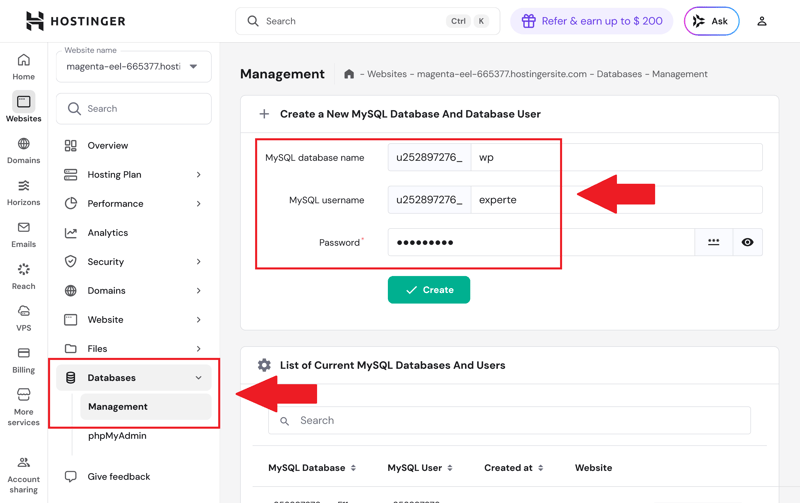
Add a database.
Step 4: Open the "Hosting Plan" section of your website and note the FTP credentials. The key details are the FTP host and FTP username. The FTP password is the same as your Hostinger account password unless you set a custom one.
You’ll use these credentials to connect to your Hostinger web space with an FTP client and upload the WordPress files.
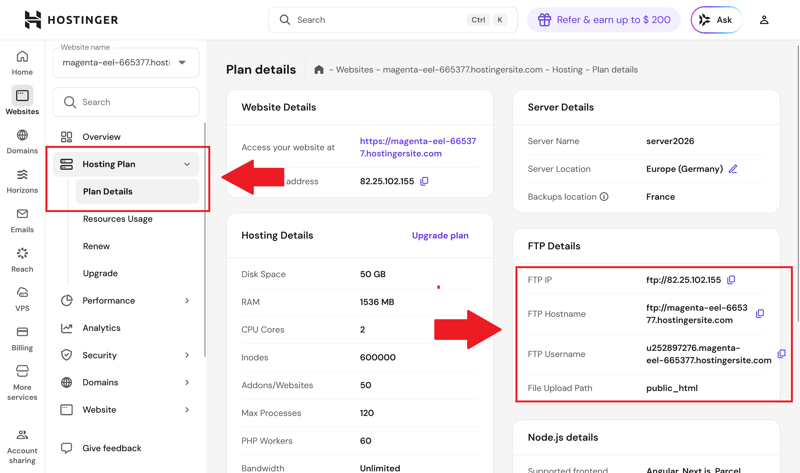
Your FTP details.
Step 5: Download the latest WordPress version as a .zip file from WordPress.org. After downloading, extract it on your computer.
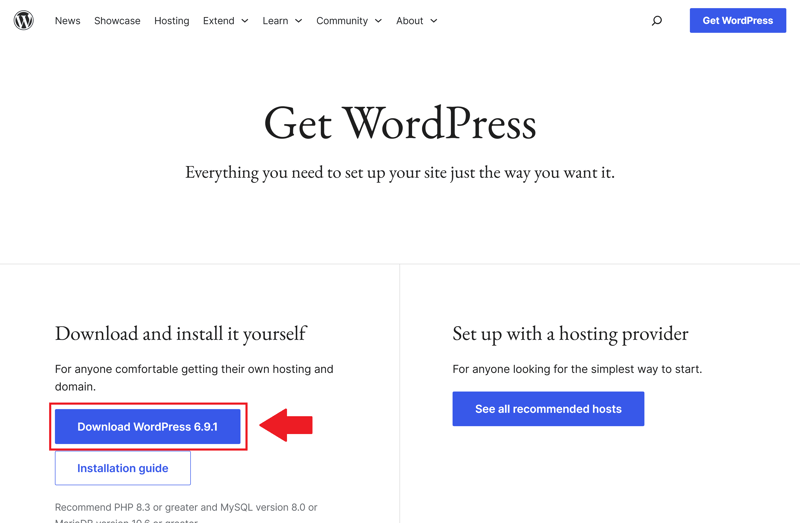
Download WordPress.
Step 6: Connect to your server using an FTP client like FileZilla. Enter the FTP host, username, and password from Step 4 to establish the connection.
Upload all the WordPress files from the extracted "wordpress" folder. The folder structure looks like this:
The upload takes a few minutes. Once it’s done, the WordPress files are on your web space, and you can start the installation in your browser.
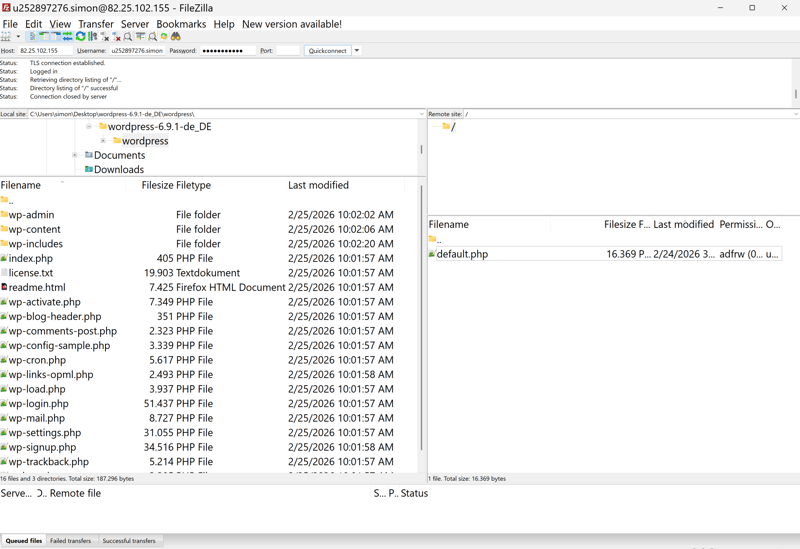
Uploading files via the FTP client FileZilla.
Step 7: Open your domain in a browser. The WordPress installation wizard starts automatically and shows you what information you’ll need.
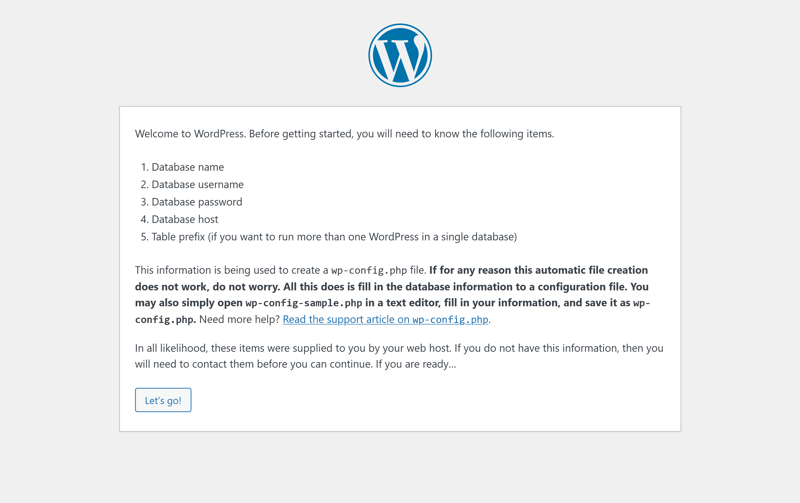
The first step of the WordPress installation wizard.
Step 8: Enter the database credentials you created earlier in Hostinger (Step 3). Enter the database name, username, and password.
For the database host, you'll typically use "localhost". You can leave the table prefix as "wp_" unless you plan to run multiple WordPress installations in the same database.
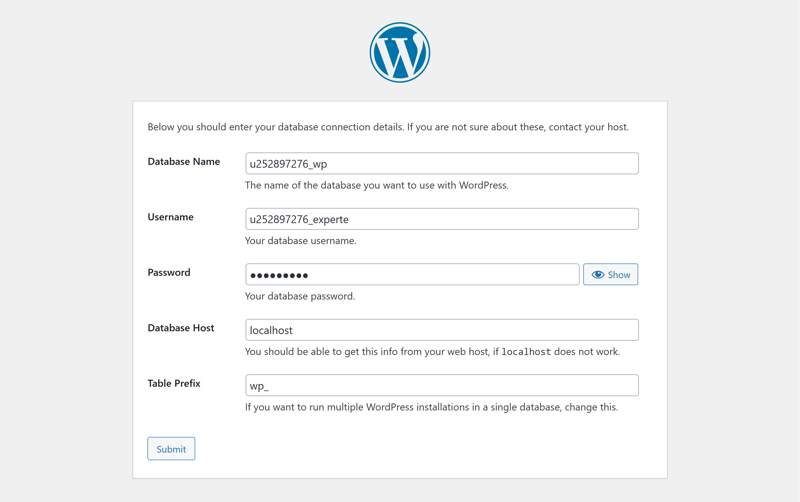
Entering database information.
Step 9: Choose a title for your website, create an admin username, and pick a strong password.
Also enter an email address. You’ll need it for password resets and system notifications.
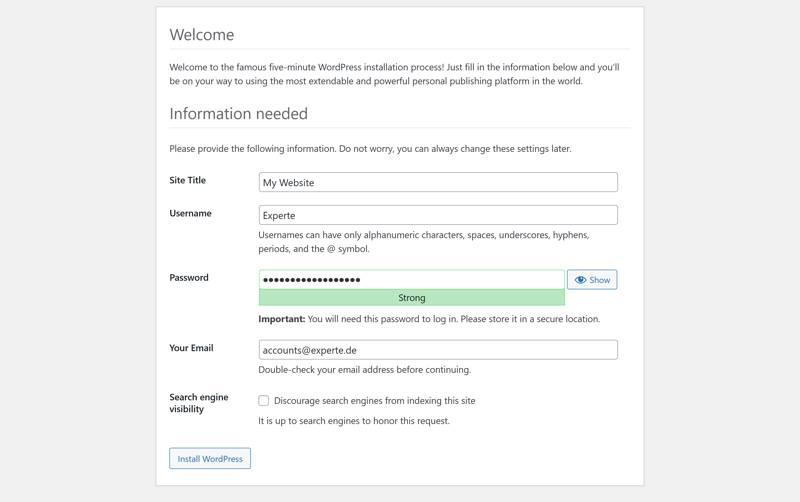
Entering the site title, username, and other details.
Step 10: WordPress will redirect you to the login page. Sign in using the username or email address and password you just created.
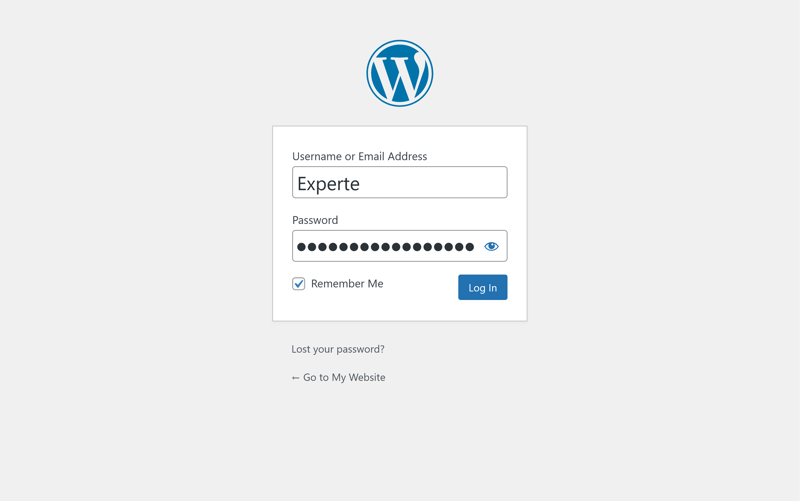
Log in with your credentials.
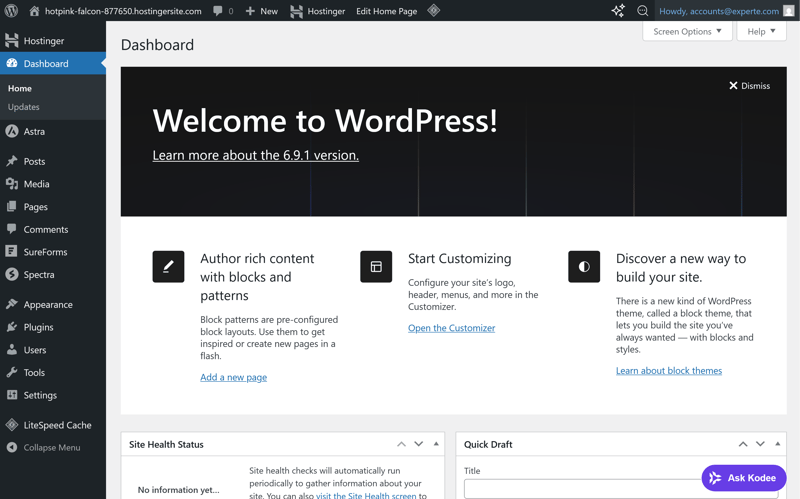
Once you’re logged in, you’ll land on the WordPress dashboard:
The WordPress dashboard home screen.
That’s it! The manual installation is complete, and your WordPress site is ready to go. You can now create posts and pages, customize your design, install plugins, and manage your settings.
Prefer watching instead of reading? In our video tutorial, Alex shows you how to install WordPress on IONOS manually and configure it step by step:
Final Verdict: Automatic Is Easier, Manual Is More Flexible
Whether you should install WordPress automatically or manually depends on your needs and how comfortable you are with the technical side of things.
Automatic installation handles most of the heavy lifting and gets you up and running in no time. It’s the best choice if you want to get started quickly and focus on content and design rather than technical details.
Manual installation is a different approach. It gives you a deeper understanding of how WordPress is structured. You’ll know exactly where your files are, how the database is connected, and which settings run behind the scenes.
Still looking for the right hosting provider for your WordPress project? Check out our comparison of the best WordPress hosting providers to see which ones offer easy setup and reliable performance.