Self-host n8n: How to Install n8n on a VPS


Automate routine tasks while maintaining full control—that's what n8n offers. The open-source tool connects apps, services, and databases. You can easily run it on your own server.
In this guide, we'll walk you through installing n8n on a VPS step by step. You have two options: manual setup or installation with a pre-built image. We'll cover both methods in detail.

n8n is a popular automation tool with over 300 integrations.
When you self-host n8n, you keep full control over your data, features, and custom configurations.
A small VPS with 1–2 GB of RAM is usually enough. For larger workflows, 4 GB of RAM is recommended.
You can install n8n manually or from a pre-built image.
Which option works best depends on your requirements and technical expertise.
Installing n8n: 2 Methods
Before setting up n8n on your own VPS, you need to choose an installation method. You have two options: manual installation or automatic one-click installation with a hosting provider that offers a pre-built n8n image.
These approaches differ significantly in the effort, flexibility, and technical know-how they require.
Automatic One-Click Installation
Some hosting providers offer a pre-built n8n image. You get a ready-to-use n8n environment without having to deal with technical details first. This accelerates the process considerably.
The main pros and cons of a one-click installation are:
quick to set up and easy to replicate
isolated environment, no conflicts with other applications
updates are simple with a new image
scaling and migrating to other systems is easy
limited access to specialized hardware
customizing the image may be restricted
only available with hosts that offer one-click setup
Manual Installation on a VPS
With manual setup, you install n8n yourself on a Linux server. It takes more effort, but you keep complete control over your system.
The pros and cons of this method:
full control over the system, environment, and dependencies
direct access to the hardware and system resources
no additional layer like Docker required
more effort for setup and maintenance
risk of version or package conflicts
security and backup tasks are entirely your responsibility
updates must be applied manually
Guide: Install n8n Automatically (One-Click)
A one-click installation eliminates most of the configuration work, and you can start your workflows in just a few minutes. This method is recommended if you have little experience with Linux servers.
Hostinger is one provider that offers a suitable one-click installation. The hosting company provides you with an Ubuntu-based server image that gets n8n up and running in minutes. In the following sections, we'll show you how to complete the setup at Hostinger step by step.
In our VPS comparison, you'll find four more hosts that support automatic n8n installation, like DigitalOcean, Contabo, and OVH.
Step 1: Rent a VPS and Start the Installation
Log in to your Hostinger customer account and choose a suitable VPS plan like KVM 1 (1 vCPU core, 4 GB of RAM) or KVM 2 (2 vCPU cores, 8 GB of RAM). After placing your order, the server will be ready to use within a few minutes.

Go to "Operating System" and select n8n as the application template for your server. This template is based on the current Ubuntu LTS version and includes n8n in a preconfigured Docker environment.
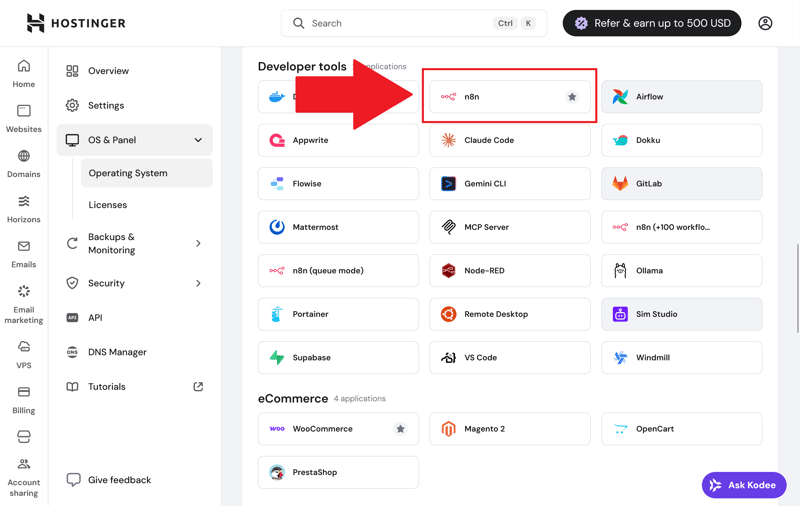
n8n in Hostinger's software selection.
Keep in mind that Hostinger will delete all existing data on the VPS. For a new server, this isn't an issue. Next, you'll set a root password.
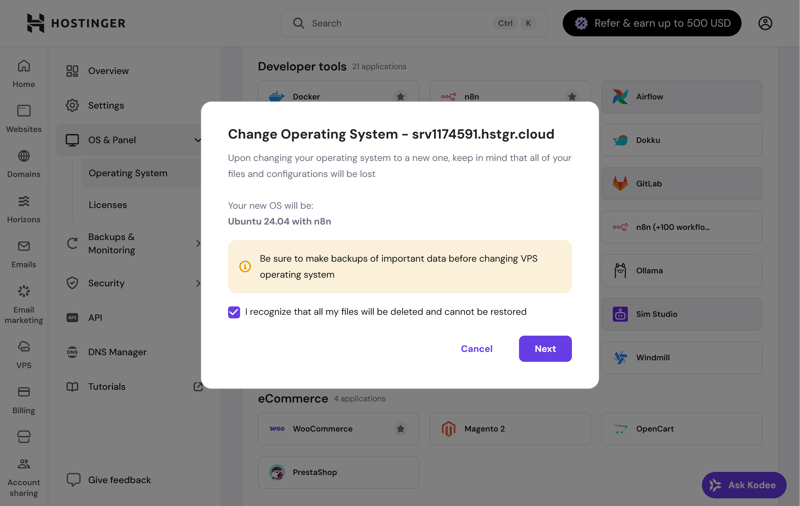
Installing n8n and Ubuntu on Hostinger.
Hostinger automatically installs all required components. It sets up the operating system, provides Node.js, installs n8n, and launches it in a Docker container. This process takes just one to two minutes, and your n8n server is ready to go.
Step 2: Set Up n8n and Connect Your Domain
To access the n8n interface, click "Manage App" in your hPanel. This opens the n8n web interface. On your first visit, a setup wizard will prompt you to create a user account.
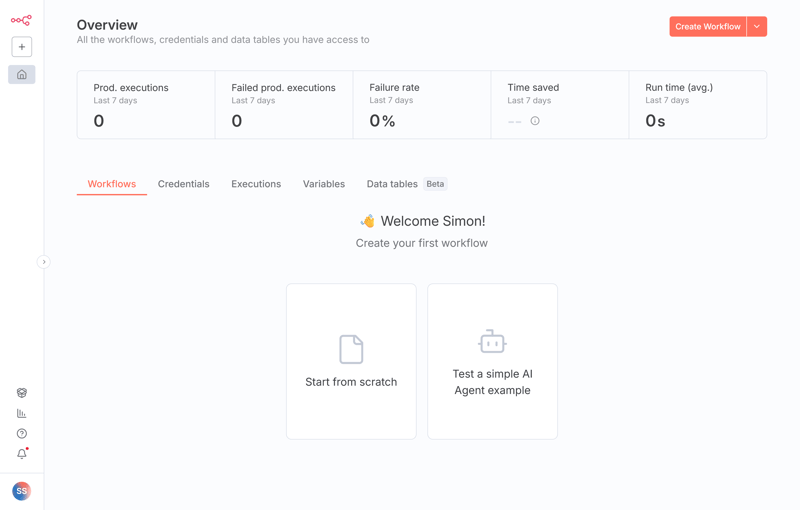
Enter your email address, first and last name, and a secure password. You'll use these credentials to log in to your n8n instance from now on. After completing the registration, you'll see the n8n dashboard, where you can immediately create new workflows and manage existing ones.
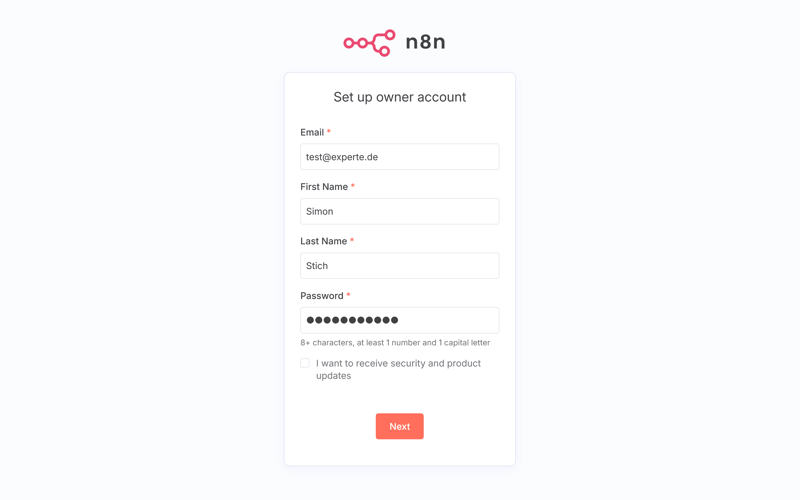
Creating a user account in n8n.
By default, your new n8n instance is accessible through a system-generated URL or your VPS's public IP address. If you'd rather use your own domain, connect it to the server just like in the manual installation (more on that later).
Even though Hostinger's one-click installation saves you a lot of work, you should still maintain your server regularly. Install security updates for the operating system, update the n8n Docker image, and back up your workflows and configuration files.
In your hPanel, you can also create snapshots of your entire VPS. This lets you quickly restore a working version in case of an emergency:
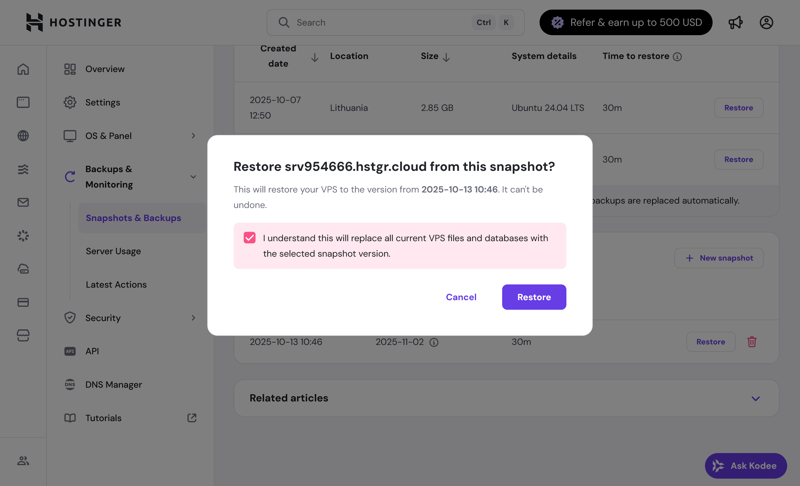
Restoring your VPS from a server snapshot.
Guide: Manually Install n8n on a VPS
Alternatively, you can also install n8n manually on a Linux server. In this guide, we'll use a small VPS from Hetzner* as an example. The process is nearly identical for other providers.
Before you start: A manual installation requires at least basic knowledge of Linux servers, especially the command line. If you lack experience, you should consider using a one-click installation instead.
Step 1: Rent a VPS From Hetzner
Rent a VPS through the Hetzner Console to get started. For simple workflows, a smaller plan like the CX11 with one virtual CPU, 2 GB of RAM, and 10 GB of SSD storage is enough. For larger projects, consider the CX21 with 2 vCPUs, 4 GB of RAM, and 40 GB of SSD. Choose Ubuntu 24.04 LTS as your operating system.
Once the server is activated, connect to it via SSH. On macOS or Linux, open the Terminal. On Windows, use PowerShell or an SSH program like PuTTY. Use this command:
Replace "YourServerIP" with the IP address of your VPS. After logging in, update your system right away to make sure all packages are up to date as well:
This ensures the latest security updates are installed. You can also configure a firewall at this point, but make sure to keep port 22 open for SSH.
Step 2: Prepare Your Server for n8n
Now that your server is ready, set up the technical foundation for n8n next. Since n8n runs on Node.js, you need to install a current LTS version of this JavaScript runtime environment.
The easiest method is to make use of the installation script from NodeSource. To do so, enter the following into your server's command line:
This adds the appropriate package repository and installs Node.js along with npm, the Node package manager. Next, verify that both tools are available and check which versions are installed. n8n requires Node.js version 18.17.0 or newer, up to and including version 22.
For security reasons, don't run the n8n process as the root user. Instead, create a dedicated user account just for n8n:
Then switch to the newly created user account:
From this point on, complete all remaining installation steps under this account. This way, the process won't have unnecessary system privileges. n8n will store its configuration and database files in this user's home directory.
Step 3: Install and Start n8n via npm
Once Node.js, npm, and a user are set up, install n8n. You do this via npm with the following command:
The installation process downloads all required packages and sets up the application so it's available systemwide. To test it, start n8n directly in the foreground by typing n8n in the terminal.
If the start is successful, n8n will indicate that the editor interface is now available at http://localhost:5678. Stop the test run with the keyboard shortcut Ctrl + C.
To keep n8n running reliably in the background, set up a process manager. You can use PM2, which is designed specifically for Node.js applications, or systemd, which is built into Linux. If you want to use PM2, first install it with:
Then start n8n with:
Alternatively, set up the systemd service by creating the file /etc/systemd/system/n8n.service with the following content:
After saving the file, reload systemd and enable the service, which will also start it immediately. Then check its status:
Step 4: Set Up HTTPS and a Domain
Set up a reverse proxy to make n8n accessible under your own domain with an encrypted connection instead of just an IP address and unencrypted port.
First, register a domain or use an existing subdomain. In the domain's DNS settings, create an A record that points to your server's IP address. Once the DNS change is active, install the nginx web server, which will act as a reverse proxy. Use this command:
After installation, create a configuration file called n8n.conf in /etc/nginx/sites-available/. Add the following content, replacing n8n.mydomain.com with your actual domain:
This configuration automatically redirects requests on port 80 to HTTPS and forwards the encrypted traffic to the local n8n service on port 5678. Activate the configuration by creating a symbolic link (a type of shortcut) from the file in sites-available to sites-enabled:
Next, reload nginx with:
For encryption, a free "Let's Encrypt" certificate is a great option. You can request one using the Certbot tool. Install it with:
Then start the certificate request with:
Once the setup is complete, open n8n at https://n8n.mydomain.com and follow the setup wizard to create your first user. After that, the open-source automation tool is ready to use.
n8n is ready to go.
Step 5: Operational Security and Maintenance
Regular backups are essential to keep your system secure and stable over time. The SQLite database used by n8n is stored in the ~/.n8n/ directory by default. You should back up this directory regularly because it contains all your workflows, execution logs, and credentials.
Updates are another important factor. Keep your operating system up to date with:
n8n also releases new versions frequently. You can update to the latest version with this command:
A restrictive firewall configuration is also recommended. By default, only ports 22, 80, and 443 should be accessible from the outside. The internal n8n port 5678 should only be reachable through the reverse proxy. Optionally, you can restrict access to the n8n interface to specific IP addresses or add an extra layer of security with basic authentication.
n8n Explained: How the Automation Tool Works
n8n ("n-eight-n") is a visual tool for automating workflows. In a browser-based interface, you create workflows using nodes that receive, process, and pass on data.
Trigger nodes start a workflow when an event occurs or at a specific time.
Action nodes perform tasks like API calls, database queries, or file processing.
Transformation nodes modify data by filtering, converting, or calculating.
Trigger nodes kick off all the actions that follow. Action and transformation nodes then ensure the workflow runs in a structured, automated way until the final output is generated or the results are stored.
Unlike similar cloud services like Zapier or Make, you can run n8n on your own infrastructure. This usually comes with several advantages:
Data privacy: All your data stays on your infrastructure instead of the n8n cloud. Nothing leaves your own server.
Cost control: You don't pay ongoing fees for executions or have to worry about usage limits.
Flexibility: Custom integrations, complex logic, and individual adjustments are possible at any time.
Independence: You're not affected by outages, price changes, or API restrictions from other providers.
The technical requirements for self-hosting are manageable:
When idle, n8n only needs about 180 MB of RAM. CPU usage also stays low with typical workflows.
To get started, a server with one vCPU and 1 to 2 GB of RAM is enough.
If you want to run many parallel workflows or automate memory-intensive tasks, plan for 4 GB or more.
For the operating system, common Linux distributions like Ubuntu or Debian work well.
You'll also need a current Node.js LTS version (18.17.0 or higher) and npm as your package manager.
Conclusion: Which Option Is Right for You?
Whether you prefer to set up n8n yourself on a VPS or use Hostinger's one-click installation depends on your experience, available time, and goals.
If you like having full control, want to understand the details, and aren't afraid of the command line, a manual installation is the best choice. It lets you control every aspect of your system yourself. You decide everything from the operating system to service configuration and custom optimizations.
If you want to get started as quickly as possible without spending time on server administration basics, the one-click installation is the better path. This option is ideal for beginners or situations where you would like to implement your automations right away.

Neither method is inherently better. They simply serve different needs. Either way, you get a powerful tool to automate your recurring tasks. And you get the peace of mind that your self-hosted data stays under your control.