All of those wonderful pictures of your big day or event...gone! Whether from your wedding, graduation, or that unforgettable vacation you can't stop talking about, losing your treasured snapshots is a major blow. Just as in any other situation where it feels like the world is caving in around you, keep one thing in mind: Don't Panic!
This is because chances are good that you'll actually be able to restore the photos you've 'lost'. In this article, we'll show you how to go about this systematically, and walk you through each step, sharing some hints and tips for preventing such a scenario from repeating in the future.


Your Chances of Successful Data Recovery
Your chances of success are highest when you've just recently lost the pictures, whether through your own inadvertent action, or that of a program. The same holds true if a data storage device has undergone a quick format.
The longer back the file(s) were lost, the more difficult it is to recover them since they might have already been overwritten. In the event that you've shredded a particular file (such as with an antivirus program), it won't be possible to recover your pictures since they've already been overwritten multiple times.
Should your computer or laptop no longer start on its own, you can get it up and running with your system's emergency recovery tools. After that, try to either repair your operating system or manually copy the images to a different data storage device (supposing that you have one). If you don't, you'll have to use what's available on your system's rescue disk or partition.
Data recovery becomes more complicated when your computer or smartphone has fallen prey to malware. These can be removed or neutralized, but there's no guarantee that your device won't be impacted down the road. Reinstalling your operating system or loading a system backup are the best and most surefire ways to head off adverse consequences.
Rounding things out, if your system has suffered damage to its hardware, specialists can help, however, they're often pricey.
Options for Recovering Photos
First, try to restore your photos using your system's tools and resources.
Manual Backups
Did you save any copies of your pictures somewhere else? A USB stick, external hard drive, or in the cloud? If so, congratulations, your images aren't lost!
Recycle Bin
Windows, Linux, Mac, Android & Co. all have a virtual recycling bin. Whenever you delete a file manually, it winds up here. This handy app is well-named too, since, more often than not, you'll find what you deleted waiting for you. Should your 'lost' pictures be here, all you have to do is restore them to their previous location. Whether on Windows, Linux, or macOS, right-click on the files and select Restore or Put Back.
On Android devices, go to Google's Gallery app, select Library from the bottom menu, and then Bin on the top right.

Google's Photo Gallery features a bin where deleted files are temporarily stored.
Now, you can see any photos that you might have deleted by accident. Should you have backed up the deleted photos to the cloud, they'll be automatically removed after 60 days. Images that weren't previously backed up to the cloud are only kept for 30 days before they're gone forever.
Select the photos you'd like to save and then click on the Restore button at the bottom. A pop-up may open, in which the app asks whether you'd really like to restore the photos to their original location from the recycle bin. Confirm this by tapping on Restore and the image(s) will be back in the gallery.
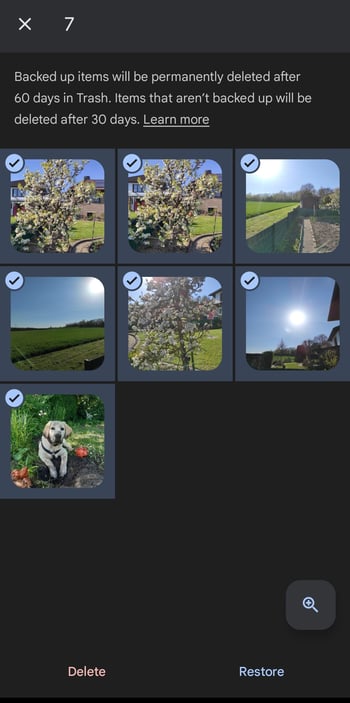
Pick which photos you'd like to restore.
Hint: Android's Gallery app also features a recycling bin.
Internal Windows Solutions
If you use Windows, you likely have File History and/or Recovery enabled. Should this be the case, either method can be used to create secure backups of your files, including your photos.
File History
Supposing that you've activated File History on Windows, you might be able to recover deleted pictures. This is only the case, however, if they were in a Windows library or on your desktop.
In the following example, the Stock Photos folder was deleted from the Images library. Click on the Windows search bar and type file history, followed by enter. Then click on Restore personal files.
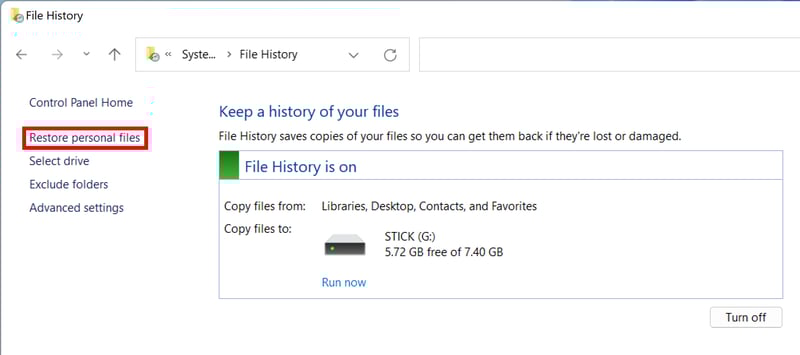
File History is a recovery feature that comes with Windows.
A pop-up will open, showing the File History landing page. There, you're given an overview of all folders, libraries, and favorites that are backed up.
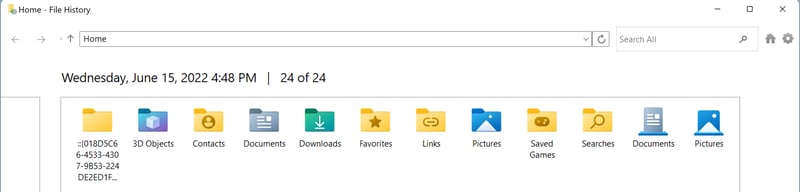
On the File History landing page, Windows shows you all folders and files that are backed up.
Returning to our example, we clicked on the arrow at the bottom of the page to see whether the folder, Stock Photos, was among those for which history had been saved. The further back a file or folder was deleted, the longer you'll have to look for it.
We opened the Images library, selected the Stock Photos folder, and clicked on the green circular arrow at the bottom. Now, the pictures have been restored.
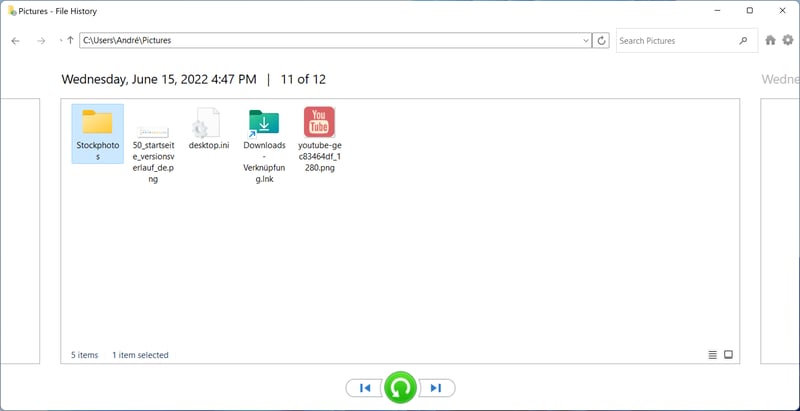
Look through the different versions of your files and folders by clicking on the arrows at the bottom of the interface.
Previous Versions
Previous versions of folders and files for which backups were made at various points in time can be restored. Of course, this only works when a folder or file has not been deleted in its entirety. Should they have been deleted, you can restore them using File History.
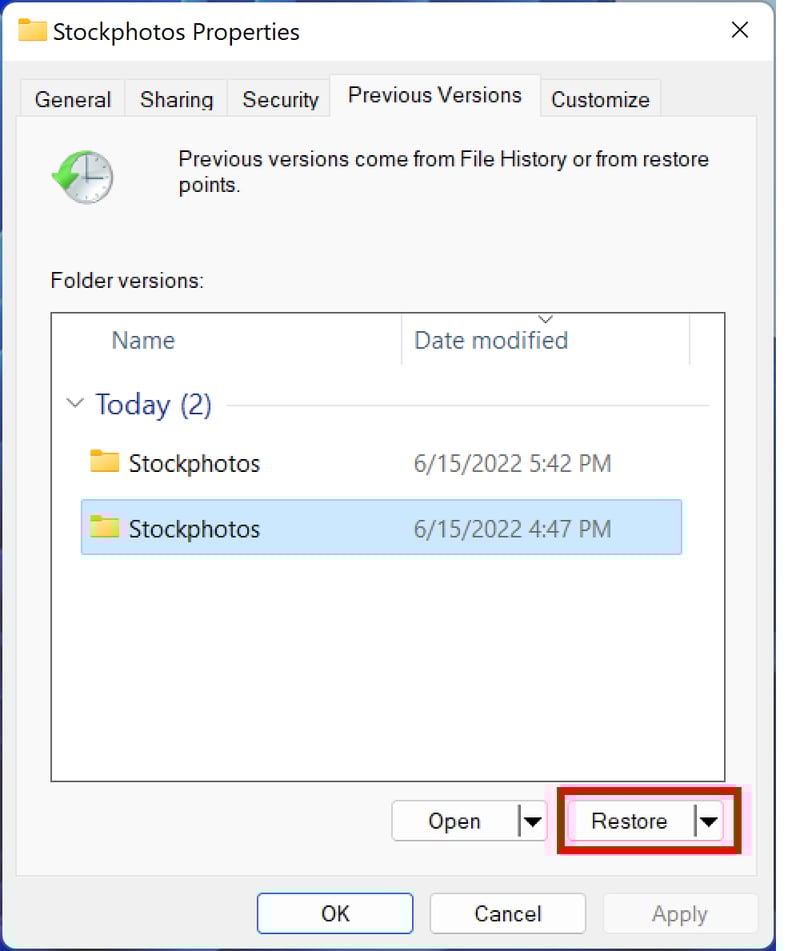
In order to access a previous version of the Stock Photo folder, pursuant to our overall goal to restore it, we right-clicked on it. In Windows 11, look for the Show Further Options menu.
A submenu should now open in which we right-clicked on the Previous Versions tab. In the pop-up that appears, you can select from all the different versions and see the various backups of the folder. We then selected the version of the folder we wanted, and on Restore. If you'd like to be extra cautious and want to select where the folder should be restored, click on the drop-down menu and specify through the Restore In option.
Restore an earlier version of a particular folder.
Android and iOS Apps: Not Recommended
There are lots of apps for Android and iOS devices that claim to be able to help you restore images or pictures. However, for a number of reasons, we generally advise against using these.
Usually, it's better to use recovery software that's running on another end device. This prevents data from being overwritten when installing the app or restoring files and folders.
Of the few data recovery apps that work, most show all of the pictures they found, not only those that were deleted. As such, you'll have to sift through everything on your phone or device, without being able to filter out irrelevant results.
Another issue is that many recovery apps are unreliable. They might not work well (or at all), and/or bombard you with ads. Others will only help recover your files if you make an in-app purchase (which can be expensive). We advise consulting the reviews of any app you intend to download in the Apple and Google app stores - they speak volumes.
But what should you do if you want to recover images on your Android or iOS device that aren't in the bin or saved on the cloud? We recommend these tools:
Our Top 3 Tools for Recovering Your Pictures
In case you never backed up your files, don't worry. There exist special programs that help to recover images. Below, we'll introduce you to three tools that can be used at no cost.
Recuva and EaseUS Data Recovery Wizard Free are all-arounders that might save the day, whereas TestDisk is specifically for repairing your operating system. It comes with PhotoRec, a sub-component that was designed for restoring deleted pictures.
PhotoRec
TestDisk is an open-source tool for 32 and 64-bit Dos, Windows, Linux, and Mac systems. It can be used to repair partition tables, create a new NTFS bootloader, or recover lost files - even from wiped partitions.
PhotoRec is one of TestDisk's sub-programs, specifically designed to help recover lost images. In addition to the usual file extensions that graphics and photos have (PNG, JPG, GIF, etc.), it also recognizes file formats used by digital camera producers.
The program works via prompt, however, Windows users can take advantage of qPhotoRec, its graphic user interface.

TestDisk is available at no cost.
If you're a Windows user, download the Zip file, ideally on a second computer or laptop that hasn't lost any data. Once the download is complete, unzip the file to a folder on a USB stick.
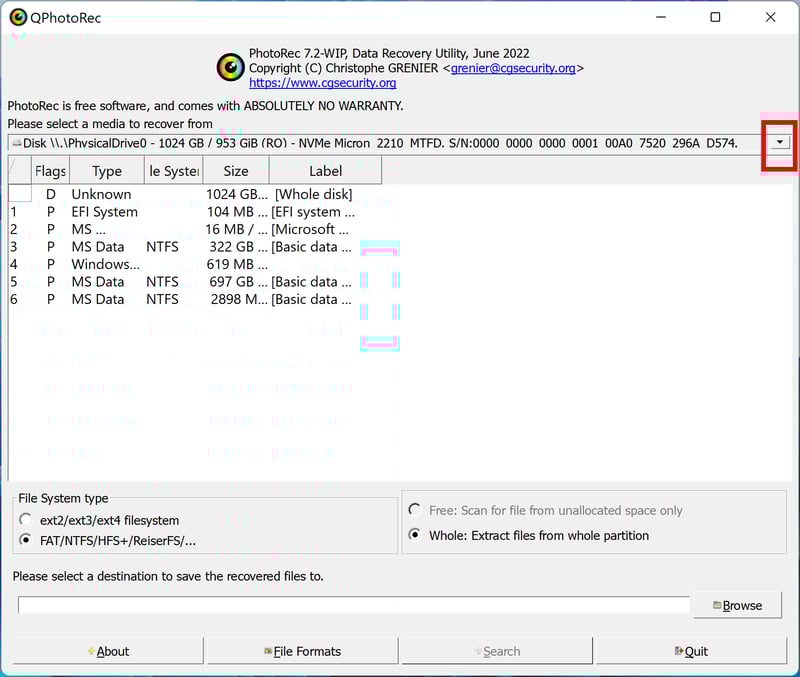
Open the folder, and start the program by double-clicking on qphotorec_win.exe. Look for the drop-down menu in the upper right and select the drive on which you'd like to recover your photos.
qPhotoRec's user interface.
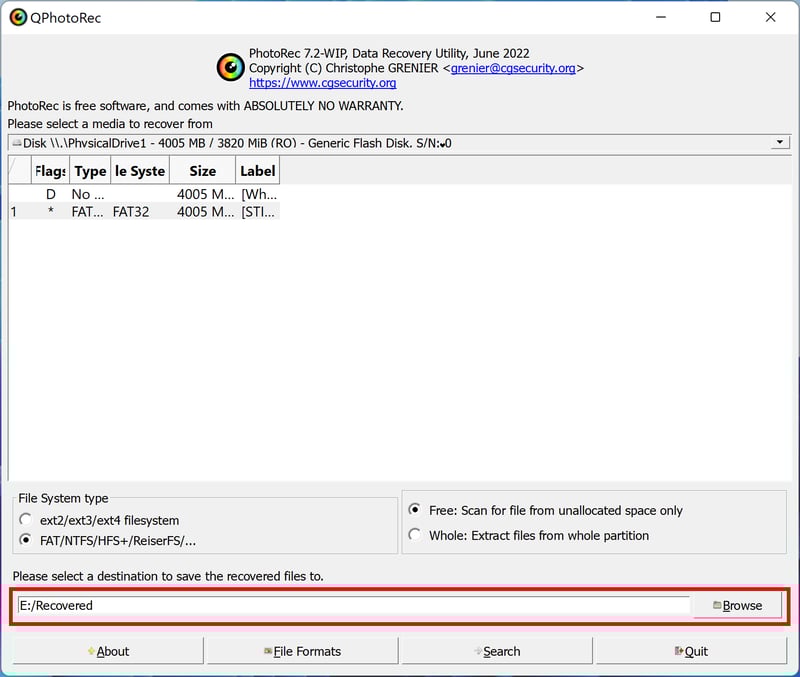
Click on Browse in the window that opens in order to specify where the recovered photos should be saved. For this, select a different data storage device that doesn't have any pictures you'd like to restore.
Take care that no special characters are in the folder path. Otherwise, PhotoRec will halt the recovery process with an error notification.
Select a place to save the recovered photos.
PhotoRec will now begin looking for lots of different file formats commonly used by pictures. In case you'd like to widen the search's scope, click on the File Formats button at the bottom of the window.
After this, a pop-up will open. Click on Reset and choose the file formats that the program should search for. The more precise you are, the faster the search will be.

Specify which file types you'd like to search for.
In case you're only interested in recovering lost, standard format images, selecting JPG and PNG should be more than enough. However, you can also look for special file formats, like those for raw data (RAW).
Once you're satisfied, confirm your decision by clicking on OK.
Now, to start looking, click on Search. Keep in mind that PhotoRec automatically restores all deleted files of the specified formats that it finds.

Recovery of deleted JPG and PNG files with QPhotoRec.
Now, go to the folder in Windows Explorer where your recovered files are to be saved. In our example, this is E:\Recovered. Open the folder that PhotoRec created, and you'll be able to review all of the files it recovered:
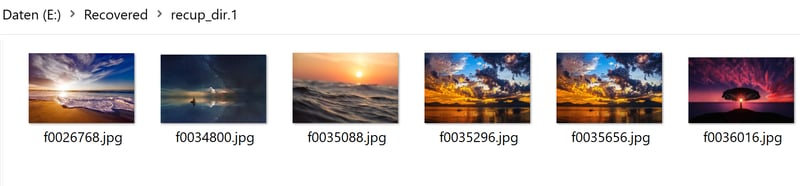
The lost stock photos have been restored, including a duplicate.
Recuva
Recuva comes from Piriform, a renowned software company that you might know as the developer of CCleaner. Its photo recovery tool can find JPG, PNG, GIF, BMP, RAW, and plenty of other file formats.
The program is completely free to use, however, a premium Pro version does exist. Either can be downloaded here for 32- and 64-Bit Windows systems. A free, portable version of the program is offered at PortableApps.com.
Once you've decided which version you're going to install and have downloaded the installation file, the setup assistant will walk you through the rest of the process:
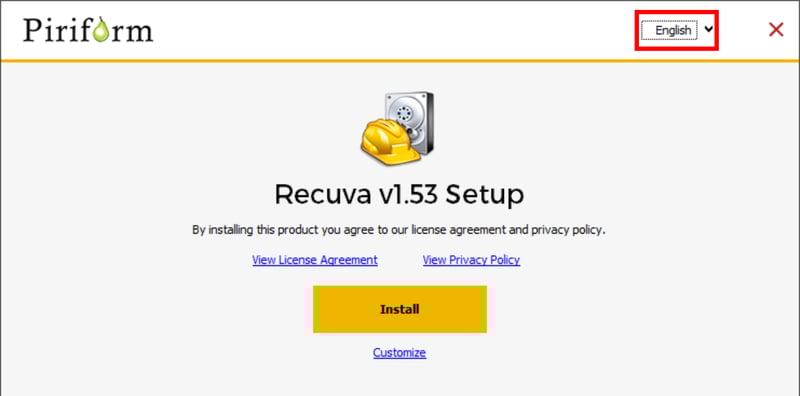
Recuva's default installation language is English, however, you can change this through the dropdown menu in the setup assistant.
Should you have opted for the program's portable version, the Recuva Wizard will start.
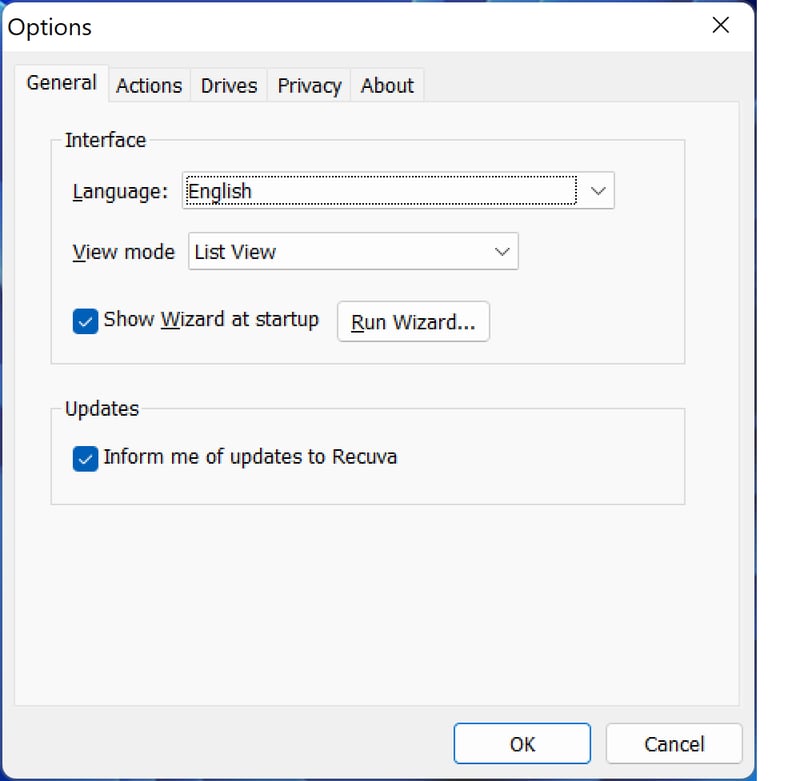
How to change the language in Recuva Portable.
Hint: By default, Recuva collects user data. Should you want to turn this off, head over to the Privacy tab in the program's options. Once there, uncheck the box next to Help improve our other apps by sending usage data to CCleaner.
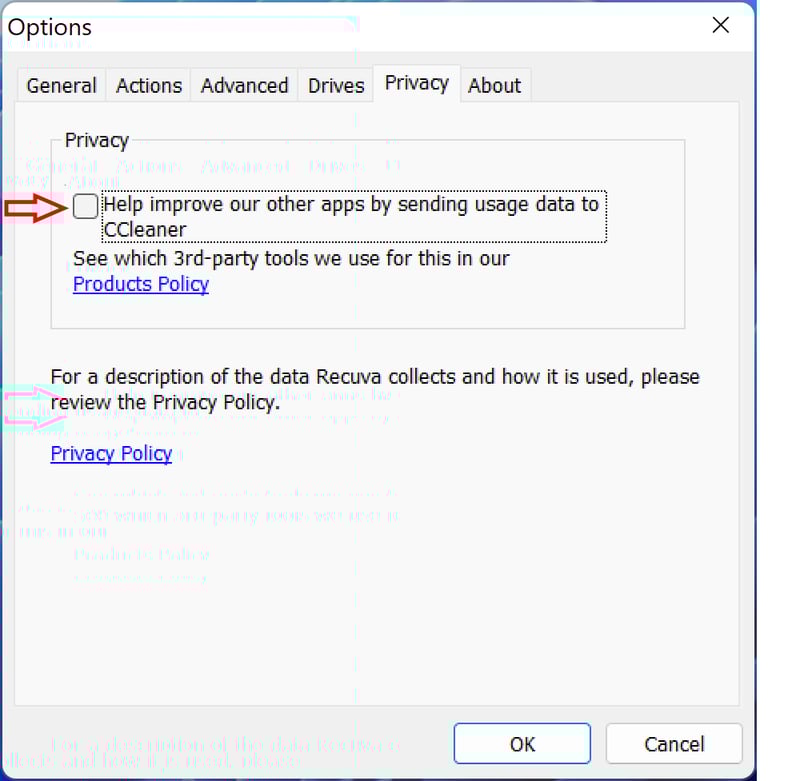
You can enhance your privacy by turning off Recuva's automatic sharing of usage data with its developer.
Start Recuva and use the program assistant. Click on Next and in the following window select Pictures from among the file types. Then, click on Next at the bottom.
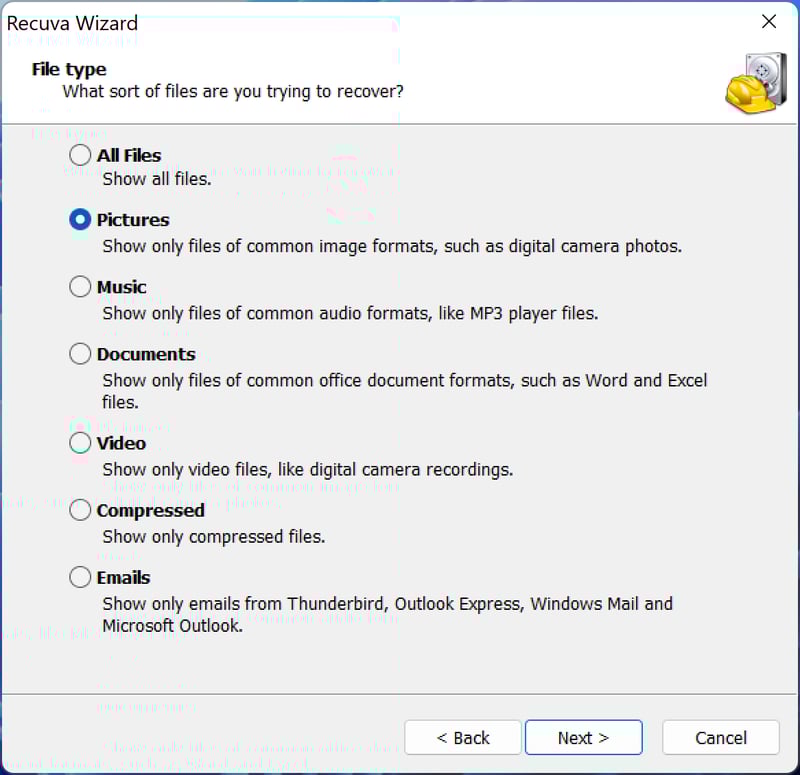
Now, select the type of files (pictures) you'd like the program to search for.
In the following window, choose where to look for the images. If you don't have a preference, it's fine to leave the I don't know option selected. Just keep in mind that the search can take a while, depending on how large your data storage device is.
The quickest option is to specify a particular location, such as:
On my media card or iPod (USB sticks, external hard drives, etc.)
In My Documents (i.e. My Pictures)
In the Recycle Bin
In a specific location (such as C:\ for Windows)
On a CD/DVD
In the example below, all contents of our Stock Photos folder on a USB stick were deleted. Generally speaking, files and folders deleted from a USB stick do not go to your Recycle Bin, but are simply removed from the portable storage device.
To search a flash drive in Recuva, you can either select the On my media card or iPod or In a specific location option.
Of course, the latter option will be the fastest, since it's the most precise. Click on In a specific location and select the USB stick. For our example, this was Drive G:\.
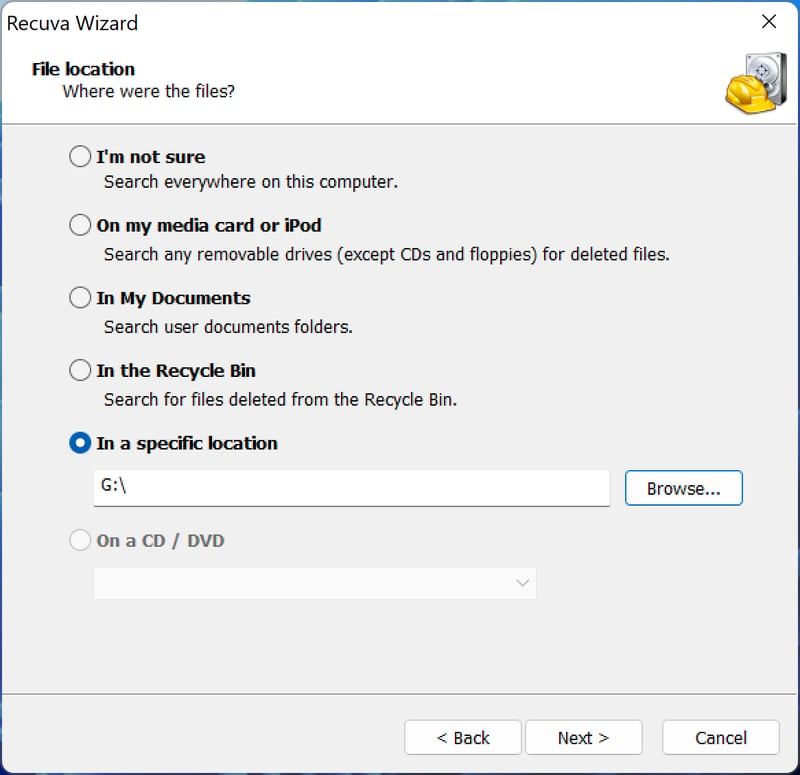
Specify the location where you've lost photos or would like to recover them from.
Click on Next. After clicking on the Start button that appears, Recuva will commence its quick search of the location you've chosen.
Start Recuva's fast search.
As can be seen in our example below, Recuva might not be able to immediately find the deleted pictures. The images are still missing:
Unfortunately, our search wasn't successful.
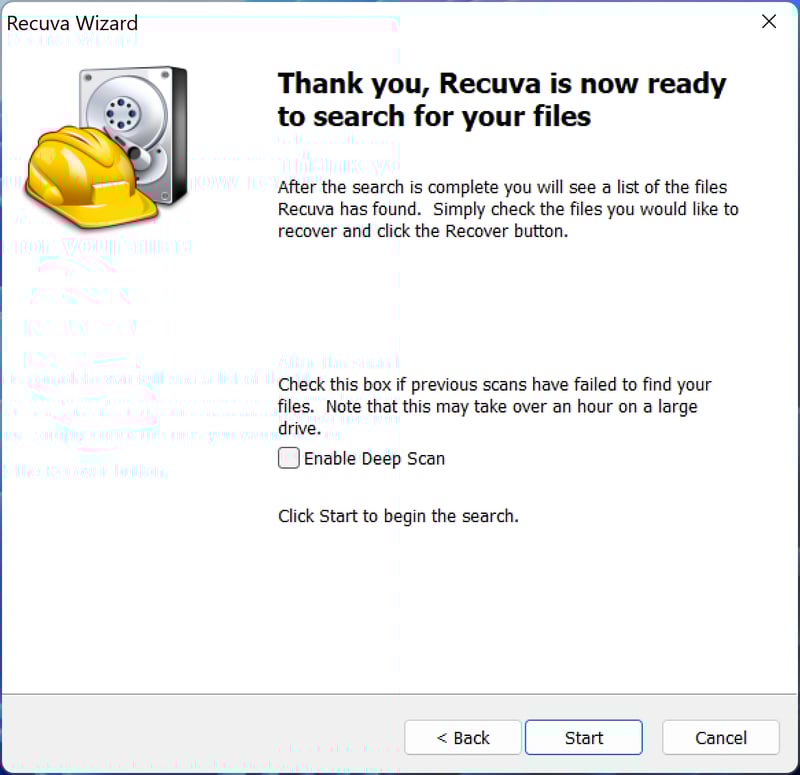
In this case, close Recuva and restart the program again with the assistant. Repeat all of the steps as you did before, with one exception: Before clicking on Start, check the box next to Enable Deep Scan. After that, click on the Start button.
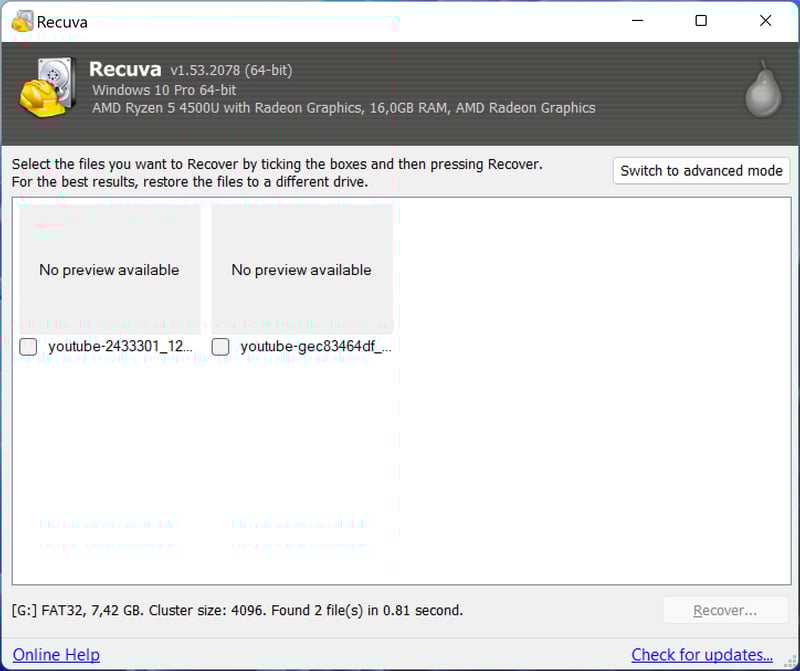
This search will take noticeably longer than the previous one, however, Recuva will find many more files. For us, this did the trick: The deleted photos were found and able to be restored.
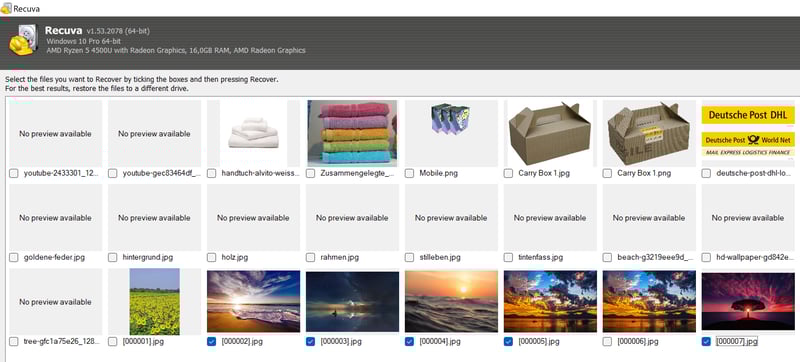
Our Deep Scan was successful.
To restore these, select the pictures you want to bring back and click on the Recover button in the bottom right. A pop-up window will open in which you can specify where the images should be saved to. Confirm your selection by clicking on OK and within a matter of moments, your recovered pictures will be there.
Our tip: It's wise to save recovered photos or files to a different data storage device than the one on which they were lost. Otherwise, you might inadvertently overwrite certain files that you actually wanted to save. Recovering overwritten files is difficult, if not impossible.
EaseUS Data Recovery Wizard Free Edition
As its name suggests, EaseUS Data Recovery Wizard Free won't cost you a nickel. Premium Pro and portable versions of the software are available, and you can test the latter at no charge.
The Free Edition allows up to 500 MB of files to be recovered. If you click on the Share button and promote the product on your social media, this limit quadruples to 2 GB.
Below, we've provided download links for all major operating systems:
Data Recovery Wizard is available for iOS devices, as well as macOS and Windows. The Android version runs on Android end devices as well as Windows computers. For reasons already mentioned, we recommend the last option if using either an Android or Windows device or computer.
Upon starting the program after installation, you'll be provided an overview of your computer's internal and external drives as well as its partitions.
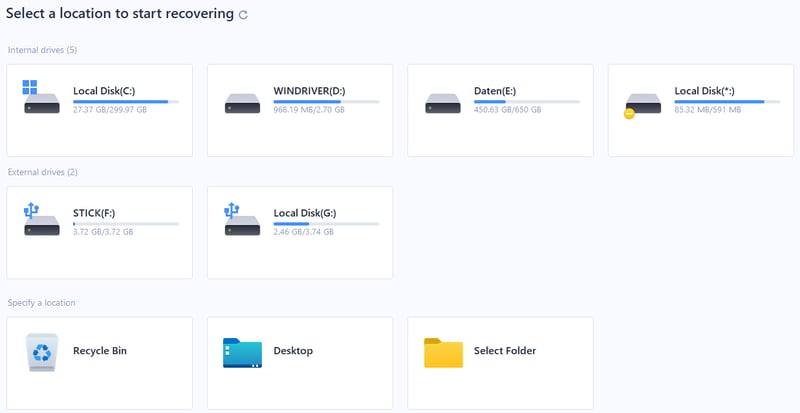
EaseUS's user interface provides an overview of all drives and partitions.
Next, specify the drive or partition where you'd like to hunt for deleted pictures. Once you've made your choice, click on Scan to start looking.
The quick scan doesn't take an inordinate amount of time. After this, a deep scan automatically starts which can take a while. Think of this extra investment of time as boosting the likelihood that the pictures or files you've lost can be recovered.
As noted above: The bigger the drive, device, or partition, the longer the scan will take to complete.
Once finished, you can view the results either by their original directory or file type.
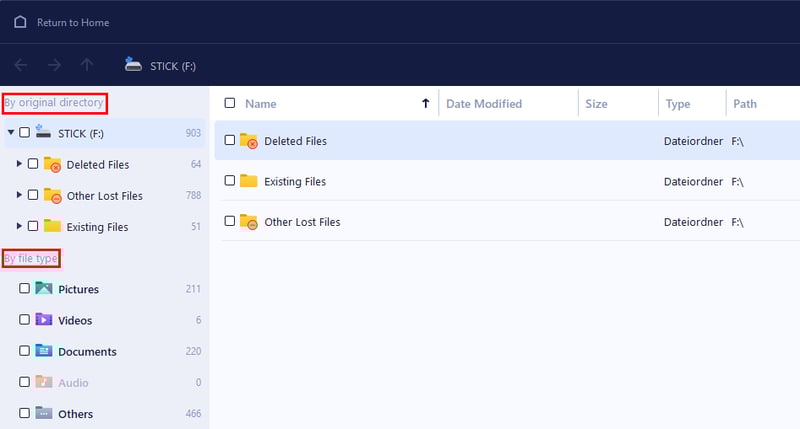
EaseUS displays search results in a clear way.
Viewing results according to their original directory makes it possible to see precisely which folders lost pictures or were entirely deleted. If looking for a specific image or group of pictures, it's best to browse through the results by file type.
In the below example, we again deleted our Stock Photos folder from our USB stick. EaseUS was able to locate the deleted folder as well as all of the images it contained:
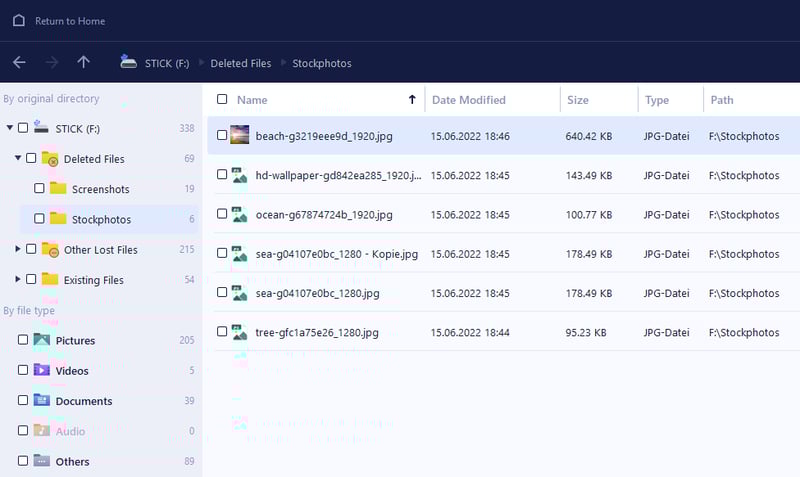
The deleted folder was found.
Next, select the folders you'd like to recover by checking the box next to them. Once finished, click on the green Recover button in the bottom right.
Now, a pop-up will open, asking you to specify where to save the recovered folder. Again, we recommend saving this folder to a different drive or storage device that hasn't suffered from any data loss.
Emergency and Rescue Toolkits
Emergency kits can help revive your computer, for example, if it fails to start correctly. These are stored on a boot-capable stick or DVD and temporarily loaded into your computer's memory upon starting. Rescue toolkits, on the other hand, are packages of tools used to recover lost files, including pictures.
SystemRescue
SystemRescue is based on Linux. The rescue toolkit includes lots of programs, such as PhotoRec, that are handy for all sorts of computer problems and issues.
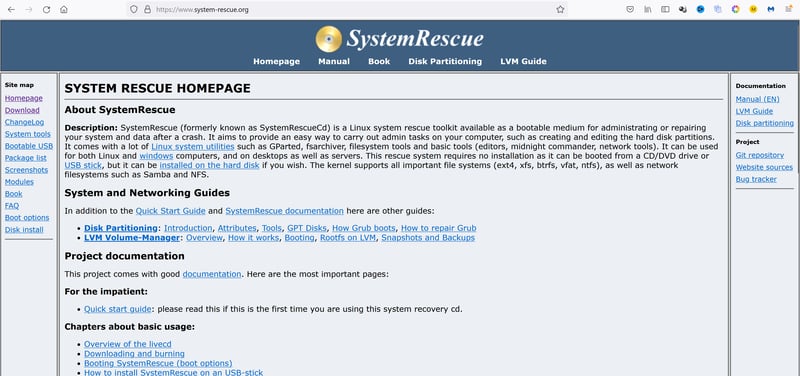
SystemRescue, a Linux-based rescue toolkit includes plenty of useful recovery aids.
The Best Measures Against Data Loss
One of the best ways to minimize data loss, such as that of pictures, is by performing regular backups. You could do this manually, but there's always the risk that you might forget a backup or put it off indefinitely.
For that reason, automatic backups are safer, since your computer performs them on its own, without you needing to do anything. As an alternative, you could save your pictures to the cloud, which is very practical for Android or iOS devices. Once again though, there's a risk that your account could be hacked and/or your pictures could fall into the wrong hands.
Whatever the case, we recommend creating a few backups of your important files. The more meaningful or valuable a picture or file is, the more steps you should take to ensure that it can't be compromised or deleted. The key is using multiple data storage devices, such as external hard drives, USB sticks, and/or DVDs.
This is where cloud solutions come into play since they prevent data loss owing to their redundancy. To see which cloud solutions, including those offered by Apple and Google, are best, have a look at our comparison of the 7 best cloud backup providers.

Modern operating systems also offer integrated solutions for creating automatic backups of your files and folders.
Windows
Windows comes with multiple backup programs, such as the aforementioned File History. This creates backup copies at regular intervals of your folders, pictures, and other files. You decide how often these take place, ranging from every 10 minutes to once per day.
Usually, backups are saved to an external data storage device, such as a stick or a hard drive. The more often backups are made, the more storage space you'll need. For that reason, it's important to ensure that your data storage device has enough capacity or that the file sizes don't get out of hand.
To activate File History, click on the Windows search (magnifying glass) and type file history. Specify which external storage device you'd like to save the backups on.
Take care that your pictures and other important files are in folders and directories that are backed up by Windows, such as My Pictures or My Documents.
Android and iOS
To back up your images on Android, open the Google Photos app. In the upper right of your device's screen, tap on Settings, and then on Photo Settings near the bottom of the pop-up window that opens.
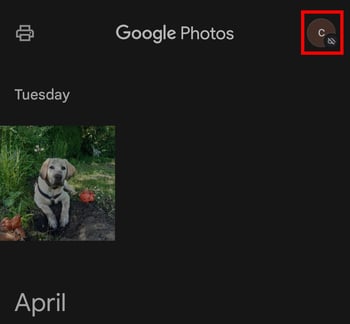
Open settings in Google Photos.
In the new menu that opens, tap on Back up and sync and toggle the switch on to backup your photos and videos to your Google Drive account.
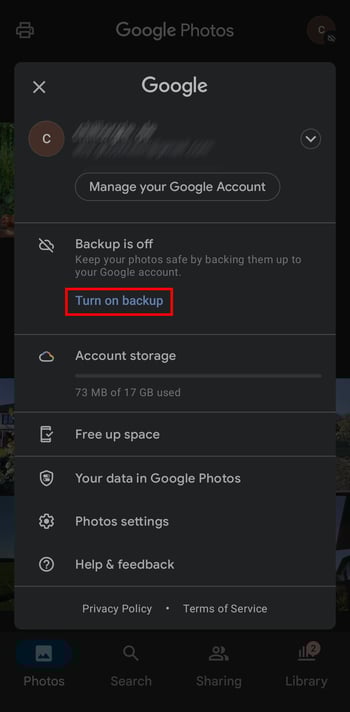
Toggle backups on in the settings section of the Google Photos app.
In the menu that opens, you'll be able to specify whether files should be uploaded to your Google account in their original size, or optimized.
Generally, pictures shouldn't be large than 200 MB and/or have a higher resolution than 150 megapixels. For videos, the size limit is 10 GB.
Tap on Confirm in order to activate backups of your photos and videos.
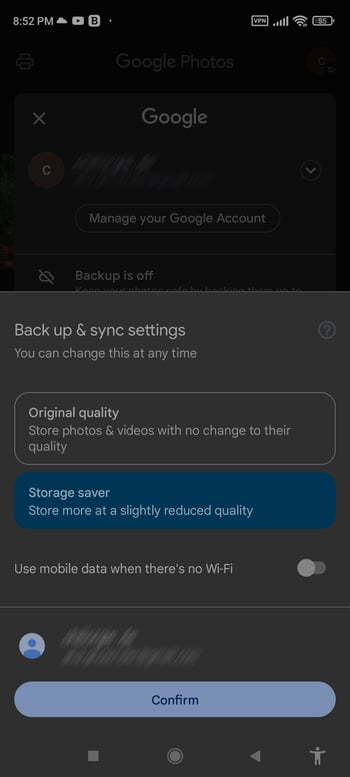
Confirm activation of Back up and sync.
We've provided further information in our EXPERTE.com article on Android backups.
In case you want to back up the pictures on your iPhone to iCloud, open settings on your device. Tap on iCloud, followed by your username, and then again on iCloud and Photos. Now, activate backups to iCloud.
Our EXPERTE.com article shows you in detail how to set up iPhone backups in just a few steps.
macOS
If you're using macOS, you can back up your files using Time Machine or by saving them to iCloud. Apple's support area provides information on how exactly to do this.
Conclusion
All it takes is a second to lose access to your cherished pictures. Thankfully, there are a variety of tools and rescue kits that can save the day, allowing you to restore images and files presumed to be gone forever.
However, there's no guarantee that you'll always be lucky. For that reason, it's smart to regularly back up important folders and files to different storage devices and, if possible, the cloud. Only in this way can you make sure that your pictures will always be available.
FAQs
Chances are good, so long as the files haven't been overwritten. You can usually restore photos from backups or the recycling bin, as well as with special data recovery programs.
There are lots of solutions. We recommend PhotoRec, Recuva, and EaseUS Data Recovery Wizard Free, all of which are reliable data recovery tools.
PhotoRec and Recuva are free and can be used without limitations. EaseUS Data Recovery Wizard Free restricts the size of files that can be restored.
To do this, you'll need to get a rescue kit for your computer, capable of booting either from a DVD or USB stick. These offer a variety of different tools that can be used to restore pictures and other lost files.
Regularly back up important files and folders to various data storage devices (USB sticks, external hard drives, etc.). Another good idea is to create cloud backups of your files, where the risk of data loss is essentially non-existent.