It's never been easier to do business online. To make sure that you sell as professionally as possible, you'll need to offer your customers or clients a positive shopping experience in your own online store. Ecommerce platforms like Shopify make setting one up simple.
But how to get your store off the drawing board? We'll show you how to set up an online store with Shopify in 10 easy steps and let you know what to pay attention to.


10 Steps to Your Own Shopify Store

Before your Shopify store can welcome its first visitor, you'll need to configure a few settings. We've broken each of these 10 important steps down, from planning to grand opening.
Here they are:
Planning and Preparation
Although luck is important in any business venture, ecommerce success is rarely a coincidence. Before opening your digital store, ask yourself these key questions: What do I want to sell and why do I think these products are marketable?
If you already know what you want to sell and why, you can skip this step. However, if you're just firming up your idea, take these factors into consideration:
Market research and competitor analysis
You're more likely to complete sales if demand for the products you're offering either isn't satisfied or only partially met by the market. With that in mind, take some time to think about which products the market wants. There are several ways to do this:You can use Google Trends to see what people are currently searching for.
Consult studies and surveys, such as those on Statista, to gauge a market's size or understand the potential of certain products better.
Through competitor analysis, you can find out which products your competitors offer and what customers like or dislike about them.
Target group analysis
Another important factor is understanding who you are selling to. By identifying and understanding your target group, you can better predict their wants and desires, offering what truly appeals to them.Find product or service ideas
Based on the insights you've gained, you can generate service or product ideas. Brainstorming can help you put your finger on relevant ideas and limit your selection. Once you've settled on a particular product or service, evaluate its chances of success using your knowledge about your market and/or target group.
Are you still looking for the right product or service for your Shopify store? If so, this article might be helpful:

Create a Shopify Account
Let's move away from the drawing board and towards the keyboard: The first thing you'll need is a Shopify account, which only takes a few minutes to set up. The platform even offers a free trial, so you can try it before committing to a paid subscription.
Step 1: Go to Shopify's website* and click on the black "Start free trial" button.

Shopify offers a free trial.
Step 2: Next, Shopify asks a few questions about your project, your experience level, and your needs. Click through the steps. To finish registration, you'll need to generate a Shopify ID, either through email or your Apple, Facebook, or Google login.
Convenient: It isn't necessary to input payment information to start your free trial. This means you won't have to worry about winding up on the wrong side of a subscription trap.
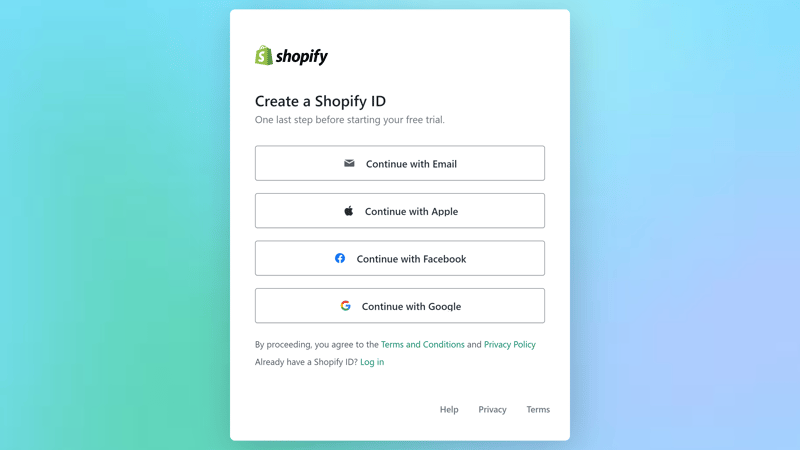
There are different options for registering a Shopify account.
Shopify will now create your account, after which you'll be taken to the platform's dashboard. This is where you'll actually put your online store together. The platform offers beginners a helping hand with a setup guide, showing you how to create a fully-functional online store in 10 steps. You'll start with product management.
Add Products
Your products or services are what make your online store a business. Once you've added them in the product management area, you can showcase them anywhere in your online store. For that reason, it's important to carefully and methodically add your good and services to Shopify - investing the time now will pay off later.
Step 1: Click on "Add product", either in the setup guide or the "Products" menu.
Step 2: Input all important information about your product, such as its name, description, and photos in the window that opens.
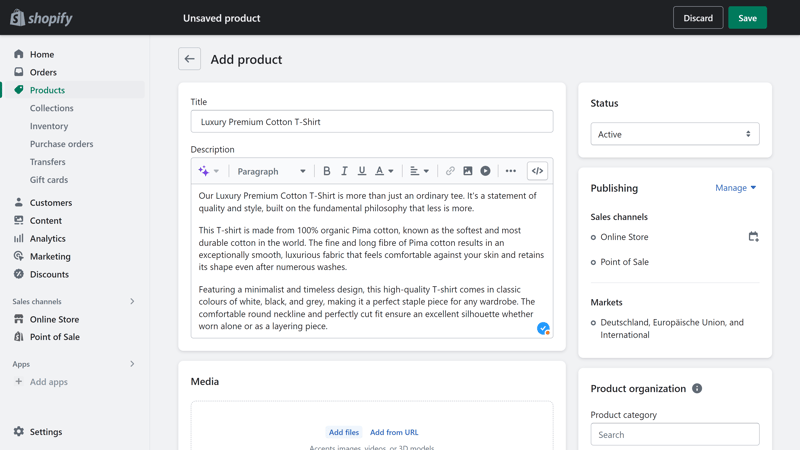
Add the first product to your Shopify store.
Step 3: Specify a price and click on the "Save" button. After this, your product has been created.
Step 4 (optional): It's possible to modify a number of other settings as well. You can include the product in a category (collection) or add tags to it. Beyond that, you're able to input a comparison price, so that the product will be shown as discounted or marked down. There are also inventory and delivery settings.
Step 5 (optional): The "variant" area is particularly important since this is where you can add variations of similar products. For example, "color" and "size" variants allow you to add multiple options for a single product that will automatically be displayed to your customers. It's possible to specify the price and availability for each individual variant.
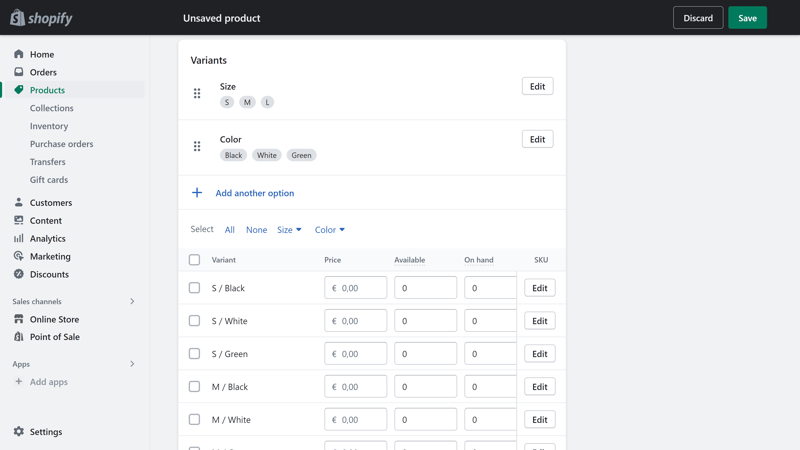
Create variations of each product in your store so that you can offer different sizes or colors without having to input each item individually.
Adding products to your online store is one of the most time-consuming aspects of setting up a digital business. However, your hard work will pay off, since the more products you add at the beginning, the easier it is to design the store later on. Take your time in stocking your digital shelves.
Customize Your Digital Storefront
For the time being, your products are only in your Shopify backend. To make them available to prospective customers, you'll need to showcase them on your digital sales floor. To design this, Shopify features an integrated website builder.
Step 1: Open the shop builder by clicking on "Online Store" in the main menu to the left (under "Sales Channels").
Step 2: Select a suitable Shopify theme from the Theme Library. These design templates provide the walls, doors, windows, and interior for your store - all you have to do is customize them to your needs.
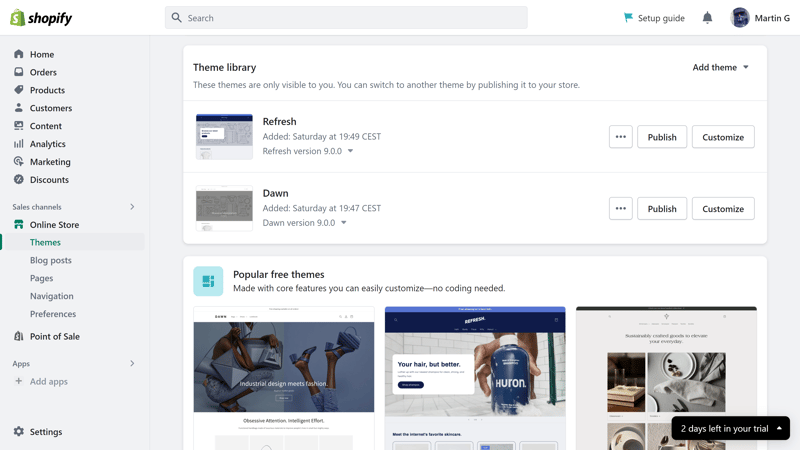
Shopify offers more than 80 themes to choose from.
Step 3: After you've selected a theme, click on "Customize" to adjust it to your preferences. At this point, you'll be in the actual website builder where you can visually design your store.
Step 4: Now it's up to you: Use the Shopify editor's tools to express your creativity and customize your digital storefront's appearance to your exact preferences.
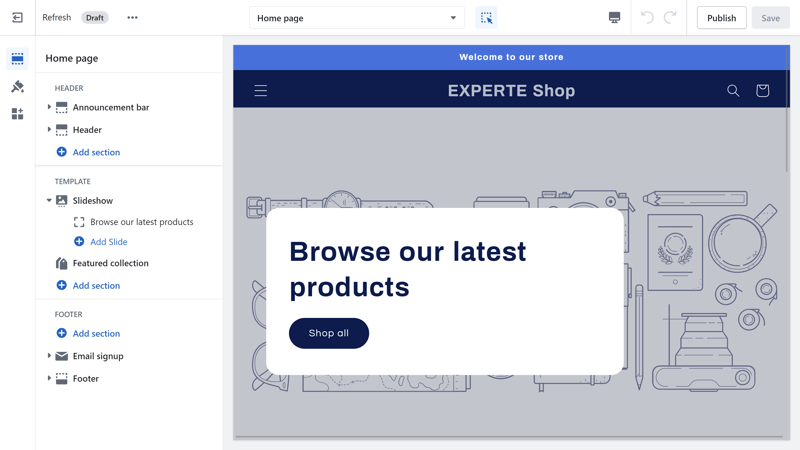
Shopify's store builder is easy and intuitive for beginners lacking design or programming knowledge.
Shopify's store editor is fairly intuitive, however, there are a few trickier aspects. Here's a crash course:
Off to the left, you can alternate between three different areas: Sections, Theme Settings, and App Embeds.
In the "Sections" area, you'll define a page's structure. This includes the header, body, and footer, as well as all of the accompanying content. Every theme includes different default sections, ranging from "Image with Text" to "Featured Category" to "Slideshow".
The "Theme Settings" area is where you'll customize your website's layout and appearance, choosing between different color schemes, buttons, or adding a logo.
In the "App Embeds" area, you can install apps that give your store extra features or enhance existing ones. These include product review apps, wishlists, and loyalty programs.
You won't be able to configure page and site menus directly in the editor, but rather, the "Online Store" area of your Shopify admin dashboard. Go to Settings > Navigation to not only adjust your store's menus but also specify important SEO information for them, such as their titles and meta descriptions.
Legal Considerations
Shopify is active around the world, however, the legal framework for doing business varies from country to country. Depending on where your shop is located, you'll need to make sure that you adhere to all local laws and regulations. Here are a few tips:
Policies
Online stores should have a few, standard, boilerplate policy texts. These don't only give your business a degree of transparency and credibility, but also protect you should any legal disputes ever arise with your customers.
Delivery and return policies, a data privacy policy, and conditions or terms of use are all important. To view and edit your store's policies, go to Settings > Legal. Shopify helps by automatically generating templates that you can customize to make applicable to your business.
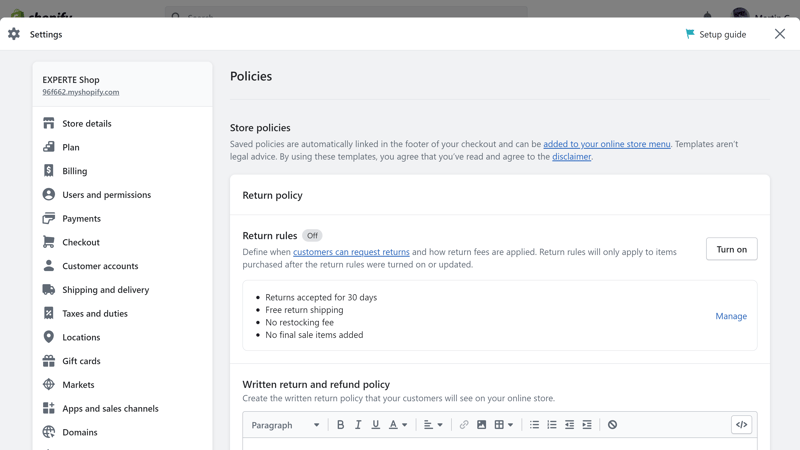
Make sure all important policies are applicable to your business before launching your online store.
GDPR Compliance
Are you doing business in the European Union? If so, you'll need to adhere to the General Data Protection Regulation (GDPR). For example, you can only use a customer's data if they've given explicit consent for you to do so. To make sure that your online store conforms to this, go to Sales Channels > Online Store > Preferences > Customer Privacy and click on the button next to "Collected before consent".
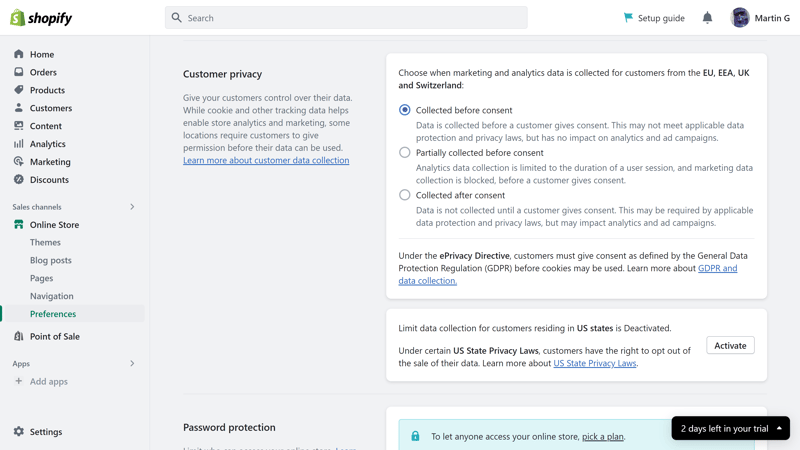
EU regulations don't permit websites or businesses to collect and store user data without their consent.
Laws are tricky, however, Shopify's settings and features go far in making sure that your online store remains on the right side of them. If you're uncertain whether your store fulfills all of the legal requirements wherever you intend to do business, we recommend consulting a lawyer or a local service that specializes in ecommerce.
Specify Payment Methods
Although you've designed your digital storefront and stocked its shelves with merchandise, customers can't complete purchases until you add a payment method. Let's do something about that.
To accept payments, head to Settings > Payments and specify a payment method. The easiest option is Shopify's payment gateway (Shopify Payments). This supports all common payment methods. Click on the "Activate Shopify Payments" button and follow the instructions.
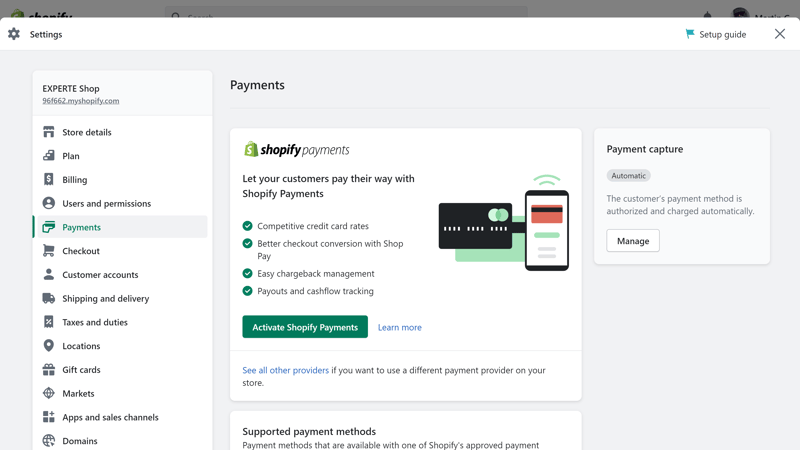
Shopify Payments is the ecommerce platform's dedicated payment gateway.
Shopify Payments isn't the only option: By clicking on "Add payment methods", you can configure other payment gateways as well.
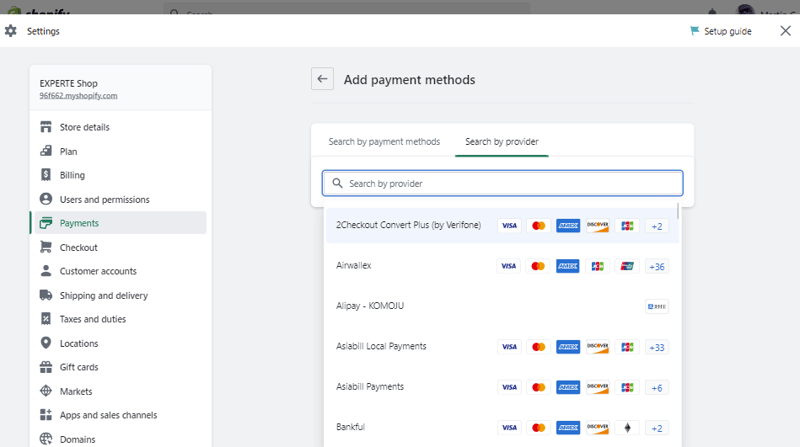
Shopify supports a number of other payment gateways as well.
Configure Delivery Options
Unlike in a brick-and-mortar store, digital boutiques (generally) need to send the ordered product to its customer. To set up delivery, go to Settings > Shipping and delivery. As might be expected by now, Shopify offers a wide range of options, which, for the sake of convenience, are broken down into four methods:
Flat-rate shipping costs
Shipping costs based on order value
Shipping costs based on weight
Shipping through a delivery service
Follow these steps to enable one or more of the above methods:
Step 1: Head to Settings > Shipping and delivery and click on "Manage" in the "General shipping rates" area.
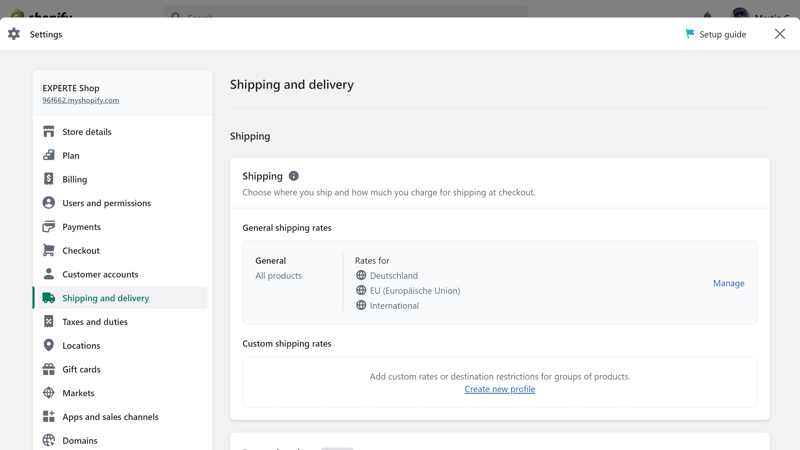
Shopify allows users to specify different delivery regions.
Step 2: In the next menu, you can manage your store's location and configure different delivery zones. It's possible to specify shipping fees for each region. To add a new zone, click on "Create zone".
Step 3: Add a new rate for a delivery zone by clicking on the "Add rate" button.

It's possible to set a rate for each delivery zone.
Step 4: You'll now be able to further define the kind of shipping offered. To offer flat-rate shipping, select from rates by clicking on the "Rate name" dropdown menu, and inputting a price. If you'd prefer your delivery costs to be weight or value-based, click on "Add condition".
Step 5: Click on the green "Done" button in the bottom right to save your shipping option.
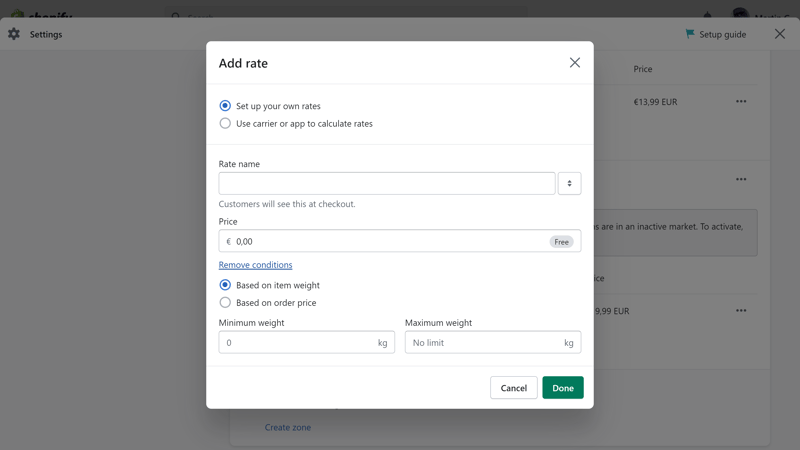
You can offer your customers flat-rate shipping or charge delivery costs based on their order's weight or value.
Of course, there are plenty of other options waiting for you in the delivery settings area: These include the ability to specify a delivery timeframe, package size, local pickup, and more.
Configure Tax Settings
As Benjamin Franklin famously said: "In this world, nothing can be said to be certain but death and taxes". The latter holds true to doing business on Shopify. For your customers, sales tax is important (depending on your jurisdiction), since you'll need to collect this and pay it to local authorities.
Shopify offers a range of different tax settings that automatically collect tax based on where your store is located. All the same, especially if you're doing business internationally, you'll also need to think about taxes and import duties in those jurisdictions and at least be familiar with them.
It's possible to modify the platform's default tax settings to conform to local laws and regulations.
Below, we'll walk you through the basics of configuring tax settings in Shopify:
Step 1: To review and modify your store's tax settings, go to Settings > Taxes and duties.
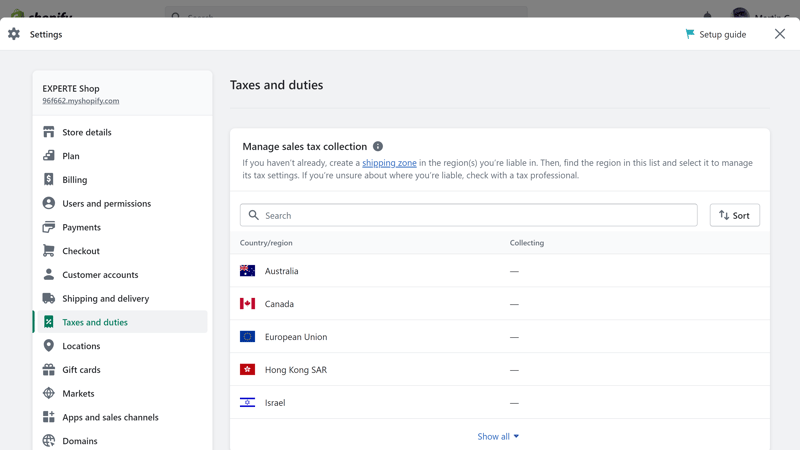
You'll also be able to adjust your tax and duty options in the settings menu.
Step 2: By default, the box next to "Include tax in prices" is checked. If you'd prefer to not charge sales tax on every sale, in order, for example, to exempt B2B sales, uncheck the box.
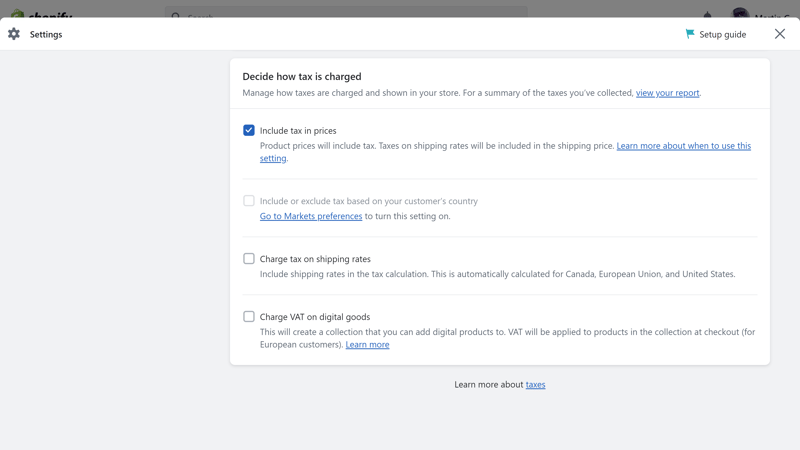
Uncheck the box if you'd prefer not to charge sales tax as a lump sum to all customers.
Step 3: Specify the country or region that you'd like to configure tax settings for.
Step 4: Next, click on the "Collect VAT" button to set up sales tax for countries in which your business has a tax obligation.
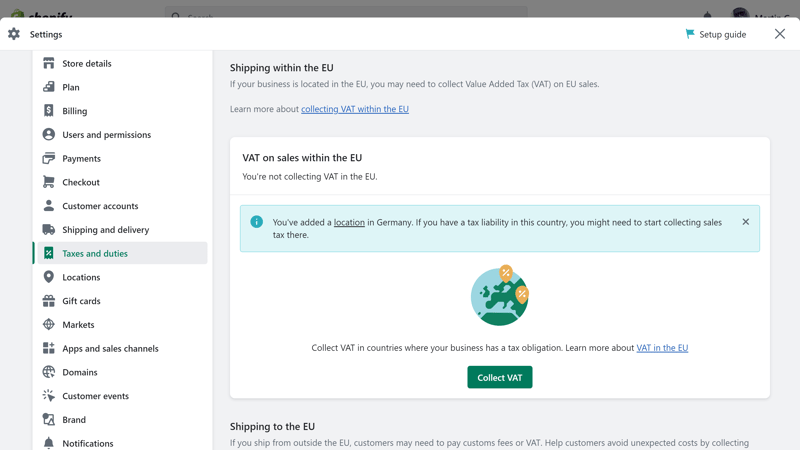
Click on the "Collect VAT" button.
Step 5: At this point, you'll need to select how you want to register your store for VAT. Options include One-Stop-Shop or country-specific registration. Alternatively, you can apply for a micro-business exemption.
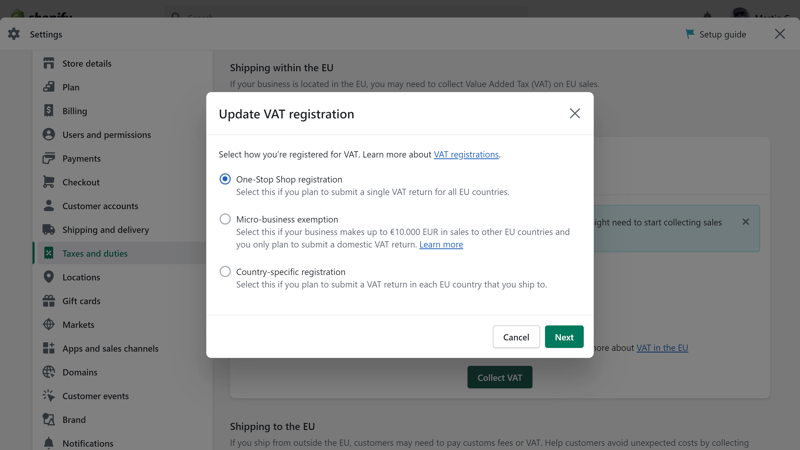
Choose how you want to register your business for VAT.
Specify Your Name and Domain
Digital stores don't only need a name, but also a suitable domain.
Naming your store is relatively easy: Go to Settings > Store details and provide information about your business's official name and address.
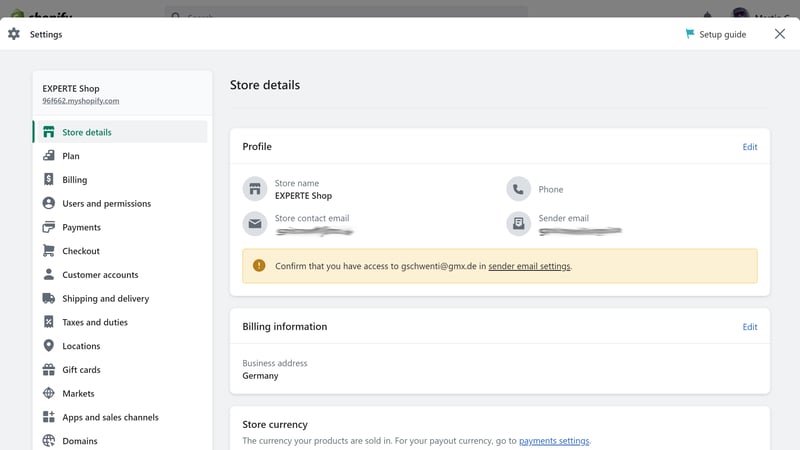
Give your online store a memorable name.
At least for doing business online, a domain (or digital address) is more important, since this is what your prospective customers will need to navigate to in order to make purchases. Shopify offers a convenient and direct way to register a domain in the Settings > Domains area.
Click "Buy new domain" (or "Connect existing domain", in case you already own one) and check whether your desired domain is available by entering it in the search bar. Should it be taken, you can contact its owner and try to buy it from them.
Everything you need to know about domains can be found in our guides below:

Open Your Online Store
Almost there: Once you're satisfied with your store's appearance and inventory, have configured its tax, shipping, and payment settings, and filled out all the necessary policy documents, it's time to open your digital doors.
Or not quite: Your online store has actually been "public" for quite a while, however, while testing it out, it remains password-protected. Only after you've purchased a Shopify subscription (and attached a domain), will you be able to open your store to the general public.
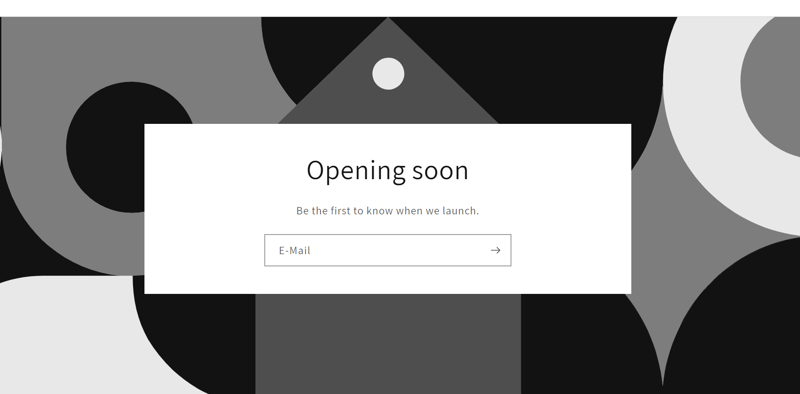
While testing your Shopify store, it remains password-protected.
Make a Test Order
Before that, Shopify recommends simulating an order or two to make sure that everything works as you intend it to. To do this, go to Settings > Payments and activate the "Bogus Gateway" for testing. After that, visit your online store, place an order, and check whether everything worked in Shopify's backend.
For a more detailed guide to test orders, be sure to check out Shopify's help center.
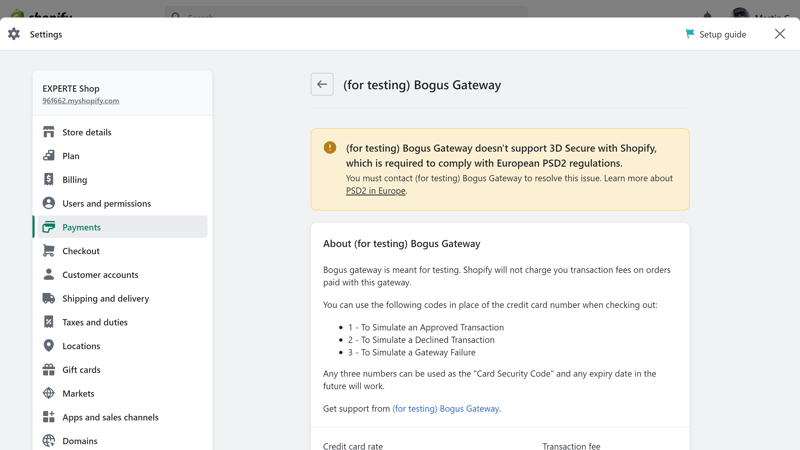
Place a test order in your Shopify store before going live by activating the Bogus Gateway.
An Online Store Is Never Closed or Complete
Congratulations - Your Shopify online store is now open for business! However, just like a regular brick-and-mortar shop, there's always something to do, even if you don't have to dust shelves or sweep the floor.
Have you configured your store's SEO page settings? This helps search engines funnel visitors to your pages and products, boosting your traffic and sales. What about tracking tools such as Google Analytics? With these, you'll gain valuable insights into what your business is doing right and its areas for improvement. Or, how about marketing strategies on Facebook, TikTok, Instagram, etc.?
A booming online store is never really complete or closed for business: It's a living and growing enterprise that changes over time. For that reason, we recommend getting familiar with all of Shopify's features and settings to maximize the platform's benefits and offer your customers the best online shopping experience possible.
Conclusion
Shopify is a powerful ecommerce platform that allows users to create a professional and appealing online store in a relatively brief amount of time. To get your store ready for your first visitors and customers, add products, adjust the store's design to your preferences, and specify important payment, delivery, and tax settings. Let our guides walk you through each of these steps.
However, the work really gets started only after you've opened for business: Not only will you need to handle orders, but also market your products and further optimize your store.
Or maybe you've decided that you'd like to explore other ecommerce options besides Shopify? If so, you can check out our comparison of the 8 best ecommerce solutions.
FAQs
How much a Shopify store costs depends on your subscription: Basic, Shopify, or Advanced. Yearly subscriptions range from $29 per month to $299 per month. Credit card rates (transaction fees) are also charged differently from subscription to subscription, from 2.9% + $0.30 to 2.4% + $0.30.
Not much: In order to create a Shopify account, all you need is an email address. Payment information is only required when choosing a paid subscription. Of course, your store will need to offer products or services, which you can add in the product management area.
It should be possible to create a professional store with a decent-sized inventory within a few hours. However, the amount of time varies according to how many (or how few) products and services you offer as well as the extent to which you want to customize your store's design. Keep in mind that there will always be something to do, even after your store goes live.
Deciding that something is "better" than Shopify is a very subjective judgment. Wix Stores offers a more powerful design editor, while BigCommerce gives users unlimited product variants and numerous marketing features. We've prepared a list of the best alternatives to Shopify for you.