Would you like to make an informative brochure or an eye-catching flyer for your business? In the past, you might have needed to contact a graphic designer, but thanks to online design platforms, you can handle it yourself these days.
Below, we'll show how you can create a professional flyer for free, as well as what to pay attention to.
Create a Flyer: Make a Flyer Online in 7 Steps
There are only seven steps between you and a finished flyer. Below, we'll walk you through what you need to do.
Choose a Design Platform: The Most Important Decision
Before you can let your creativity flow, you'll need to select the right online design platform. We tested five of the most well-known in our comprehensive EXPERTE.com review series:

In our test, we highlighted the strengths and weaknesses of each platform, how to use them, and what sort of advertising materials they can help you make. Without further ado, we'd like to introduce you to our overall winner, which we recommend for designing free flyers:
EXPERTE.com Review Winner: Canva

The best-performing platform in our EXPERTE.com test was Canva, an intuitive online design program from Australia. Thanks to its huge selection of templates and elements, as well as its versatile editing options, Canva allows anyone to create visually-stunning marketing materials - regardless of your design skills.
To get a better idea of what the platform has to offer, you can try Canva out for 30 days at no cost. Throughout the trial period, you'll have access to all of the program's premium features, making it possible to design flyers that you can use later on for whatever you need.
Canva's Advantages and Disadvantages
Intuitive, easy to use
Professional templates
Comprehensive stock media archive
Good price-performance ratio
Free premium trial
Lacks media search filters
Unimpressive number of templates
Online Design Platform Ranking
Canva is far from the only online design option available. Below, we've provided a complete ranking of all the providers we tested:


Select a Template
Note: We used Canva for the rest of this guide. Other design platforms offer similar capabilities, however, menus, options, and features vary and might be named differently.
Once you've created a Canva account, you'll be taken to your personal dashboard. Here, you can create new designs with just a few clicks, or view and edit existing ones.
All Canva templates are sorted thematically by their usage purpose. To find a relevant layout for your flyer, click on Design spotlight in the main menu and then Flyer. Alternatively, you can click on Marketing in the menu on the left, followed by Flyer.
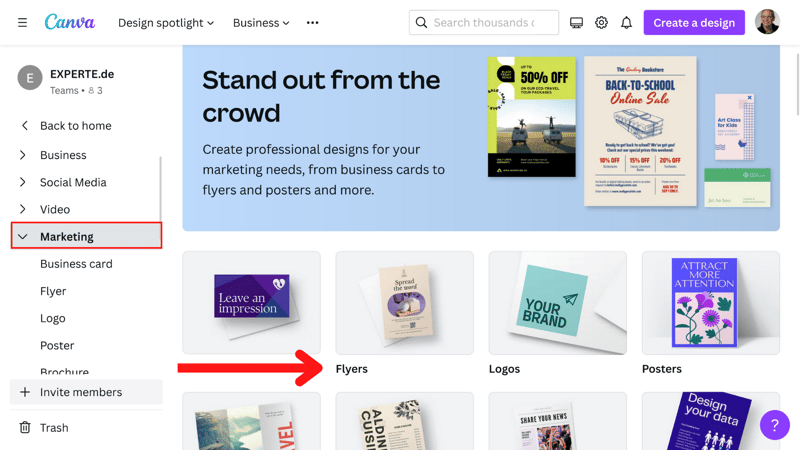
There are two ways to access flyer templates in Canva, which are sorted thematically and by usage purpose.
In our example, Canva presented nearly 70,000 templates, an unmanageable number of results to search through. Even though the service lacks filters, you can refine hits using the text search bar.
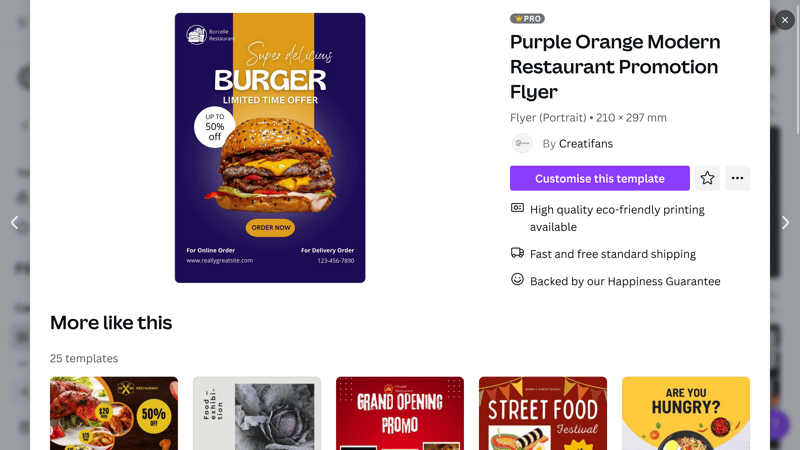
To find templates for red flyers, simply type "flyer red" and press enter. If you'd like something to advertise your restaurant, try "flyer restaurant". We liked the ability to preview each template before clicking on and using it. Should a specific design meet your criteria, open it by clicking on the three-dot (meatballs) menu in the upper right, followed by Customize this template.
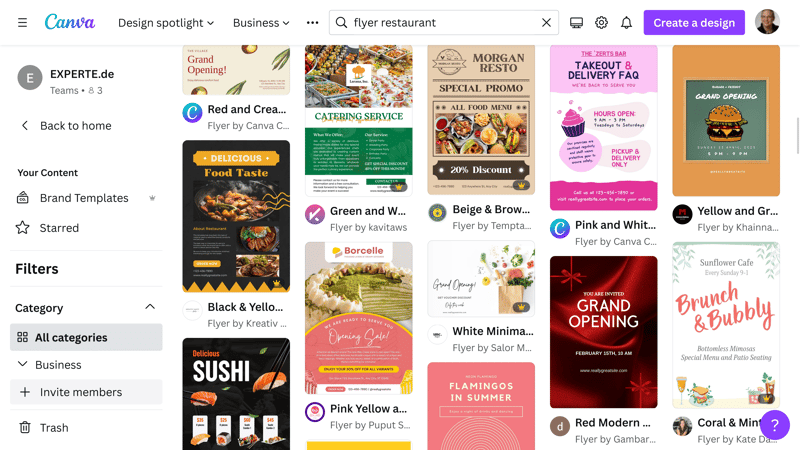
Unfortunately, Canva does not offer any filter options for templates. However, the platform's keyword search helps to narrow down results.
Customize Your Template: Create a Layout According to Your Preferences
After you've selected a template (in our case, we chose a restaurant flyer), Canva opens it in the editor.
Now, you're in the platform's creative engine room, and have access to all of its design elements. On the left sidebar menu, you'll find a few customization options, including Uploads, Text, Projects, Photos, Videos, and much more.
Now you can customize your flyer using Canva's powerful editor.
It's possible to align any template's font and style to your company's corporate identity (CI) or branding guidelines. Simply click on the element you want to modify and a menu bar will open through which you can make any desired changes. To adjust the font, select the text and choose a new font or upload one of your own from the menu that opens above it.
The text menu bar also includes size, color, style, position, and effect options. Special tools for adjusting transparency and adding links can be found by clicking on the three-dot (meatballs) menu on the right.
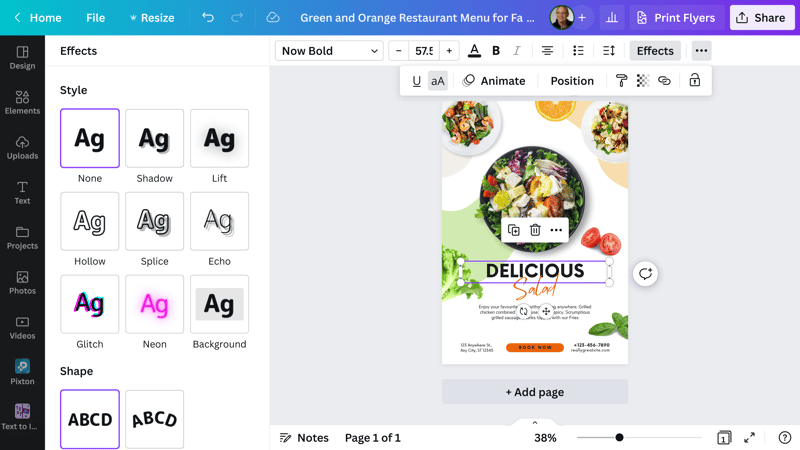
After you've selected a snippet of text, the editing menu will open in which you can adjust its font, size, color, and style.
Add Elements: Swap Images, Change Colors
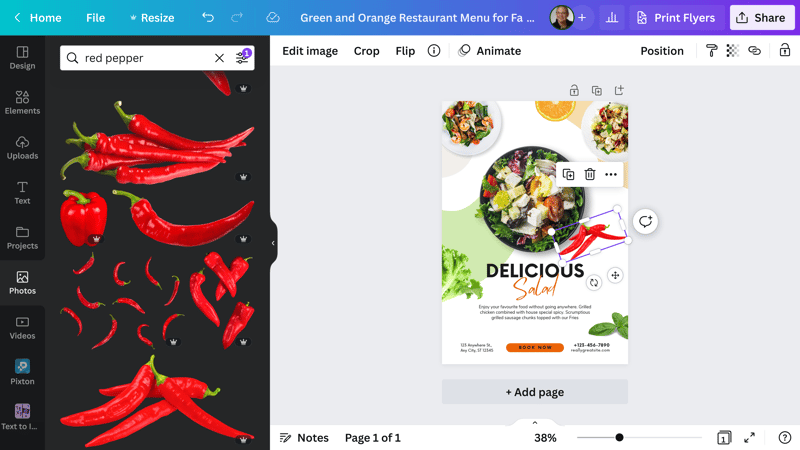
You're not only able to change a template's text with Canva, but also to add graphics, lines, forms, stickers, and photos to the layout.
For example, we wanted a chili pepper instead of a tomato on the right side of our flyer, so we clicked on the tomato and deleted it. Then, we clicked on Photos in the menu to the left, typed 'pepper', and selected the "Cut-outs only" filter option. This ensured that all results were transparent, making them easy to integrate into our flyer.
It's possible to adjust the color of an element by clicking on it and assigning it a new color tone using the upper menu bar.
If you want to swap out or enhance certain elements, the menu to the left offers a huge selection of fonts, shapes, lines, illustrations, and much more.
It's possible to delete or swap out images and elements from any Canva template, or add entirely new ones. This means that you can tailor your flyer to your exact preferences. Keep in mind though that less is often more, and that most of the templates are already visually balanced and optimized.
Should you want a particular image, but not have time to search through a photo database, you can use the Text to Image tool. Simply type what you'd like and Canva will try to visualize it.
In our example, we looked for a salad with tomatoes that would then be placed in the middle of our flyer without its background. Below, you can see the results.
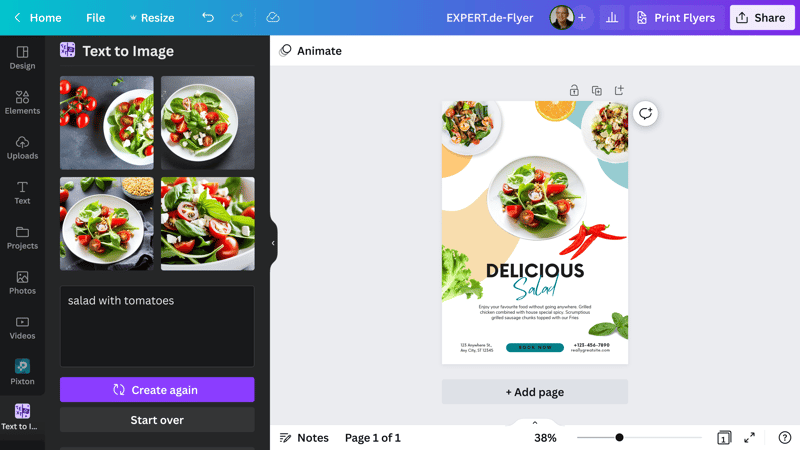
Bringing thoughts to life: With Text to Image, Canva tries to visualize whatever it is that you have in mind.
Proofreading and Editing
And now for a less creative, but equally important aspect of creating a flyer: Proofreading. Grammatical, spelling, or punctuation errors are often noticed only after 1,000 or more copies of a flyer have been printed. Worse than that, they undermine the believability and seriousness of your business.
Since most overlook their own mistakes, it's a good idea to have someone else proofread your flyer's copy before you start printing. This can be a colleague, family member, friend, or even all of the above: The more eyes that look for errors, the less likely they are to slip through.
If you have to go it alone, try the following approach: Slowly read and articulate each letter of a word aloud. In this way, you'll be able to more easily notice missing or double letters.
Pay particular attention to telephone numbers, URLs, or email addresses. In our example, it would be more than embarrassing if people calling the number on our flyer weren't able to order salads.
Depending on the browser you use, a variety of add-ons are available that mark misspelled words or problematic sentences and make suggestions for how these can be improved. While helpful, this can't completely replace a human check.
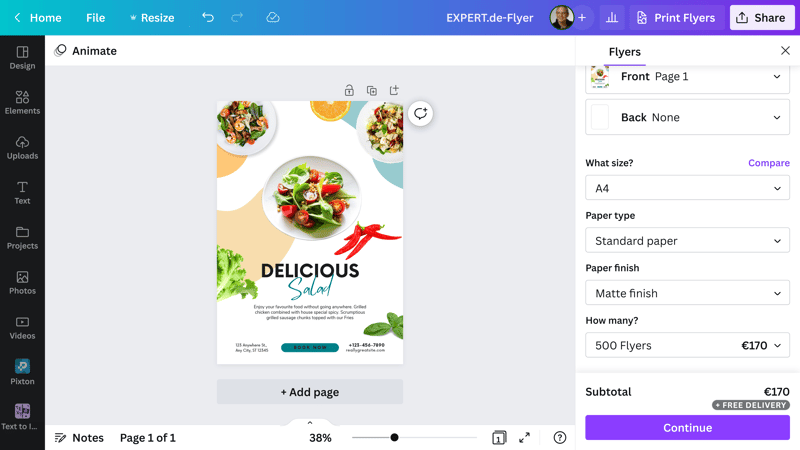
Download & Share: Prepare for Print
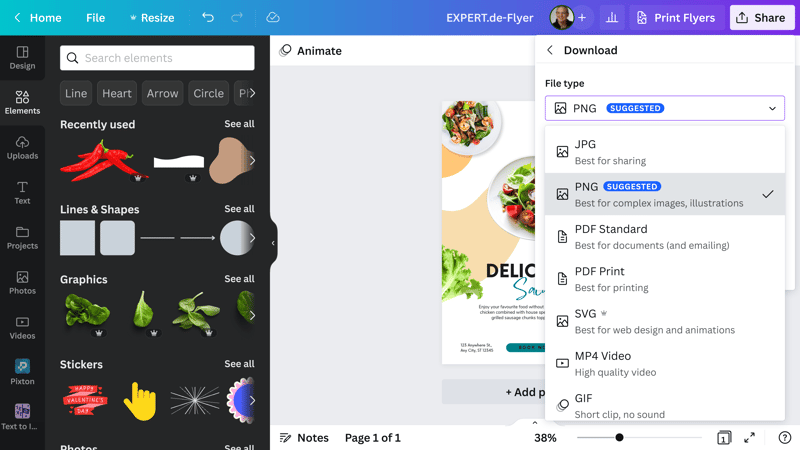
Once the layout is to your liking, features all of the images and graphics you want to include, and has readable and error-free text, it's time to download the file. In Canva, you'll do this by clicking on Share in the upper right.
If you click on Download, a submenu will open in which you can specify which format you want the file in. For each of these, Canva offers a brief explanation, letting you know what they're recommended for.
Your choice of format depends on what you intend to do with the flyer. Should you want to share it on social media, select a narrow .jpg or .png. For printing, ask the printer which format they recommend. PNG is common, however, you'll need to specify its resolution before downloading the file. Keep in mind that as the resolution increases, so does the file size.
With PNG files, you can adjust resolution prior to download.
If you're working with a professional printer, your flyer will likely have to be converted into Print PDF. If it's printed offset, select CMYK (Cyan-Magenta-Yellow-Key). Don't worry: These color plates are used differently than their RGB (Red-Green-Blue) counterparts.
For digital printing, keep the document in RGB. Whatever the case, check the box next to Flatten PDF since this can enhance print quality even further. Your printer will let you know whether you need to add crop marks.
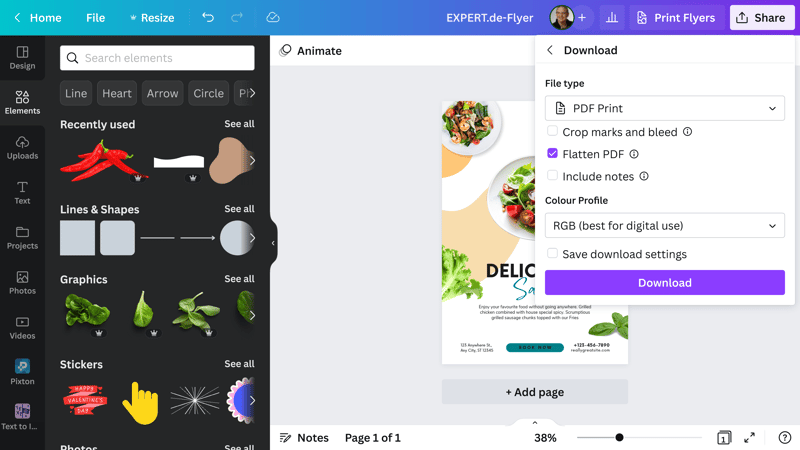
For the Print PDF file type, you'll need to pay attention to which color plates your printer uses.
Print: The Finished Product
There are several ways to get your finished flyer on paper. Should you only need a few copies, you can print these at home.
For more professional or larger quantities, you'll need to go to a printer. Canva does offer an option for this, however, it is relatively expensive. Alternatively, you can go to a printer in person or find a digital service and have them print your flyer (from your PDF) at a fraction of the cost.
To ensure that your flyer looks as professional as possible in real life, bring or send its PDF to a dedicated printer.
Conclusion
Thanks to online design programs like Canva, it's possible to make a free flyer for nearly any purpose in a short amount of time. Its layout templates are professional and well-designed, allowing anyone, even without any creative skills, to put something together that matches their own needs or even their company's corporate identity.
Should you just need a few flyers to hang up around the neighborhood or hand out to friends, you can print your creation at home. If you're promoting a business, campaign, or event, you'll want to get in touch with a professional printer and use the PDF you've created. Canva offers on-demand printing, however, there are definitely more affordable options both online and offline.
FAQs
There are seemingly endless numbers of online design platforms that can be used to create a flyer. We intensively tested five of them in our EXPERTE.com online design comparison, with Canva emerging as the winner. Intuitive to use, its powerful editor and versatile templates and elements impressed us.
Yes. With an online design platform like Canva, you can make free flyers by taking advantage of its free 30-day trial. This provides access to all of its Pro features, however, high-resolution downloads are only available to paying subscribers. The only cost you'll have to contend with is for printing, either at home (paper and ink) or an online or offline service.
To create a visually appealing flyer, you'll need to select an online design platform. Once registered, look for a template that catches your eye and start to customize its layout. Fonts, images, and elements can all be easily adjusted to meet your exact specifications. When complete, download the file in the best format possible, depending on its intended usage, and start printing.
Classic flyers are DIN A4 ("Letter") or DIN A5 ("Half Letter"), however, this depends on how much information they include and the font size. DIN A4 flyers offer more room for design, whereas DIN A5 flyers are easier to distribute.