Email Marketing Automation: What It Is and How to Get Started in 2026

Email marketing works best when it’s efficient but still feels personal. That’s exactly what email marketing automation is designed to do. Instead of sending every message manually, you create an automated email workflow once, and the system handles the rest, such as follow-ups after a signup or purchase.
This guide covers the basics of email marketing automation, including common workflows, automation tools, and how to create your first automated email campaign. We’ll compare the top platforms and walk you through setting up your first campaign with Brevo, step by step.
Email marketing automation is the automatic sending of emails triggered by an action (like a signup, purchase, or click).
Common uses include welcome emails, abandoned cart reminders, and re-engagement campaigns for existing customers.
One of the biggest benefits of email marketing automation is saving time.
It also lets you send targeted messages, so your audience gets the right message at the right stage of their customer journey.
Tools like GetResponse, Mailchimp, or Brevo (formerly Sendinblue) are great for small businesses and solopreneurs.
What Is Email Marketing Automation?
Email marketing automation is the process of sending emails automatically when specific conditions or triggers are met. These conditions are called triggers. The goal is to send the right message to the right person at the right time.
The main difference between email marketing automation and a traditional newsletter is control. A regular newsletter usually goes out to everyone at the same time, like every Thursday at 10 a.m. Automation responds to what your readers do. The system notices when someone takes an action or makes a purchase and reacts instantly.
This approach has several advantages:
Better results
Automated emails often generate significantly higher engagement than standard broadcast emails.Saves time
You set up your emails once, which saves businesses and solopreneurs time and effort.More relevant content
Your customers don’t get generic mass emails. Instead, they receive messages tailored to what they need right now.
How Email Marketing Automation Works
Email marketing automation works on a simple principle: the system responds to a specific trigger and then runs a predefined sequence (workflow) once a condition is met. Think of it as a flowchart that runs individually for each contact.
It All Starts With a Trigger
A trigger is essentially a digital “if-then” command. If a specific condition is met, an email goes out.
There are generally three types of triggers:
1) Action-Based Triggers | 2) Time-Based Triggers | 3) Behavior-Based Triggers |
|---|---|---|
Users take an action. Examples include clicking a link, making a purchase, or filling out a form. | The system responds to dates. This could be a birthday, an anniversary, or an upcoming subscription renewal. | The system responds to inactivity. For example, it activates if a user hasn’t opened an email in 30 days. |
A single trigger is enough to initiate your email automation. But by combining triggers, you can build complex workflows that feel like a personal conversation.
How Automated Emails Typically Work
Automated emails follow a clear, repeatable process with three key parts:
- 1.
The trigger
The starting signal for the whole workflow. - 2.
The workflow
The set sequence of actions, where you also define the timing (e.g., “Send Message B exactly 48 hours after Message A”). - 3.
The condition (filter)
This lets you branch your workflows. For example, you can send a discount coupon only if the contact clicked but hasn’t bought yet.
Examples: 3 Real-World Email Automation Scenarios
Email marketing automation has many uses. Here are three common examples:
Example: The Welcome Series
Say John is interested in healthy eating. He visits your website and downloads a free ebook, “Healthy Cooking.” That action (the trigger) sends him your first welcome email. The goal is to build trust and greet John as a new lead.
To keep John engaged, you can spread the series over several days and build trust and strengthen the relationship:
Email Order | Timing | Content and Goal |
|---|---|---|
1 | Immediately | Confirmation and delivery of the promised content (download link for the ebook). |
2 | After 2 days | A helpful tip, like a recipe. This adds value without pushing a sale. |
3 | After 4 days | A specific offer or an invitation to an in-person cooking workshop. |
Example: Recovering Abandoned Carts
Jane is shopping for dog accessories and visits your store, where she’s bought before. She adds a collar to her cart but gets distracted before checking out. Cart abandonment is extremely common in e-commerce, but an automated reminder can help recover the sale.
The system detects when someone takes an action or makes a purchase and reacts instantly.
Trigger: A product has remained in the cart for a set amount of time.
Action: Automatically send a reminder email.
About 24 hours later, Jane receives a message, often with a subject line like “Did you forget something?” It frequently includes a discount code to nudge her to complete the purchase.
Example: Re-Engagement—Winning Back Inactive Customers
A personalized message can sometimes win back customers who haven’t bought anything or opened an email in a while.
Trigger: No interaction (purchase or email open) for over 90 days.
Action: Send an email with the subject “We miss you” and an exclusive update or incentive to spark their interest again.
This also helps keep your list clean. If customers don’t respond to the reactivation attempt, they can be removed. That protects your deliverability rates for active subscribers.
How to Set Up Your First Email Marketing Automation
Modern tools make it straightforward to set up email marketing automation. We’ll walk you through it using Brevo (formerly Sendinblue) as an example.
Brevo’s visual interface makes it a great choice for beginners. The steps are similar for most other email marketing platforms.
Step: Create a New Automation
Log in to your Brevo account and click the “Automations” tab in the left-hand menu. Then click the “Create an automation” button.
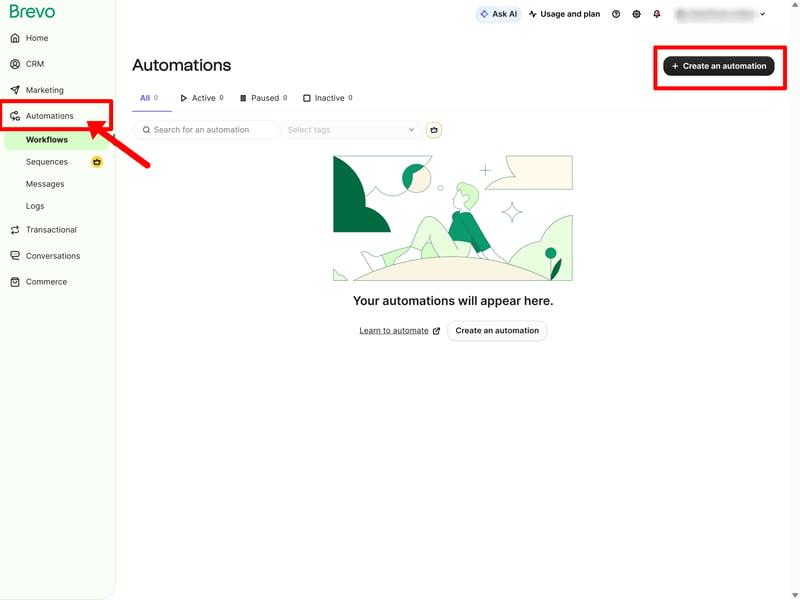
Brevo’s interface is intuitive and easy to navigate.
Step: Choose Your Automation Type
Brevo offers templates for the most common types of email automation. You can also build one from scratch if you prefer.
For this example, we’ll pick the “Welcome message” template:
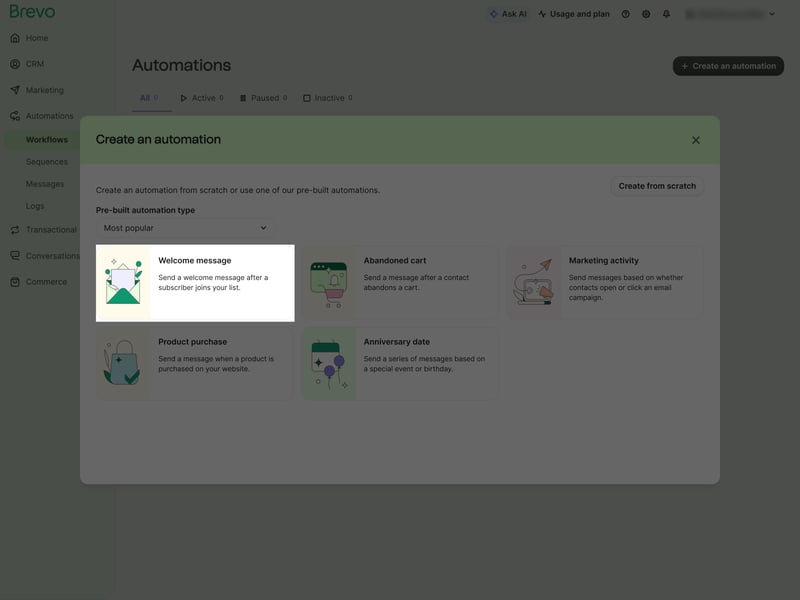
Select the welcome message template from the automation options.
Step: Select Language and Create the Automation
Your automation workflow appears in a visual builder. Start by choosing your language from the dropdown menu on the left. Then click “Create automation.”
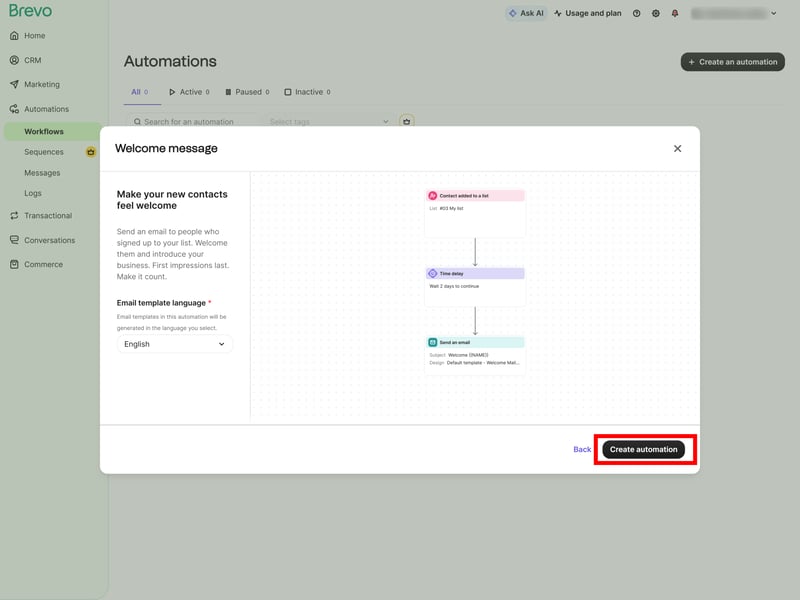
Click “Create automation” again. We’ll set up the details next.
Step: Set the Trigger
Now decide when your email should go out. For this campaign, we’ll use “A contact added to a list” as the trigger.
Now the automation starts whenever someone signs up for your newsletter, requests a free ebook, shares their details during a purchase, or is added to your list manually.
If you’ve already uploaded a contact list to your Brevo dashboard, pick it from the dropdown menu. You can also import a new list here. Then click “Next” to confirm.
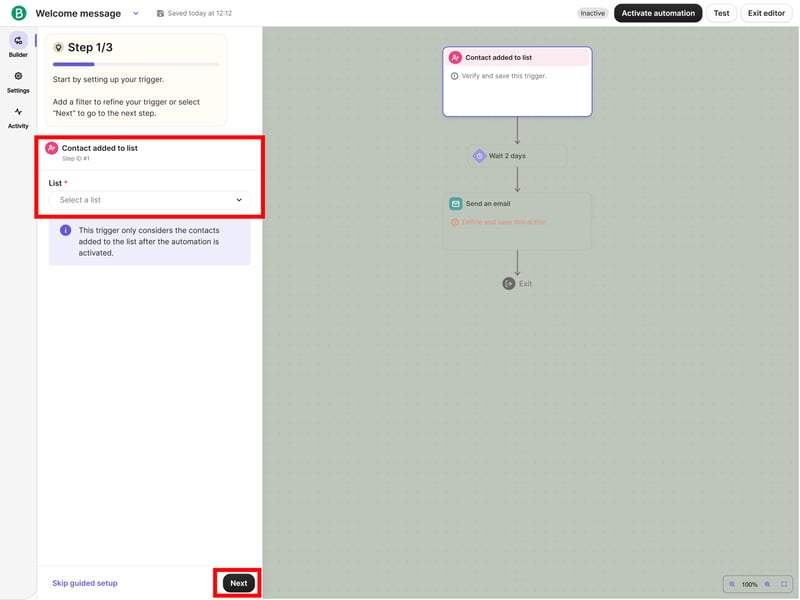
The trigger for our welcome email: “A contact added to the list.”
Step: Add a Delay (Optional)
An email often feels more natural if it doesn’t arrive the second someone signs up. So you can set a delay of minutes, hours, or even days before the next step kicks in.
For this test, we set the delay to five minutes:
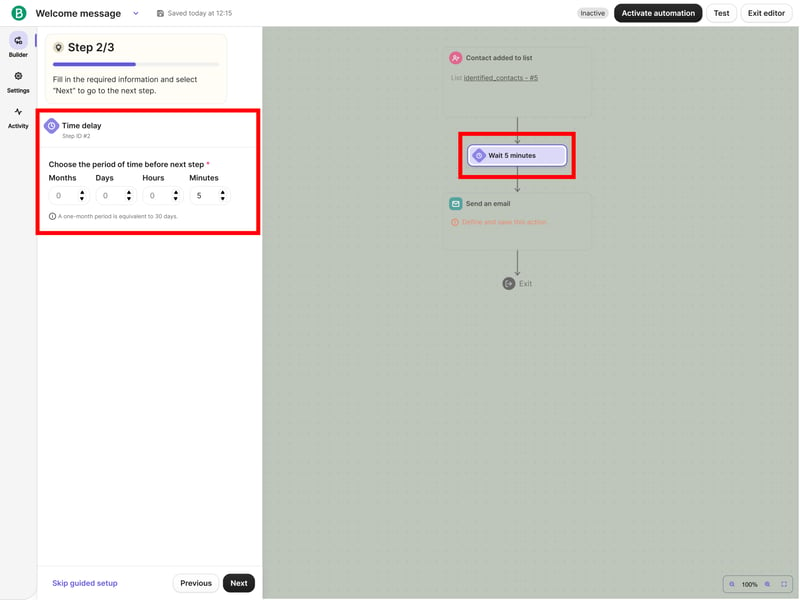
Set the exact delay before your email is sent.
Step: Prepare the Email for Sending
Next, design your email’s layout and content, then preview it.
Note: We’re skipping the “Event data” option here. This feature allows you to dynamically insert details the recipient provided during a specific action, such as a product name from a purchase or a preference selected during sign-up.
Since our welcome email only uses basic contact details like the recipient’s name, the default settings work fine.
Click “Confirm” to finalize the design.
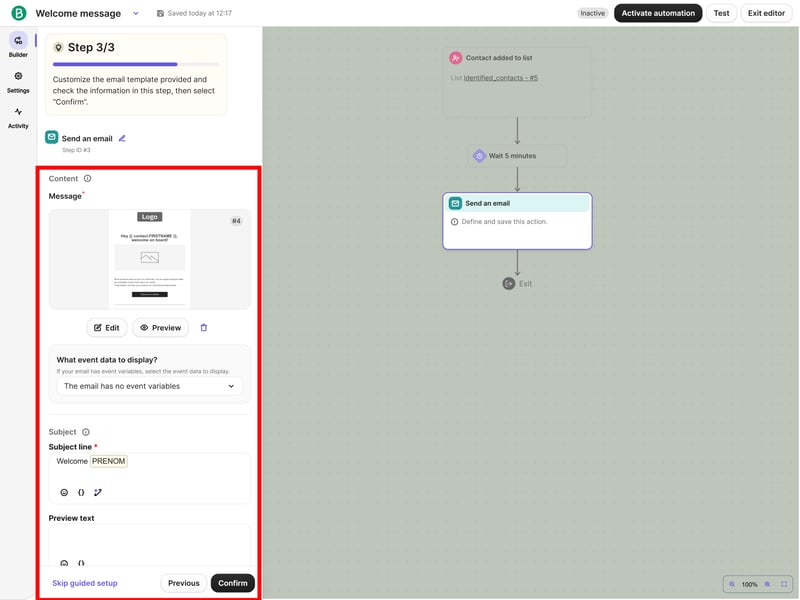
Email setup: Here, you define the layout, subject line, sender, and the event data to use.
Step: Activate the automation
After clicking “Next,” you’ll see an overview of your campaign. You can still edit individual elements and run a test. When everything looks good, click “Activate Automation.”
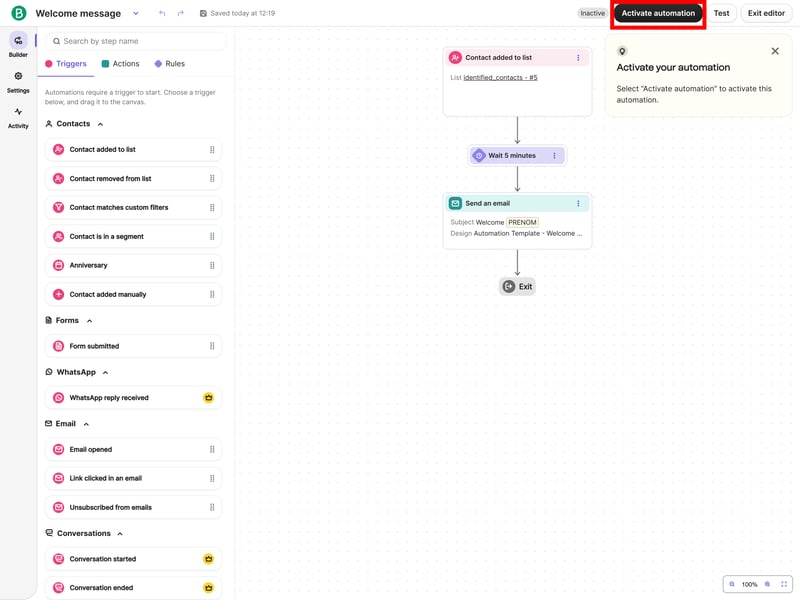
Click “Activate automation” to finalize your campaign setup.
Congratulations! You’ve created your first automated email campaign.
Step: Add follow-up emails
Once your welcome email is running, the next step is building out the rest of your automation sequence. To keep new contacts engaged after the first welcome email, add more emails to your sequence. Here are a few proven strategies:
Ask for feedback
If you’ve sent a digital info product, follow up a few days later to ask what they think. Include a helpful guide, no sales pitch. If your audience cares about “healthy eating,” they’ll appreciate three simple everyday recipes more than an immediate offer.Build trust
Use this phase to establish yourself as an expert. Share useful insights that match your audience’s interests, but hold off on making an offer.Guide them to the next step
Once your readers have seen your helpful content and built trust, introduce your offer. That could be an introductory deal, a discount on their first purchase, or an invitation to a personal consultation.
To add these steps, just include more triggers and actions in your workflow. What started as a simple welcome email can grow into a strong, personal customer relationship, all running in the background.
What Are the Best Email Marketing Automation Tools?
There are plenty of email marketing tools for freelancers and small businesses. The right one for you depends on your experience, budget, and how much complexity you need.
We reviewed some of the most popular options. Here’s our full ranking, with links to our detailed reviews:
Final Verdict: Is Email Marketing Automation Worth It?
Email marketing automation replaces manual work with automated workflows that deliver a message at the right stage of the customer journey. Once set up, the tool sends your messages automatically, tailored to how your contacts behave. If you’re just starting out, keep it simple. Pick a tool like Brevo, GetResponse, or Mailchimp. Create a basic welcome series, then refine it based on your results.
This approach works well for freelancers and small businesses. It helps you build customer relationships systematically and guide leads toward a purchase without constant manual work. But keep in mind: automation is only as good as the strategy behind it.